AV:RetroTINK-5X Pro
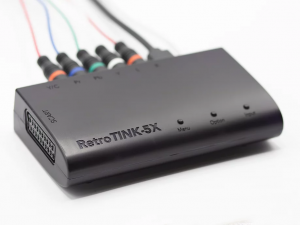
The RetroTINK-5X Pro is an advanced video upscaler designed by Mike Chi. It is the latest offering from the RetroTink line of graphics upscalers and line-doublers.
How To Use The RetroTINK-5X Pro - A Beginner’s Guide
The RetroTINK-5X Pro is a product designed to solve the problem of using retro video game consoles with modern flat panel displays. If you’ve arrived at this guide, you’re probably aware of some problems when trying to play older video game systems on a newer TV's.
HDMI vs Analog
In many situations, the cables that came with your game system will not be compatible with the modern digital HDMI inputs on your TV. One of the main features of the RetroTINK-5X Pro is to convert these signals into an HDMI format your modern display can understand.
Correct Image Processing
In the cases that your display does have the correct hook ups to connect your console, there’s still a good chance that the resulting output will be blurry, distorted and laggy. This is because most displays are designed with video content in mind, and the video processing used to handle video isn’t a good fit for retro consoles. Features like minimal and consistent latency, integer scaling and proper handling of 240p are almost always missing when using a flat panel’s included analog inputs.
Lag
The RetroTINK-5X Pro by design is an extremely low lag device, and includes advanced modes to operate even more quickly (with trade offs to other features, see Triple Buffer vs Frame Lock Mode and 1080p (Min-Lag) for more info).
lag (aka latency) is the measurement of the time between a controller button input to when the action is shown on screen. Every electronic device takes a little bit of time to do its job. In the context of gaming, this includes the controller itself, the video game console, any upscalers or splitters in the signal chain, and the display. Having too much lag in a setup can make gameplay feel sluggish, unresponsive, and in extreme cases unplayable. This is why enthusiasts seek devices (controllers, displays, upscalers, etc.) that minimize latency. Devices that do their job as quickly as possible are often referred to as "low lag" or "virtually no lag".
when seeking products that are low latency, it's helpful to know that anything less than a frame in a 60fps signal is colloquially considered very low lag. Often milliseconds (ms) are used to measure lag. 1 frame of a standard 60fps signal is equal to approximately 16.7ms.
Just Play the Damn Game™
Thanks to Mike Chi’s research and engineering, the RetroTINK-5X Pro is one of the best products on the market specifically built to address the peculiarities of retro video game analog signals. While a complex engine of tweakability lies under the hood for enthusiasts, the RetroTINK-5X Pro prioritizes ease of use so anyone can get their console up in running.
Here are the basic steps anyone can take to get a great experience with their retro video game console:
- Connect the RetroTINK-5X Pro to your display using an HDMI cable.
- Connect your video game console’s video and audio to the RetroTINK-5X Pro using a supported cable.
- Power on the RetroTINK-5X Pro using the included MicroUSB cable - many TV’s will have a USB hookup on the back that will work as a power source.
- Using the included remote, select the appropriate input from the Input Source menu. (This choice depends on the cable you are using to connect your video game console to the RetroTINK-5X Pro, see Supported Inputs section for more information).
- Using the included remote, select the appropriate output from the Output Res. menu. (For most TV’s, 1080p (Fill) is a great “all around” choice.)
And that’s it! You don’t have to be an A/V engineer to get remarkable results from the RetroTINK-5X Pro, all the hard work is done behind the scenes. Understanding jargon such as automatic phase detection, polyphase scaling or motion adaptive deinterlacing isn’t required for you to gain the benefits and enjoy your retro consoles on a flat panel with great results.
Supported Inputs
The Tink 5x supports nearly every major analog video format used by retro video game consoles. Please see the Inputs Source section for more information about supported resolutions and modes. When selecting a cable, note that the original manufacturer's cables (Nintendo, Sega, Sony, etc.) are typically high quality options. When available, trusted 3rd party cables that meet or exceed the quality of OEM cables are noted in the following sections.
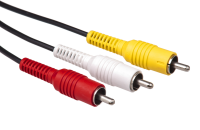
Composite
SCART-CV
S-Video
YPbPr / Component
|
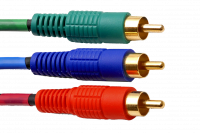
YPbPr or "Component" video is a high quality analog standard that uses 3 RCA cables to carry separate parts of the video signal. Component video was featured on consoles such as PlayStation 2, PlayStation 3, Xbox, Wii, and Gamecube (model # DOL-001 only).
To use YPbPr with the Tink 5x, insert the Y RCA plug (typically colored green) into the Tink 5x’s “Y” input, insert the Pb RCA plug (typically colored blue) into the Tink 5x’s “Pb” input, and insert the "Pr" RCA plug (typically colored red) into the Tink 5x’s “Pr” input. For audio, insert your left and right audio into the “L” and “R” inputs respectively. Then, select YPbPr or YPbPr (SDP) for from the Tink 5x’s Input Source menu. Review the Input Source section of the guide for more information concerning differences between YPbPr and YPbPr (SDP) modes. Recommended YPbPr / Component Cables |
SCART-RGB
|
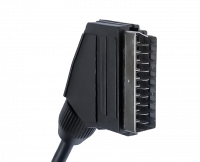
The Tink 5x supports RGB input through the SCART connector input. SCART was not widely used in the United States but was common in Europe, and video game consoles often featured RGB video and audio connections over SCART. To find out if your console supports RGB over SCART, go back to the check out the Main Page, choose your console, and see if there are any RGB mods listed OR check RetroRGB's website.
CompatibilityTink 5x is designed to accept RGB over SCART in the "EuroSCART" variant and NOT JP21. Though JP21 uses the same style connector, it is not compatible with the Tink 5x and may damage your hardware. SyncThe Tink 5x accepts sync on luma, sync on composite and c-sync RGB over SCART configurations. Check with your SCART cable manufacturer to ensure compatibility with the RetroTink 5x Pro. Note that TTL sync is not supported by the Tink 5x and may damage your hardware. 31khz SignalsThe Tink 5x can accept 31khz RGB signals with the use of a compatible sync combiner device. This allows for "VGA" input from compatible sources / resolutions. Sync combiner products include the HD15-2-SCART and VGA2SCART. A common implementation of this option is accepting Dreamcast "VGA" using a compatible VGA cable. Other options include building a sync combiner directly into the SCART cable, such as the Retro Access Dreamcast 15khz/31khz SCART cable. Recommended SCART-RGB Cables |
Cable Comparisons
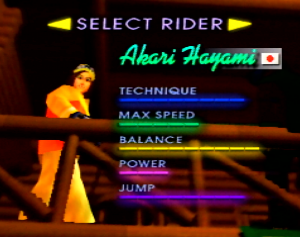
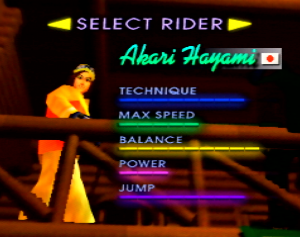
| Console | Composite | S-Video | RGB | Component |
|---|---|---|---|---|
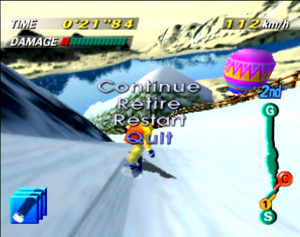
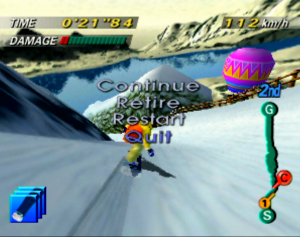
| Nintendo 64 Examples #1 (Examples captured with NTSC N64 with Voultar's N64 RGB Kit installed) |
||||
| Nintendo 64 Examples #2 (Examples captured with NTSC N64 with Voultar's N64 RGB Kit installed) |
||||
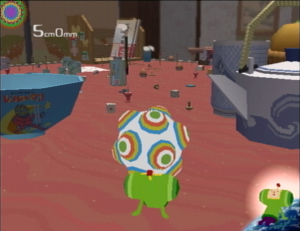
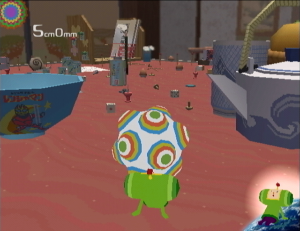
| PlayStation 2 Example 1 |
Advanced Features
Video Modes
An important element to unlocking the advanced features of the RetroTINK-5X Pro is knowing the specific video mode your console is outputting. This isn't always easy - video modes can change depending on your cable type, game selection, console menu options or even settings within the game. In some cases, video modes will change in-game, often between in-game menus and gameplay (see Triple Buffer vs Frame Lock Mode for more information on the 'Chrono Cross' problem). Thankfully, the RetroTINK-5X Pro handles the hard work and adjusts seamlessly behind the scenes to process nearly anything your video game console can throw at it. However, understanding your console's video modes can open up advanced tuning options to dial in your console and video preferences.
A Video Mode, simplified, is the number of vertical picture lines a console is generating, followed by either a p or an i, or Progressive and Interlaced respectively - e.g., 480p. For this section, the differences between Interlaced and Progressive will be the focus. (For a complete list of compatible input video modes, see the Input Source section of the wiki.)
Interlaced Signals
Interlaced video is a video standard that dates back to the dawn of broadcast television, and was mainly a technology used on standard definition CRT displays. With interlaced video, the image is drawn on the screen from top to bottom in two consecutive passes. The first pass draws the image in the even spaces, and the second pass fills the image in the odd spaces. This process happens quickly to create a smooth persistence of motion. This "tik-tok" method of filling in the screen allowed early engineers to get more out of the limited bandwidth of TV broadcast signals.
While interlaced video is still used in certain situations, modern display technology doesn't process video in the same way, and interlaced video has to be converted into a progressive image before it can be drawn. The process of turning an interlaced video signal into a progressive one is known as deinterlacing. While Motion Adaptive Deinterlacing is the most sophisticated and is the default deinterlacer on the RetroTINK-5X Pro, there are situations where other deinterlacing methods can create desirable effects, such as Bob and the corrisponding Bob Scanline Modes. More about the The RetroTINK-5X Pro's deinterlacing options and examples are outlined in the Interpolation/De-interlacing section of the wiki.
Progressive Signals
Unlike Interlaced video, Progressive video modes are drawn to the screen in one pass, and thus do not require deinterlacing to be drawn on modern displays. Common progressive modes found in retro consoles include 240p, 480p, and 720p. Because they do not require additional processing, they are typically seen as a higher quality signal (often described as sharper or cleaner) and in most cases are preferred over interlaced options. Progressive video modes can also be processed using the RetroTINK-5X Pro's Pre-Scaling functions for additional resolution-dividing and scanline effects.
Determining Video Modes
placeholder. this is a biggie
Triple Buffer vs Frame Lock Mode
Older video game consoles didn't always have perfect video timings. CRT's typically had no problems working with these variances, but these "imprecise" consoles can sometimes have trouble working with modern TV's and capture devices that conform to a more rigid standard. Some games, such as Silent Hill or Chrono Cross on the PlayStation 1, will alternate between 240p or 480i video modes if you are in-game or in the items/pause menu respectively. On many displays, upscalers and capture devices, this can often create a long delay and a "no input detected" screen while the device reorients to the new video mode. The issue of a device taking a gameplay-harming amount of time to change between video modes has been colloquially called the "Chrono Cross" problem.
Triple Buffer
The RetroTINK-5X Pro uses Triple Buffer mode to effectively eliminate the "Chrono Cross" problem and create very high compatibility with displays and capture devices even for consoles with "imprecise" video. However, Triple Buffer mode comes at the expense of increased lag and occasional and minor judder. The lag varies between approximately 0.25 to 1.25 frames in this mode.
Frame Lock
For those looking for the lowest possible lag, the RetroTINK-5X Pro offers a Frame Lock mode. With Frame Lock enabled, the RetroTINK-5X Pro uses the console's video input as it's base clock and offers a fixed lag of approx. 0.25 frames. The lowered lag comes at the cost of possibly lower compatibility with some TVs and capture cards, and not protecting devices from the "Chrono Cross" problem.
The RetroTINK-5X Pro defaults to Triple Buffer mode to ensure the highest compatibility for users. To toggle between Triple Buffer and Frame Lock, navigate to the HDMI settings and toggle the V. Sync (Vertical Sync) option.
Horizontal Sampling Modes
The RT5X uses a combination of its flexible video ADC plus polyphase scaler to produce various horizontal sampling options. The Generic 4:3 and 16:9 modes interpolate the horizontal directions to produce the correct aspect ratio at the select output resolution.
The optimal modes, listed for the various consoles, sample the horizontal direction at the same rate as the original console. Here are the currently included "Optimal Timing" presets:
| Preset | Description |
|---|---|
| Generic 4:3 | Scales the video using a 4:3 aspect ratio. Good generic choice for 4:3. |
| Generic 16:9 | Scales the video using a 16:9 aspect ratio. Good generic choice for native 16:9 games or for stretching anamorphic 16:9 content to fill the screen. |
| SNES/PCE 256 | For SNES or PC Engine / Turbo Graphix 16 games that use a 256 horizontal resolution. |
| Gen/Sat 320 | For Genesis / Megadrive games that use a 320 horizontal resolution. |
| PS1 320 | For PlayStation 1 games that use a 320 horizontal resolution. |
| N64 320 | For Nintendo 64 games that use a 320 horizontal resolution. |
| NEOGEO 320 | For NeoGeo games that use a 320 horizontal resolution. |
| Saturn 352 | For Sega Saturn games that use a 352 horizontal resolution. |
| PS1 384 | For PlayStation 1 games that use a 384 horizontal resolution. |
| HiRes 512 | An optimal sampling mode for games that use a 512 horizontal resolution, including (but not limited to) specific PlayStation 1 and SNES games. |
| HiRes 858 | HiRes 858 is a sampling mode that is optimized for later-generation 480i and 480p analog sources, including (but not limited to) DVD playback, Dreamcast, Xbox, GameCube, Wii, Xbox 360, PS2, PS3 and Wii U. |
| GBI Optimal | An optimal sampling mode for use with Gamecube's running Extrem's Game Boy Interface software. GBI Optimal is only available when a 360p input is detected |
| DTV-A \ DTV-B | Optimal sampling mode for 480p sources. DTV-A and DTV-B are closely related, choose A or B depending on what looks best to your eyes. DTV-A \ DTV-B is only available when a 480p input is detected . |
| DTV 858 (3:2) | A 3:2 aspect ratio variant of the DTV 858 optimal mode. Consoles that use a 3:2 aspect ratio and 480p include the Sega Dreamcast. DTV 858 (3:2) is only available when a 480p input is detected and the output resolution is set to 2560x1440p. |
| DTV 858 (4x) | An integer 4x scaled DTV sampling mode. DTV 858 (4x) is only available when a 480p input is detected and the output resolution is set to 2560x1440p. |
Post Processing Filters
The RetroTINK-5X Pro features customizable post processing filters designed to simulate the look of certain CRT and LCD displays. Below is a list of the current featured presets, as well as examples captured from the same video source for comparison and reference. To view the post-processing effects example images with the best clarity, click once to view the images enlarged, and click the enlarged image again to view them in your browser without scaling.
| Preset | Off | Slot Mask | A. Grille -1 | BVM |
|---|---|---|---|---|
| Description | ||||
| Preset | PVM-600 | FV310 | Consumer-1 | Consumer-2 |
| Description | ||||
| Preset | LCD (Optimal Horizontal Sampling) |
LCD (Generic Horizontal Sampling) | ||
| Description |
Pre-Scaling and Bob Scanline Modes
Pre-Scaling
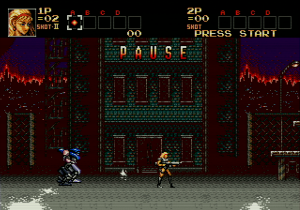
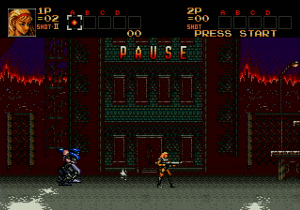
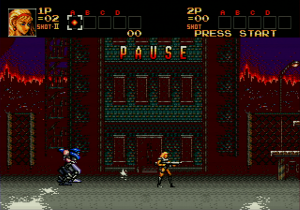
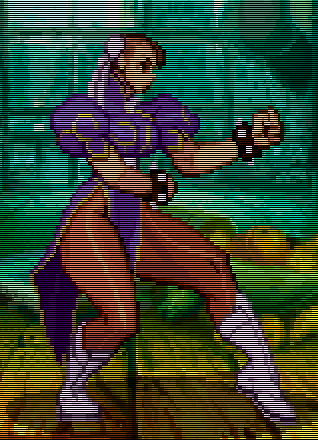
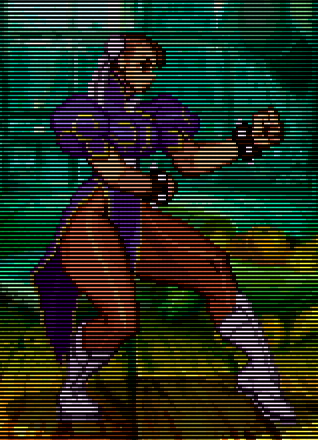
The RetroTINK-5X Pro includes the ability to "Pre-Scale" progressive video content, or discard scanline intervals, at one-half or one-third increments of the source input. This discards vertical lines resulting in a loss of resolution and visual information, and isn't always a desirable effect. However, this loss in resolution is useful in some circumstances, such as more accurate scanline rendering for 240p visual content output from consoles that run at higher resolutions (such as the Dreamcast or Wii). The following example is from Street Fighter 3: Third Strike for the Dreamcast. The Dreamcast is outputting 480p, but the assets of the game are 240p graphics being doubled in software. The RetroTINK-5X Pro can throw away half the redundant visual data before applying post-processing effects, resulting in a more "arcade CRT authentic" scanline size and effect.
More information can be found at the Post-Processing Filters, Post-Processing, and Interpolation/Deinterlacing sections.
| No Scanline Effects | Scanline Post-Processing with No Pre-Scale | Scanline Post-Processing with 1/2 Pre-Scale |
|---|---|---|

|
|
|
| This example was achieved by setting the Scanline to Gaussian and Scanline Str. to 50 in the Post-Processing section, and setting Prescale to 1/2 in the Interpolation/Deinterlacing section. | ||
Bob Scanline Modes
Much like pre-scaling for progressive content, Bob Scanline Modes gives you additional control for how scanlines are applied with 480i interlaced content. To use the various Bob Scanline options, the Deinterlacer must be set to "Bob" in the Interpolation / Deinterlacing menu, and scanlines should be enabled in the Post-Processing menu (any preferred combination of "+Scanline Beam" and "+Scanline Str." settings).
The "Post-Deint." or Post Deinterlace option applies scanlines after the 480i source has been deinterlaced to 480p. This gives the appearance of thinner scanlines.
"Pre-Deint. or "Pre-Deinterlace" treats the 480i source as 240p, so the applied scanlines are thicker. This is especially appropriate for situations where a 240p graphical asset game is being displayed in a 480i video mode.
The "CRT Simulate" setting functions similarly to Pre-Deinterlace, but shifts the odd and even scanlines every frame to reproduce how a CRT display would draw the image. For more context on how deinterlacing works, please see a section that has not been written yet serving as a quick primer on interlacing and deinterlacing.
Below are some examples from Mega Man Anniversary Collection on the PlayStation 2. It is an example of a game that renders 240p assets through 480i video output. This is not typically a desirable combination for the best video quality, but using Bob Scanline modes and scanline Post Processing filters can help improve the visual experience of the game.
| Motion Adaptive (default) | Bob + Pre-Deint. | Bob + Post-Deint. |
|---|---|---|
| Bob + CRT Simulate | Bob + Pre-Deint. + Scanlines | Bob + CRT Sim. + Scanlines |
Saving and Loading Profiles
The RetroTINK-5X Pro includes 10 slots to save your custom settings. To save your settings, navigate to the [Save Profile] section from the Main Menu. Selecting one of the Save Profile slots (1-10) will save any current changes made to the RetroTINK-5X Pro system into the chosen slot. The values can then be loaded from the Load Profile menu, or a slot be set to load on boot from the On-Screen Display/Startup Profile selection.
Console Specific Configurations
Wobbling Pixel's Recommended Settings
User Wobbling Pixels creates excellent video guides to dial in optimal settings for various retro gaming consoles and situations. Here is a list of the console-specific guides they have created (so far):
Link to Wobbling Pixel's YouTube Channel
| PlayStation 1 | Game Boy Interface (Gamecube + GBA Player) |
|---|---|
| PSP | Nintendo 64 |
| Dreamcast | SNES |
| PlayStation 2 | |
SNES 8:7 Aspect Ratio Mode
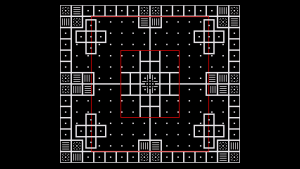
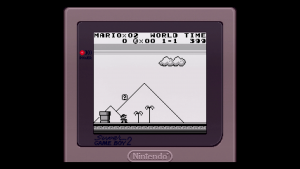
In 1440p resolution mode set Horizontal Sampling to Gen/Sat 320, ADC Samp./Line to 2046 (multiple of 341) and lower H (Interp) Size to 2046. Center horizontally with H Position +268. This is ideal for Super Game Boy, as it's closer to the Game Boy's 1:1 Aspect Ratio.
| 8:7 Aspect Ratio Examples | |
|---|---|
| 240p Test Suite Monoscope | Screenshot SGB Super Mario Land |
3DO
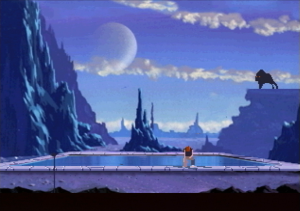
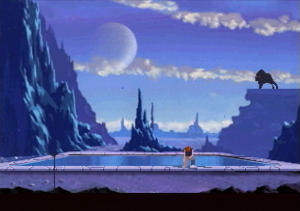
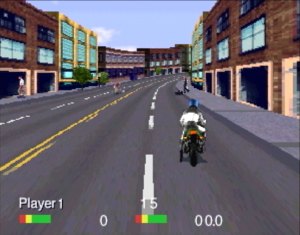
The 3DO renders video to a 320x240@15bpp frame buffer, then through a "corner weight color averaging interpolation" algorithm that up-converts the video to 640x480@24bpp. The algorithm can be set between the "corner weight color averaging" or a simple "nearest neighbor" upscale depending on the 3DO software.
When deciding how to best handle 3DO games through the RetroTINK-5X Pro, it would be beneficial to compare the game's appearance of Motion Adaptive deinterlacing against Bob with Bob Scanline set to Pre-Deint (a process converting 480i to 240p). Games that do not use the "corner weight color averaging interpolation" feature will look almost identical between "240p" and "Motion Adaptive" modes, whereas games that do use the color interpolation effect may have a beneficial sharpened look in "240p" processing mode.
More info concerning the "corner weight color averaging interpolation" algorithm can be found at 3dodev.com
| 3DO Special Processing Examples | ||
|---|---|---|
| "Motion Adaptive" Mode | "240p" Mode | "240p" With Post-Processing |
Upgrading Firmware
To access the latest bugfixes and upgrades with the RetroTINK-5X Pro, it is necessary to upgrade the device's firmware. Upgraded firmware files can be found from the official RetroTINK website, or by joining the Discord community to gain access to the latest experimental firmware versions.
Bob from RetroRGB has created a video tutorial giving step-by-step details on how to perform a firmware upgrade on the RetroTINK line of products.
RetroTINK-5X Pro Firmware Notes
The current public firmware version is 2.71. For older firmware version notes, please see the RetroTINK-5X Pro firmware version history wiki page.
Version 2.71
Originally released April 19th, 2022
Notice: Firmware updates erase saved profiles and reset the device to default settings.
- Advanced resolutions: 1440p, 4K24, 1536p are hidden by default. Go to [OSD] -> Advanced Res option to enable them.
- New experimental high resolution modes added:
- 2560 x 1440 wide screen 1440p for broader compatibility with TVs that will not accept 1920 x 1440.
- 2048 x 1536 ("iPad").
- 4K24 (for 60 Hz sources) and 4K25 (for 50 Hz) sources. Frame lock on for 60 Hz sources changes to 4K30.
- These modes are considered experimental and provided without support or guarantees.
- New 1080p (Min-Lag) mode operates the RT5X as a line doubler to achieve ~1 ms when frame lock is turned on for 240p, 480i and 480p sources.
- 720p source can be scaled to 1920 x 1440 or 2560 x 1440.
- 240p and 540p modes have been removed to save space.
- "Pre-scaler" option in the [Interp./Deint.] menu to convert 480p and 720p sources to 240p, before re-upscaling.
- Optimal timings re-enabled for composite and S-video sources.
- Option to enable optimal timings for interlaced sources.
- Hi-Res 512 and 858 optimal timing modes added.
- "Pre-emph" filter now goes down to -5.
- Option to load profile on power up in the [OSD] -> Startup Profile option.
- Press and hold remote control button to keep incrementing/decrementing option.
- Press "back" button 6 times rapidly to load default profile.
- Variety of bug and crop fixes.
RetroTINK-5X Pro User Interface Map
RetroTINK-5X Pro Main Menu
| RetroTINK-5X Pro Main Menu | Description |
|---|---|
| [Input] | Opens the Input Source Menu. |
| [Output Res.] | Opens the Output Resolution Menu. |
| [Scaling/Crop] | Opens the Scaling/Cropping Menu. |
| [Interp./Deint.] | Opens the Interpolation/De-interlacing Menu. |
| [H. Sampling] | Opens the Horizontal Sampling Menu. |
| [Post. Proc.] | Opens the Post-Processing Menu. |
| [SDTV Decoder] | Opens the Standard Definition Decoder Menu. |
| [Video ADC] | Opens the Video ADC Menu. |
| [HDMI] | Opens the HDMI Output Menu. |
| [OSD] | Opens the On-Screen Display Menu. |
| [Save Profile] | Opens the Save Profile Menu. |
| [Load Profile] | Opens the Load Profile Menu. |
| [Status] | Opens the Status Menu. |
| [About] | Opens the About Menu. |
Input Source
| Input Source | Description |
|---|---|
| YPbPr | Selects YPbPr input for “component” input. Supports 240p-1080i video sources. |
| SCART-RGB | Selects SCART-RGB input. Supports 240p/480i RGB inputs, as well as “VGA”/”858” inputs using supported sync-combining cables and hardware (see HD15-2-SCART for more info). |
| Composite | Selects composite input. Supports standard definition 240p / 480i video sources. |
| S-Video | Selects S-Video input. Supports standard definition 240p / 480i video sources. |
| SCART-CV | Selects composite video via the SCART connector. Composite over SCART cable or compatible RCA to SCART adapter is required. Supports standard definition 240p / 480i video sources. |
| YPbPr (SDP) | Selects YPbPr input using the standard definition processor (SDP). Not as sharp as the normal YPbPr input but supports better error tolerance and color adjustments. Only accepts standard definition 240p or 480i sources. |
Output Resolution
| Output Resolution | Description |
|---|---|
| 1080p (Fill) | Selects 1080p (Fill) output mode. In this mode, the video source will be stretched vertically to fit the screen. Pro’s: None of the video information is cropped, all of the vertical screen space is used. Con’s: Somewhat softer image due to the non-integer scaling. |
| 1080p (Over) | Selects 1080p (Over) output mode. In this mode, a 240p signal will be multiplied 5 times and 480i / 480p are multiplied 2.5 (2.5x) times. The output will slightly exceed the vertical edges of the 1080p frame and be cropped at the top and bottom. Many retro games accommodate this cropping as they were intended to be played on CRT’s that typically cropped this area as well. Pro’s: Larger playfied due to the 5x scale and sharp image thanks to integer scaling. Con’s: Vertically cropped image. |
| 1080p (Under) | Selects 1080p (Under) output mode. In this mode, a 240p signal will be multiplied 4 times and 480i / 480p are multiplied 2 times. The video output will be centered on the screen with a black border. Pro’s: Sharp integer scaled output. Con’s: Smaller image / unused 1080p screen space. |
| 1080p (Min-Lag) | Selects 1080p (Min-Lag) output mode. In this mode, 240p, 480i and 480p sources are scaled in approximately 1 millisecond to achieve the absolute lowest possible latency. |
| 1200p | Selects 1200p output mode. |
| 720p | Selects 720p output mode. |
| 480p | Selects 480p output mode. |
Output Resolution (Advanced Res)
The following outputs are disabled by default and can be enabled by setting “Advanced Res” to “On” in the [OSD] (On-Screen Display) menu.
| Output Resolution (Advanced Res) | Description |
|---|---|
| 1920x1440p | Selects 1920x1440p output mode. |
| 2560x1440p | Selects 2560x1440p output mode. |
| 4K (24/25Hz) | Selects 4K (24/25Hz) output mode. |
| 1536p (iPad) | Selects 1536p (iPad) output mode. |
Scaling/Cropping
| Scaling/Cropping | Description |
|---|---|
| H Position | Adjusts the horizontal position of the video output. |
| V Position | Adjusts the vertical position of the video output. |
| H (Interp) Size | Adjusts the horizontal size of the video output. When in a generic h. sampling mode, the adjustment will be represented in a percentage value. In an optimal sampling mode, the adjustment is a pixel incremental value. |
| V Size | Adjusts the vertical size of the video output, adjustment represented in a percentage value. |
| H Crop Start | Sets the cropping position for the left side of the screen. Masked off areas will be shown in pink. |
| H Crop End | Sets the cropping position for the right side of the screen. Masked off areas will be shown in pink. |
| V Crop Start | Sets the cropping position for the top of the screen. Masked off areas will be shown in pink. |
| V Crop End | Sets the cropping position for the bottom of the screen. Masked off areas will be shown in pink. |
Interpolation/De-interlacing
| Interpolation/De-interlacing | Description |
|---|---|
| Vertical Filter |
| Deinterlace Method | Motion Adaptive | Weave | Blend | Bob | Smooth-Bob |
|---|---|---|---|---|---|
|
Motion Adaptive: A high-quality method of deinterlacing that dynamically chooses between of 'Bob' and 'Weave' based on how much movement it detects in a given part of the screen. |
| Interpolation/De-interlacing | Description |
|---|---|
| Bob Offset | -4 to +4 |
| Bob Scanline | Post-Deint.: "Post-Deinterlace" Applies scanlines to the image as 480p. The 480i is deinterlaced to 480p and the scanlines are applied. Pre-Deint.: "Pre-Deinterlace" treats the 480i source as 240p so the applied scanlines are thicker. CRT Simulate: "CRT Simulate" is the same as Pre-Deinterlace, but shifts the odd and even scanlines every frame to reproduce how a CRT display would draw the image. |
| Field Order | Normal, Invert |
| Pre-scaler | Off: No line skipping. 1/2: Skips every other vertical line, e.g. 480p becomes 240p. 1/3: Skips 2 out of 3 lines, e.g. 720p becomes 240p. See the Pre-Scaling section above for more info. |
Horizontal Sampling
Note for further explanation - The H. Interp takes the horizontal resolution produced by the ADC sample rate and the further interpolates it to the final display resolution.
| Horizontal Sampling | Description |
|---|---|
| Preset | See the Horizontal Sampling Modes section above. |
| Phase Detect | N/A (In Generic 16:9 and Generic 4:3 Presets), Auto, 1 of 5, 2 of 5, 3 of 5, 4 of 5, 5 of 5. |
| Lock Speed | Slow, Medium, Fast |
| ADC Samp./Line | |
| H (Interp) Size | Adjusts the horizontal size of the video output. When in a generic h. sampling mode, the adjustment will be represented in a percentage value. In an optimal sampling mode, the adjustment is a pixel incremental value. |
| Allow Interlace | Disabled (default), Enabled. |
Post-Processing
| Post-Processing | Description |
|---|---|
| Load Preset | See Post Processing Filters section above. |
| +Scanline Beam | Off, Exponential, Gaussian, S. Gaussian, LCD. |
| +Scanline Str. | 0-50. |
| +Intensity Mod. | 0-50. |
| +Mask | Slot, Grille-Med., Grille-Bright, Grille-Coarse, Shadow-1, Shadow-2, Shadow-3, Off. |
| +Gamma Boost | -10 to +10. |
| +Color Boost | -10 to +10. |
| +Pre-emph | -5 to +3. Negative values apply a blurring effect, positive values apply a sharpening effect. |
Standard Definition Decoder
| Standard Definition Decoder | Description |
|---|---|
| Brightness | -128 to +127. 0 is Default. |
| Chroma | -128 to +127. 0 is Default. |
| Phase | -128 to +127. 0 is Default. |
| Contrast | -128 to +127. 0 is Default. |
| Y/C Filter | 4L Adaptive (default), 4L Fixed, Notch. |
| Aperture | 0 to 15, 1 is default. |
| CTIE | 0 to 3, 1 is default. |
| Black Level | 0 IRE (default), 7.5 IRE. |
Video ADC
| Video ADC | Description |
|---|---|
| SDTV LPF | Off, Light, Medium (default), Strong. |
| EDTV LPF | Off (default), On. |
| SoG Thresh | 20mV - 300mV. 120mV is Default. |
| LLPLL Gain | 0 to 7. 2 is Default. |
| LLPLL BW | 0 to 7. 7 is Default. |
| Pre-Coast | 0 to 32. 1 is Default. |
| Post-Coast | 0 to 32. 6 is Default. |
| ADC Phase | 0.00 Deg, 11.25 Deg, 22.50 Deg, 33.75 Deg, 45.00 Deg, 56.25 Deg, 67.50 Deg, 78.75 Deg. 90.00 Deg, 101.25 Deg, 112.50 Deg, 123.75 Deg, 135.00 Deg, 146.25 Deg, 157.50 Deg, 168.75 Deg, 180.00 Deg, 191.25 Deg, 202.50 Deg, 213.75 Deg, 225.00 Deg, 236.25 Deg, 247.50 Deg, 258.75 Deg, 270.00 Deg, 281.25 Deg, 292.50 Deg, 303.75 Deg, 315.00 Deg, 326.25 Deg, 337.50 Deg, 348.75 Deg. 180.00 Deg. is Default. |
HDMI Output
| HDMI Output | Description |
|---|---|
| V-Sync | Triple Buffer, Frame Lock. See Triple Buffer vs Frame Lock Mode for more information. |
| Lock to 60 Hz | Off (default), On. |
| Colorspace | RGB Full (default), RGB Limited. |
| Chroma Mode | Auto (default), FIRST/POINT, FIRST/LINEAR, ZERO/POINT, ZERO/LINEAR. |
| Blue Only | Off (default), On. |
| Disable CSC | Off (default), On. |
| AVINFO AR | 16:9 (default), 4:3. |
| TMDS Clock: | Fix it note- Mine shows 148.50 MHz, not sure what changes this value. |
On-Screen Display
| On-Screen Display | Description |
|---|---|
| Size | Small (default), Tiny, Normal. |
| Blanking Color | Blue (default), Green, Red, Gray, Black. |
| Lightgun Border | Off (default), On. |
| Startup Profile | Default (default), 1 to 10. |
| Advanced Res | No (default), Yes. |
Save Profile
| Save Profile | Description |
|---|---|
| Slot 1 - Slot 10 | Selecting one of the Save Profile slots (1-10) will save any current changes made to the RetroTINK-5X Pro system into the chosen slot. The values can be loaded from the Load Profile menu, or be set to load on boot from the On-Screen Display/Startup Profile selection. |
Load Profile
| Load Profile | Description |
|---|---|
| Slot 1 - Slot 10 | Any profile previously saved from the Save Profile menu can be loaded here. Profiles can also be set to load on boot from the On-Screen Display/Startup Profile selection. |
| Default | Selecting default will restore the RetroTINK-5X Pro to the initial default settings. |
Status
| Status | Description |
|---|---|
| Source: | Shows the currently selected input source. |
| Output Res: | Shows the currently selected output resolution. |
| No Signal | The information in the rows below will only be displayed if a source is detected. Else, "No Signal" will be displayed. |
| Input Lines: | Displays the current input's horizontal resolution. |
| Input H-Freq: | Displays the current input's horizontal timing frequency. |
| Input V-Freq: | Displays the current input's vertical timing frequency. |
| Samples/Line: | Displays how many samples per scanline the RetroTINK-5X Pro is processing. |
| ADC Clock: | The clock value of the Analog to Digital Converter. |
| Ticks/Frame: |
About:
The about page will display the following information as of the current firmware update:
RETROTINK-5X Pro
© 2021-2-22 RetroTINK LLC
All Rights Reserved
(QR CODE)
Need Help? Scan the QR Code to
Join the RetroTINK Discord
Official User's Manual v1
A Wiki version of the official RetroTINK-5X Pro user's manual can be found here.
