AV:RetroTINK-4K/System Specific Settings: Difference between revisions
Bobrocks95 (talk | contribs) (Screenshots for Swiss' Force Horizontal Scale 1:1 option to get rid of the placeholder- if the longer caption throwing off the vertical alignment can be improved go for it, looked like the caption may have been cut off depending on which type of preview I) |
|||
| (4 intermediate revisions by 3 users not shown) | |||
| Line 160: | Line 160: | ||
[Picture Here: a non-640 or 320 game with the trick used (should look worse)] | [Picture Here: a non-640 or 320 game with the trick used (should look worse)] | ||
====Pokémon Stadium Game Boy Tower==== | ====Pokémon Stadium Game Boy Tower==== | ||
| Line 197: | Line 172: | ||
|- | |- | ||
|4:2:2 Upsampler | |4:2:2 Upsampler | ||
| | |Linear | ||
|} | |} | ||
{| class="wikitable" | {| class="wikitable" | ||
| Line 239: | Line 214: | ||
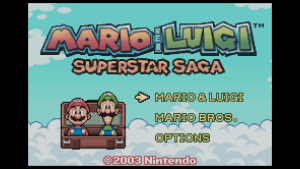
|+Game Boy Interface Settings | |+Game Boy Interface Settings | ||
! colspan="2" |HDMI Output | ! colspan="2" |HDMI Output | ||
| rowspan=" | | rowspan="7" |[[File:Mario & Luigi GBP.png|center|thumb|GameBoy Player Disk]] | ||
| rowspan=" | | rowspan="7" |[[File:Mario & Luigi GBIHF-OSSC hdmi.png|center|thumb|GBIHF-OSSC]] | ||
| rowspan="7" |[[File:M LSS GBI.png|center|thumb|GBIHF-RT4K-HDMI Optimized on RT4K]] | |||
|- | |- | ||
|Sync Lock | |Sync Lock | ||
| Line 260: | Line 236: | ||
|Vert Prescale | |Vert Prescale | ||
|1/2 | |1/2 | ||
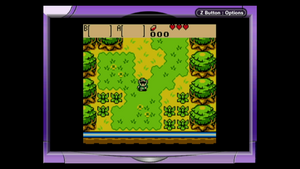
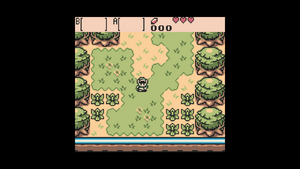
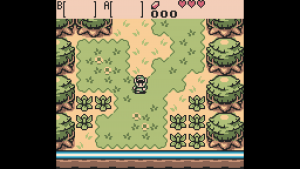
| rowspan="7" |[[File:Links Awakening GBP.png|center|thumb|GameBoy Player Disk]] | |||
| rowspan="7" |[[File:Link's Awakening GBIHF-OSSC HDMI.png|center|thumb|GBIHF-OSSC]] | |||
| rowspan="7" |[[File:LoZOoA 3 GBI.png|thumb|GBIHF-RT4K-HDMI]] | |||
|- | |- | ||
|Aspect Correction | |Aspect Correction | ||
| Line 293: | Line 272: | ||
**240p, 288p, 480i, 576i Linedoubler: Off (Let's the Tink4k handle all upscaling and deinterlacing) | **240p, 288p, 480i, 576i Linedoubler: Off (Let's the Tink4k handle all upscaling and deinterlacing) | ||
*Advanced Settings: | *Advanced Settings: | ||
** Chroma Interpolation: | ** Chroma Interpolation: On (Safe to set to off, as it has no effect if you're using YC422, see below) | ||
** Fix Sync Timing & Regenerate Csync: Off (Safe to leave as off, turn on if it fixes your issues) | ** Fix Sync Timing & Regenerate Csync: Off (Safe to leave as off, turn on if it fixes your issues) | ||
**Fix Resolution: Off (Safe to set to off if you are using default Tink4K profile, otherwise please see txt on sdcard of specific profile maker) | **Fix Resolution: Off (Safe to set to off if you are using default Tink4K profile, otherwise please see txt on sdcard of specific profile maker) | ||
| Line 306: | Line 285: | ||
**AVE Compatibility: GCVideo | **AVE Compatibility: GCVideo | ||
*Default Game Settings | *Default Game Settings | ||
**Force Video Mode: | **Force Video Mode: Auto | ||
**Force Horizontal Scale: 1:1 | **Force Horizontal Scale: 1:1 | ||
| Line 638: | Line 617: | ||
====PS1 Backwards Compatibility==== | ====PS1 Backwards Compatibility==== | ||
PS1 games | The PS2 does not perfectly render PS1 games the same way a PS1 would. Using a different graphics chip and different timings results in subtle differences in the way graphics are drawn, and therefore require different settings than what you would use on a PS1 playing the same game. Subtle differences between PS1 consoles and PS2 consoles playing the same games result in additional dithering or incorrect transparency effects. PS1 games play identically on both consoles otherwise. | ||
{| class="wikitable" | |||
[ | |+PlayStation 1 Games on PlayStation 2 Comparison | ||
|[[File:FF7 PS1 on PS1.png|center|thumb|PS1 game played on PS1]] | |||
|[[File:FF7 PS1 on PS2 PS1 Timings.png|center|thumb|PS1 game on ps2 incorrect timings]] | |||
|[[File:FF7 PS1 game on ps2 correct profile.png|center|thumb|PS1 game on PS2 with correct timings]] | |||
|} | |||
===Sony PlayStation Portable=== | ===Sony PlayStation Portable=== | ||
| Line 865: | Line 848: | ||
*HDTV Settings (Resolution): 720p (most games run at native 720p resolution, setting it to 1080p will cause the 360 to upscale and add softness to your image) | *HDTV Settings (Resolution): 720p (most games run at native 720p resolution, setting it to 1080p will cause the 360 to upscale and add softness to your image) | ||
*Reference Levels: Standard ( | *Reference Levels: (Choose one, either will work) | ||
**Standard (RGB Limited, this is the 360 default) | |||
**Expanded - (RGB Full - This '''requires''' a setting override below in the Tink4k as the Xbox 360 always send the HDMI metadata flag as RGB Limited for whatever reason) | |||
***'''Requires''' change in Tink4k setting menu: Advanced Settings -> Acquisition -> HDMI Receiver -> Colorspace -> Input Range -> '''RGB Full''' | |||
*HDMI Color Space: Source | *HDMI Color Space: Source | ||
| Line 891: | Line 877: | ||
{| class="wikitable" | {| class="wikitable" | ||
|+TurboGrafx-16 / PCEngine Settings (NTSC) | |+TurboGrafx-16 / PCEngine Settings (NTSC) | ||
! colspan=" | ! colspan="4" |Sample Rate Detection | ||
|- | |- | ||
|Auto Dec. Factor | |Auto Dec. Factor | ||
| colspan=" | | colspan="3" | On | ||
|- | |- | ||
|Auto Dec. Phase | |Auto Dec. Phase | ||
| colspan=" | | colspan="3" |Auto | ||
|- | |- | ||
|ADC Sample Rate | |ADC Sample Rate | ||
| colspan=" | | colspan="3" |2730 dots/line | ||
|- | |- | ||
|Enable | |Enable | ||
|341.250 | |341.250 | ||
|455.000 | |||
| 682.500 | | 682.500 | ||
|- | |- | ||
! colspan=" | ! colspan="4" |Manual Sample Detection (256) | ||
|- | |- | ||
! colspan=" | ! colspan="4" |RGB/Component ADC Setup | ||
|- | |- | ||
| Samples per Line | | Samples per Line | ||
| colspan=" | | colspan="3" |2730 (2290 Act.) | ||
|- | |- | ||
|Decimation Factor | |Decimation Factor | ||
| colspan=" | | colspan="3" |8 (341.250) | ||
|- | |- | ||
! colspan=" | ! colspan="4" |Manual Sample Detection (384) | ||
|- | |- | ||
! colspan="3" |RGB/Component ADC Setup | ! colspan="4" |RGB/Component ADC Setup | ||
|- | |||
|Samples per Line | |||
| colspan="3" |2730 (2290 Act.) | |||
|- | |||
|Decimation Factor | |||
| colspan="3" |6 (455.000) | |||
|- | |||
! colspan="4" |Manual Sample Detection (512) | |||
|- | |||
! colspan="4" |RGB/Component ADC Setup | |||
|- | |- | ||
|Samples per Line | |Samples per Line | ||
| colspan=" | | colspan="3" |2730 (2290 Act.) | ||
|- | |- | ||
|Decimation Factor | |Decimation Factor | ||
| colspan=" | | colspan="3" | 4 (682.500) | ||
|} | |} | ||
Revision as of 14:17, 18 April 2024
The System-Specific Settings page is all about highlighting how you can use the RetroTINK-4K's various features to improve the experience of using your video game systems beyond just plugging them in. This can range from setting 1:1 pixel aspect ratio for Super Game Boy on the SNES, to dovetailing with the Sharpscale Plugin on the PlayStation TV. While the RT4K will always provide a great experience right out of the box, the tips in this section will help remove quirks and annoyances from the original platform, or present the games more accurately.
For general information about the RT4K, please visit this page.
Defeating Dithering
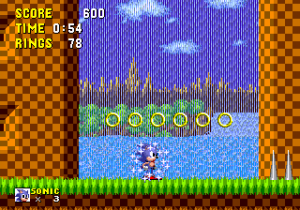
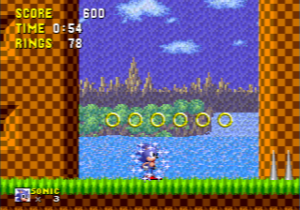
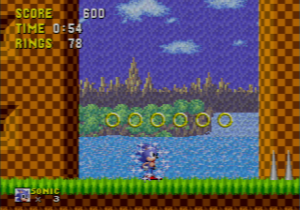
Dithering is a technique many games used in tandem with the blurring effect of a video cable (like Composite) and a CRT. The idea is that the video cable and display blend the dither patterns together, to accomplish tricks like transparency or higher color depth. When using high-quality cables like RGB-SCART and Component, dithering can become very apparent, and many users may find them unsightly. The RetroTINK-4K has an option that can help:
- Go to Advanced Settings > Processing / Effects, then set Hori. Kernel and Vert. Kernel to "Bilinear Soft" as needed. This blurs the edges of the pixels to disguise the dithering.
The cost of applying this effect is that the image will of course be rather blurry. Adding some scanlines (also in the Processing / Effects menu) can help alleviate this somewhat; don't forget that HDR will help brighten the image back up. If the dithering is only vertical stripes (like the waterfalls in Sonic the Hedgehog or the water in Kirby's Dream Land 3), you could alternately use Bilinear Sharp on the Hori. Kernel, for a slightly sharper appearance.
Nintendo Systems
NES / Famicom
| RGB/Component ADC Setup (256) | ||
|---|---|---|
| Samples per Line | 3410 (2861 Act) | |
| Decimation Factor | 10 (341.000) | |
The Famicom (or Family Computer) is the original Japanese version of Nintendo's landmark console, while the NES (or Nintendo Entertainment System) was released in all other regions. All Famicom / NES systems will be marked as such on the front, so simply read that to tell which one yours is (particularly useful regarding the top-loading redesigns). These systems render games in 256x224.
- The NES family renders and outputs all audio in mono via the white RCA jack (left speakers). To account for this, go to Advanced Settings > Audio Setup, then set Input Swap to "Mono (Left)".
- Some NES family games, like Super Mario Bros. 3, have visual errors visible on the left and right sides of the screen. These can be removed from view using the cropping tools.
The NES / Famicom can only output either Composite video or RF (with one rare exception). You will need at least a composite signal to connect directly to the RT4K. Use the list below to tell which one your system outputs:
- Composite signals are supported by the RetroTINK-4K. This can be used on either the front yellow plug, or the rear green plug.
- Original "Front-loading" NES (NES-001).
- Top-loading "AV Famicom" with the rounded power switch and flat cartridge slot.
- Sharp's "Twin Famicom".
- Sharp's "Famicom Titler" (also capable of S-Video).
- RF signals are not normally supported by the RetroTINK-4K. These models support RF output:
- Original Famicom w. hard-wired controllers.
- Revised "Top-loading" NES with a rounded cartridge slot and power switch.
- The RF Modulator output from the original "Front-loading" NES-001, which has softer sound compared to the the sharper Composite output.
Super NES / Super Famicom
| RT4K Settings | ||
|---|---|---|
| Sample Rate Detection | ||
| Auto Dec. Factor | Yes | |
| Audo Dec Phase | Yes | |
| ADC Sample Rate | 3410 | |
| Progressive Detection | 341.000 | 682.000 |
| Manual Sample Detection (256) | ||
| RGB/Component ADC Setup (256) | ||
| Samples per Line | 3410 (2861 Act) | |
| Decimation Factor | 10 (341.000) | |
| Manual Sample Detection (512) | ||
| RGB/Component ADC Setup (512) | ||
| Samples per Line | 3410 (2861 Act) | |
| Decimation Factor | 5 (682.000) | |
The majority of Super NES / Famicom games run in 256x224 resolution, while a select few games run with a mix of the following: 512x224 in the whole screen for menus, 256x224 for most of the image while running 512x224 over certain parts of the screen to create transparency effects, or the same but using 512x224 resolution to allow sharper text on the screen. It is recommended to run the Super NES in 512x224p mode to make sure you get all available detail.
[pending screenshots of Trials of Mana or Kirby game with 512 mode vs 256 mode]
This topic is a WIP, please see the same topic on the RT5X wiki
(https://consolemods.org/wiki/AV:RetroTINK-5X_Pro#512_%22Hi_Res%22_Games)
We recommend using a Super NES model number SNS-001, or Super Famicom model number SHVC-001, and an RGB SCART cable wired for Sync-on-Luma, as this works with both of the aforementioned models. There are internal revisions of these models, noted as "1-Chip" on the motherboard, and the 1-Chip-03 does not work with Composite Sync. There is a revised model, SNS-101 and SHVC-101, also known as the Super Nintendo Junior. This model only supports composite video.
As noted, there are revisions of the original model Super NES, noted by the "1-chip" on the motherboard. The 1-chip boards have sharper yet brighter video, while the non-1-chip boards have a "smeared" and slightly darker look. We encourage using the auto-gain functions in the ADC to correct the video on both models.
Profile included for automatic switching between 512 and 256 in Display Aspect Ratio, for both SCART and HDRV YPbPr cables.
Super Game Boy
| RGB/Component ADC Setup | |||
|---|---|---|---|
| Samples Per Line | 3410 (2861 Act.) | ||
| Decimation Factor | 10 (341.000) | ||
| Scaling/Crop Setup | |||
| Aspect Correction | 1:1 (Sq. Pixel) | ||
| Scaling Mode | Auto Fill Integer or Proportional | ||
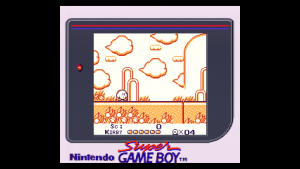
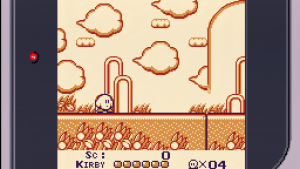
The Super Game Boy Cartridge allows you to play original style Game Boy and Game Boy Color cartridges on your TV using the Super Nintendo, and adds borders. Once dialed in, Game Boy games are rendered in a 160x144p window inside a 256x223p canvas. However, Game Boy games were expected to be displayed on the square pixels of their screens, unlike the rectangular CRT pixels that the SNES expects.
- For correct Super Game Boy pixels, go to Advanced Settings > Scaling/Cropping, then set Aspect Correction to "1:1 (Sq. Pixel)".
Profile included to maximize the Game Boy window to the screen, or 15x the original GB pixel count.
Nintendo 64
| RGB/Component ADC Setup | |
|---|---|
| Samples per Line | NTSC: 3094 (2596 Act.
PAL: 3176 (2646 Act.) |
| Decimation Factor | NTSC: 4 (773.500)
PAL: 4 (794.000) |
Unfortunately, no stock Nintendo 64s support RGB without modding the console. All stock N64s support Composite, all NTSC N64s support S-Video, French N64s support SECAM S-Video, and some PAL N64s do not support S-Video at all.
All N64s have 3 levels of video processing that keep it from being as sharp as the PlayStation and Saturn:
- All games scale their image to 640 pixels wide. Many games were rendered at different resolutions but the N64 will scale to 640.
- Many games render at 320 pixels wide and, as a trick, you can double your ADC Decimation factor to "correctly" render games in their original resolution. This trick only works for games that render at 320 pixels wide, and do not work for games that render at other resolutions that are not 320 or 640 pixels wide.
- Software level anti-aliasing. This can be disabled by patching ROMs or using a Gameshark to disable the effect.
- Hardware level anti-aliasing. This can't be disabled without a physical mod.
[Picture Here: AA enabled vs AA disabled]
[Picture Here: a 320 game with the trick used vs left at 640 (should be the same)]
[Picture Here: a non-640 or 320 game with the trick used (should look worse)]
Pokémon Stadium Game Boy Tower
Pokémon Stadium's Game Boy Tower allows you to play Pokémon games on your TV, similar to a Super Game Boy, and even uses the Super Game Boy borders. The issue, however, is the scaling noted above. These games render at 160x144p inside a 256x223p canvas, which is then scaled to 640 pixels wide. You will not get a sharp picture out of this setup due to that factor alone. It is recommended to play in a generic or default profile.
[Picture Here: SGB vs Pokémon Stadium]
Nintendo GameCube
| HDMI Receiver Setup | |
|---|---|
| 4:2:2 Upsampler | Linear |
| RGB/Component ADC Setup | |
|---|---|
| Samples per Line | NTSC: 3432 (2880 Act.)
PAL: 3456 (2880 Act.) |
| Decimation Factor | NTSC: 4 (858.000)
PAL: 4 (864.000 |
For the purposes of use with the RetroTINK-4K, it is highly recommended to use a DOL-001 GameCube, which has the digital out port, and an Insurrection Industries Carby which outputs crisp digital video and can connect to the HDMI® input port of the RT4K. If you insist on buying YPbPr cables, we can only recommend the OEM D-Terminal cable with a D-Terminal to Component adapter, or the OEM component cable.
Most GameCube Games will run at 480p, a progressive mode is activated by holding B when the GameCube boots up a game.
Swiss, the Anti-Flicker Filter, and Horizontal Frame buffer Width
While Most GameCube games run at 480p and progressive mode is relatively easy to access, many GameCube games use an "anti-flicker-filter" by default, which will soften the image. Most of these filters can't be turned off in-game, but the homebrew software Swiss will allow you to boot games, including your own disks, with the anti-flicker filter turned off. As an added bonus, newer versions of Swiss automatically turn the filter off and boot your game in 480p.
[Picture Here: game with anti-flicker filter on vs off]
[Video here: Smash Bros Melee turning the flicker filter on and off]
A few GameCube games scale their image to fit the console's frame buffer before output. Swiss allows you to turn this off and shows the image at its original framebuffer width, and you can use the RT4K to scale it back, for a small sharpness gain.
240p Games
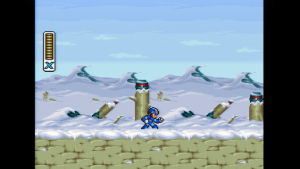
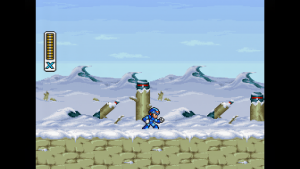
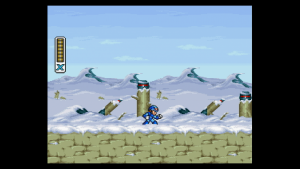
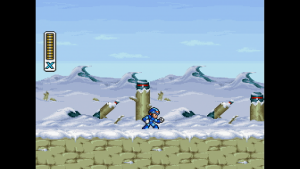
There are two GameCube games that run at 240p: Megaman X Collection, and the NES games in the Zelda Collector's Edition Promotional Disc. This means you do not have to enable 480p to run those games and can sharply scale these games on the RT4K.
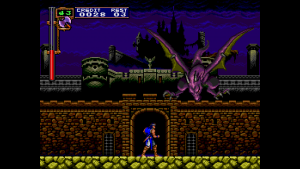
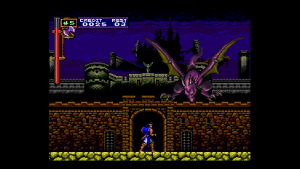
[Picture Here: Megaman X on Super NES vs GameCube]
Game Boy Player + Game Boy Interface
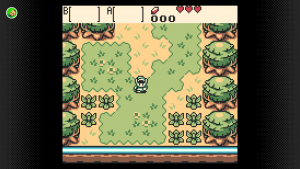
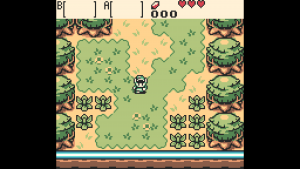
| HDMI Output | ||||
|---|---|---|---|---|
| Sync Lock | Gen | |||
| HDMI® Receiver | ||||
| Input Pixels | 2 (Output: 240p) | |||
| 4:2:2 Upsampler | Nearest | |||
| Input Range | RGB Lim. | |||
| Scaling/Crop Setup | ||||
| Vert Prescale | 1/2 | |||
| Aspect Correction | 1:1 (Sq. Pixel) | |||
| Scaling Mode | Auto Fill Integer | |||
| Color Correction Setup | ||||
| Input Factor | 2.4 | |||
| Output Factor | 2.4 | |||
| Bit Crush | 3 bits Removed | |||
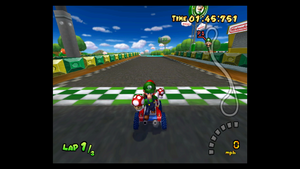
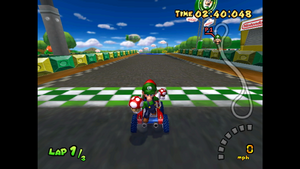
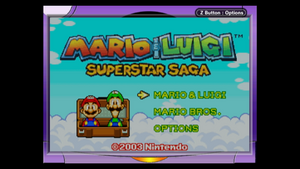
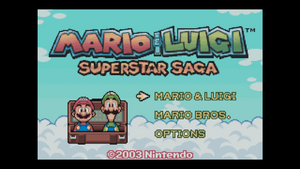
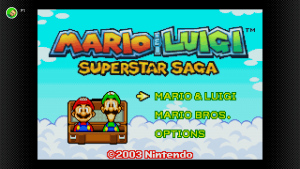
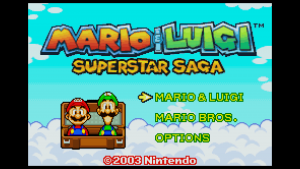
The Game Boy Player is a popular add-on to the GameCube that allows you to play Game Boy, Game Boy Color, and Game Boy Advance games on your TV. The Game Boy Player Disk does not sharply render games onto the screen, but you can use the homebrew software Game Boy Interface to sharply render games into the RT4K. A specific flavor of GBI was created to take advantage of the Insurrection Industries Carby and the TINK 4K's HDMI® Input. Please use files gbihf-rt4k-HDMI.cli, gbihf-rt4k-HDMI.dol+cli or gbihf-rt4k-HDMI.gci included with GBI and follow the instructions noted here.
Profiles included for 13x scaled GBA games and 15x scaled GBC games.
GameCube GCVideo Based HDMI Devices (Carby, GCDual, etc.)
These are some recommended settings. This may not be the best for all use cases but will yield crispy results on default Tink4k profile. Also please remember to select "Store Settings" in the GCVideo menu to save your settings or not. If you are using system specific profiles, please refer to the instructions included with the profiles.
Carby/GCDual firmware 3.1
- Output Settings:
- Allow 480p Mode: On
- Enhanced DVI Mode: On (or else there won't be audio)
- Display as 16:9: Off (off for 4:3 or on depending if your game has a widescreen mode)
- View all Modes:
- 240p, 288p, 480i, 576i Linedoubler: Off (Let's the Tink4k handle all upscaling and deinterlacing)
- Advanced Settings:
- Chroma Interpolation: On (Safe to set to off, as it has no effect if you're using YC422, see below)
- Fix Sync Timing & Regenerate Csync: Off (Safe to leave as off, turn on if it fixes your issues)
- Fix Resolution: Off (Safe to set to off if you are using default Tink4K profile, otherwise please see txt on sdcard of specific profile maker)
- Digital Color Format: YC422 (This matches what the GameCube internally uses)
- Report 240p as 480i: Off
- (Audio) Sample Rate Hack: Off (Safe to keep off, this tries to fix audio issues when enabled)
Helpful Settings in Swiss
These Swiss settings may help yield a better picture with your GCVideo devices in conjunction with the above GCVideo settings. It may also resolve issues with vertical lines.
- Global Settings:
- AVE Compatibility: GCVideo
- Default Game Settings
- Force Video Mode: Auto
- Force Horizontal Scale: 1:1
Nintendo Wii
| RGB/Component ADC Setup | |
|---|---|
| Samples per Line | NTSC: 3432 (2880 Act.)
PAL: 3456 (2880 Act.) |
| Decimation Factor | NTSC: 4 (858.000)
PAL: 4 (864) |
The Nintendo Wii is a very versatile console: it plays GameCube Games, Wii Games, and many classic retro titles through emulators as part of the Virtual Console lineup. The Wii also has easy to find YPbPr component cables and can easily support 480p across all Wii software through its component cables, making it a popular option for playing GameCube games. The Wii only supports 3 resolutions: 720x240p, 720x480i, and 720x480p. Please read on for more information on getting the sharpest possible picture from a Wii.
Profile included for basic generic output. It is recommended you use this for basic Wii use.
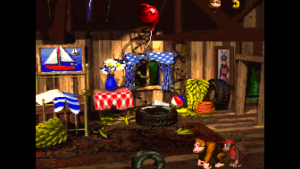
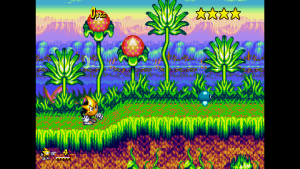
Virtual Console
Many Virtual Console games output at 240p when the Wii is in SDTV mode, and they will line double to output at 480p in EDTV mode. All virtual console games scale the image to 640 pixels wide, so it is recommended you use the default or generic profiles for playing virtual console games. Also of note: NES Virtual console games are rendered many shades darker than an original console, as an anti-epilepsy measure.
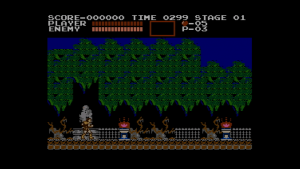
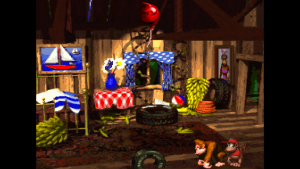
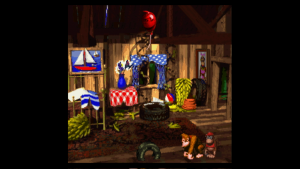
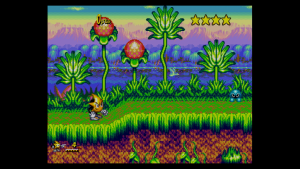
| Original Console Optimized | Virtual Console Default Settings |
|---|---|
| [pending Screenshot
Castlevania NES] |
|
| [Pending Picture of Ristar on Genesis 10x DAR] | |
| NEO GEO Game | NEO GEO Game |
USBLoader GX, and Counteracting the Anti-Flicker Filter, 480p LPF, and the Framebuffer Video Width
Homebrew called USBLoader GX allows you to activate or deactivate code before running games, even on your disks.
Most Wii games will apply an anti-flicker filter, even at 480p, which results in a softer picture. Use USBLoader GX's options to turn this off for Wii Games. If you wish to run GameCube games, you will need to turn the anti-flicker filter off separately in either Nintendont or Devolution, but USB-Loader GX does have these options in its menu.
[Video here: Super Smash Bros Brawl's settings menu turning the anti-flicker filter on and off]
There is an option in USBLoader GX called the "480p pixel fix" which makes the game look much sharper. It only works with RVL-001 models with the internal CPU-01 motherboard.
[Picture here: Wii game with 480p pixel fix off vs on]
You can get even sharper picture from the Wii by enabling the "Video Width: Framebuffer" option in USBLoader GX. This will make games output in their original rendering resolution, which you can then rescale using the RT4K to get a much sharper picture than originally intended at the "correct" aspect ratio. As an added bonus, NES and Super NES games will render at 512x224p with this option turned on, which you can use a doubled decimation factor to treat a game like its original 256x224 resolution, and get picture on par with their original consoles.
Wii GCVideo Based HDMI Devices (WiiDual, etc.)
These are some recommended settings. Please remember to select "Store Settings" in the GCVideo menu to save your settings or not. These settings are based on the WiiDual but should be similar for AVE-HDMI. Wii GCVideo based devices are not affected by the 480p LPF issue. If you are using system specific profiles, please refer to the instructions included with the profiles.
WiiDual firmware 3.1
- Output Settings:
- Allow 480p Mode: On (Please make sure in the Nintendo Wii settings menu that 480p is enabled)
- Enhanced DVI Mode: On (or else there won't be audio)
- Display as 16:9: On or Off (Make sure this setting corresponds with what is in the Nintendo Wii video settings menu)
- View all Modes:
- 240p, 288p, 480i, 576i Linedoubler: Off (Let's the Tink4k handle all upscaling and deinterlacing)
- Advanced Settings:
- Chroma Interpolation: Off (Safe to set to off, as it has no effect if you're using YC422, see below)
- Fix Sync Timing & Regenerate Csync: Off (Safe to leave as off, turn on if it fixes your issues)
- Fix Resolution: Off (Safe to set to off if you are using default Tink4K profile, otherwise please see txt on sdcard of specific profile maker)
- Digital Color Format: YC422 (This matches what the Wii internally uses)
- Report 240p as 480i: Off
- (Audio) Sample Rate Hack: Off (Safe to keep off, this tries to fix audio issues when enabled)
Games that only support 4:3 or 16:9
In general, the "Aspect Correction" setting should be set to either 4:3 or 16:9 depending on your Wii's system settings and preferred display mode. Most games support both modes natively, however some titles only support one or the other, and pad the unused area with black bars. "16:9-only" titles will display as letterboxed when the Wii is set to 4:3, with black bars on the top and bottom of the screen. "4:3-only" titles typically pillarbox the image when the Wii is set to 16:9, with black bars on the left and right of the screen- some 4:3-only games, such as Wario Land: Shake It!, will pillarbox with border artwork or game information, while the active "playing area" will remain roughly 4:3 after the image is stretched.
Due to the nature of anamorphic widescreen, it is recommended that you change your Wii's system setting (and the Tink's Aspect Correction setting) if it doesn't match one of these games, so that you aren't losing resolution to letterboxing or pillarboxing. Most known titles are listed in this thread
There are some other options if you don't want to change your settings back and forth for these titles, but still want the full resolution:
- If you use USBLoaderGX, you can change the aspect ratio setting per-game, so that the Wii will automatically switch settings when the game is launched. Keep your general setting in the Wii's menu on the aspect ratio you prefer and only change it per-game in USBLoaderGX if they do not match.
- Some Gecko codes are available to force popular 16:9 only titles into 4:3 if you prefer, usually by expanding the visible vertical area. These may have varying degrees of success to various widescreen hacks, with potential issues such as object pop-in, stretched or misplaced UI elements, and framerate issues from the increased rendering load. These codes are generally available on the Dolphin Wiki , with some screenshot examples in this thread
Nintendo Wii U
It is highly recommended to use the Wii U's HDMI® output instead of its Component output. This is because the analog video is duller, and has less sharpness (even compared to Component from the PS3 and 360).
[Insert Picture: HDMI Vs YPbPr]
- The Wii U's HDMI® only outputs in limited range. To account for this, go to Advanced Settings > HDMI® Receiver, then set Input Range to "RGB Lim.".
Wii Backwards Compatibility
The Wii U is backwards compatible with Wii and offers HDMI Output. There is a 1% scale of wii games, even outputting 480p. While you can use custom firmware to reverse this, it currently results in an offset chroma. If you can find a Wii that works with the 480p patch, it is recommended to use that over a Wii U.
[Insert Picture: Wii YPbPr vs Wii U 480p]
Nintendo Switch
Nintendo Switch Online Games
it is highly recommended to use 1080p output for the NSO emulators and turning on "Pixel Perfect" in their settings under "Game Screen" and to also turn off "Show controls in game" under "Control Display," and to turn off "reproduce classic feel" on the Game Boy and Game Boy Advance apps. This way, all games output a perfectly integer scaled, line-multiplied output for their games.
| NES, Super NES, and Genesis Games 256 Pixels Wide | ||
|---|---|---|
| [Pending Ristar Genesis DAR Screenshot] | ||
SEGA Systems
SEGA Master System
The original model of the Master System supports Composite and RGB output (S-Video is not supported without mods). The second model, the "Master System II", cannot be used with the RetroTINK-4K without modding, as it only supports RF output.
- Master System games are infamous for having borders of solid colour around the game graphics. These can be removed by going to Advanced Settings > Scaling/Cropping and using the Input Crop trim tools, but be mindful! Master System games can use two horizontal resolutions: 248 pixels and 256 pixels, and some games will use both of them. The safest option is to crop to a 256 pixels wide screen, which will leave a column on the left-hand side of 248 pixels wide screens. You could also have an additional profile just for 248 pixels wide screens.
- The Auto Crop tools will not work here, as they will consider the coloured border to be part of the image (it technically is, if still unsightly).
- The Master System also has rather dim video output compared to other systems. You can fix this by going to Advanced Settings > RGB/Component ADC and adjusting the Gain while using the 240p Test Suite. You can also use the Auto Calibrate Gain feature, which works best if there's a patch of solid, pure white somewhere on the screen.
SEGA Genesis / Mega Drive
| Sample Rate Detection | ||
|---|---|---|
| Auto Dec. Factor | On | |
| Auto Dec. Phase | Auto | |
| ADC/Sample Rate | 3420 dots/line | |
| Progressive Detection | 342.000 | 426.500 |
| Manual Sample Detection (256) | ||
| RGB/Component ADC Setup | ||
| Samples per Line | 3432 (2850 Act.) | |
| Decimation Factor | 10 (342.000) | |
| Manual Sample Detection (320) | ||
| RGB/Component ADC Setup | ||
| Samples per Line | 3432 (2850 Act.) | |
| Decimation Factor | 8 (429.000) | |
Recommended output: RGB
For practicality, "Genesis" refers to both the SEGA Genesis and the Mega Drive (it's Japanese and European name), as they are functionally identical as far as the RetroTINK-4K is concerned, outside of NTSC and PAL standards.
- The SEGA Genesis has two 240p output resolutions: 320x224 and 256x224. A third resolution, 480i, is only known to be used in the 2 Player VS modes of Sonic the Hedgehog 2 and Combat Cars.
Certain Genesis games will display coloured dots along the bottom edge of the screen. Known as CRAM (Colour RAM) dots, these would have been in the overscan area of most CRTs and thus invisible to the player, but are quite prominent on modern displays. You can hide them by going to Advanced Settings > Scaling/Cropping and adjusting the Bottom Trim value. You should not use Auto Crop, as it will consider the CRAM dots to be the bottom edge of the picture.
Composite effects. see this portion of the 5x wiki https://consolemods.org/wiki/AV:RetroTINK-5X_Pro#Genesis_Dithering
SEGA CD
SEGA 32x
Master System Games on Genesis
SEGA Saturn
| Manual Sample Detection (320) | |
|---|---|
| RGB/Component ADC Setup | |
| Samples per Line | 3416 (2866 Act.) |
| Decimation Factor | 8 (427.000) |
| Manual Sample Detection (352) | |
| Samples per Line | 3640 (3054 Act.) |
| Decimation Factor | 8 (455.000) |
| Manual Sample Detection (640) | |
| Samples per Line | 3416 (2866 Act.) |
| Decimation Factor | 4 (854.000) |
| Manual Sample Detection (704) | |
| Samples per Line | 3640 (3054 Act.) |
| Decimation Factor | 8 (910.000) |
Recommended output: RGB
SEGA Dreamcast
Recommended Output: RGBHV
DCDigital/DCHDMI (first gen/HW1)
These settings are for first gen DCDigital/DCHDMI only. Second gen and GEM versions may not match the following or have expanded capabilities. Also, this assumes the default Tink4K profile. If you are using specifically made profiles, please refer to the instructions included with those profiles.
- Firmware 4.7std: for games with native VGA support or can be forced for VGA
- Output Resolution: VGA
- Advanced Video Settings:
- Deinterlacer 480i & 576: passthru
- 240p adjust position: off
- VGA adjust position: auto
- RGB color space: full
- Video Mode Settings: Force VGA/Switch Trick VGA
- Firmware 4.7std: for games that can't be forced into VGA such as Marvel vs Capcom, JoJo, Plasma Sword, Last Blade 2, etc.
- Output Resolution: 480p
- Advanced Video Settings: (same as above)
- Video Mode Settings: Cable Detect
PlayStation Systems
Sony PlayStation
| Sample Rate Detection | |||||
|---|---|---|---|---|---|
| Auto Dec. Factor | On | ||||
| Auto Dec. Phase | Auto | ||||
| ADC Sample Rate | 3413 | ||||
| Enable | 341.300 | 426.624 | 487.571 | 682.600 | 853.250 |
All Sony Playstation models support RGBS. It is recommended to use a well shielded SCART cable that uses Sync-on-Luma.
Resolution Switching
PlayStation games will switch resolutions often, usually horizontal resolutions like 256, 320, 384 and 512, but occasionally vertical resolutions as well with 480i. The PlayStation is a perfect use for the Automatic Sampling Detection feature of the RT4K. To help with switching vertical resolutions quickly, please enable Triple Buffer in the RT4K's Output menu.
see this part of the 5x wiki https://consolemods.org/wiki/AV:RetroTINK-5X_Pro#Resolution_Switching
Profiles included will automatically switch to all resolutions. You may want to consider researching your game collection and see if you can turn off any resolutions that you won't use, for faster response from the auto sampling detection.
Sony PlayStation 2
| Sample Rate Detection | |||||
|---|---|---|---|---|---|
| Auto Dec. Factor | On | ||||
| Auto Dec. Phase | Auto | ||||
| ADC Sample Rate | 3432 | ||||
| Enable | 343.200 | 429.000 | 490.286 | 686.400 | 858.000 |
| Sample Rate Detection | |||||
|---|---|---|---|---|---|
| Auto Dec. Factor | On | ||||
| Auto Dec. Phase | Auto | ||||
| ADC Sample Rate | 3456 | ||||
| Enable | 345.600 | 432.000 | 493.714 | 691.200 | 864.000 |
The PS2 outputs 240p, 480i, 480p, and 1080i, and supports RGB as well as YPbPr. For simplicity, it is highly recommended to use YPbPr cables because the RT4K will automatically detect and switch to all those resolutions seamlessly. The PS2 will use RGBS for 240p and 480i, but will switch to RGsB for any resolutions above that. While the RT4K supports RGsB, it does not automatically switch from RGBS to RGsB, you will need to change the input manually.
All PS2 games will output either 512 pixels wide or 640 pixels wide. [sic]
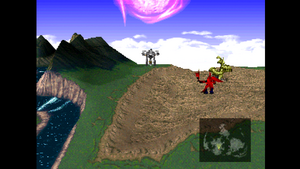
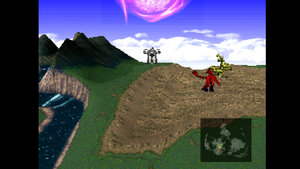
PS1 Backwards Compatibility
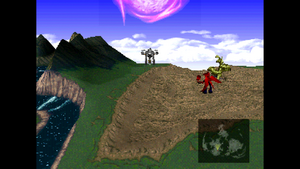
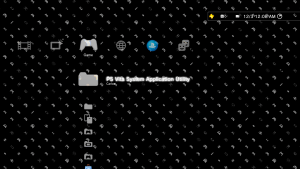
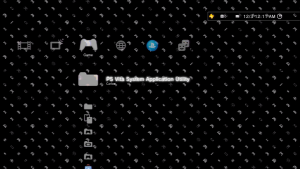
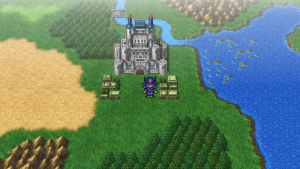
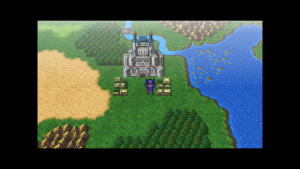
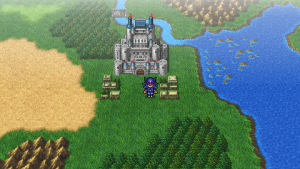
The PS2 does not perfectly render PS1 games the same way a PS1 would. Using a different graphics chip and different timings results in subtle differences in the way graphics are drawn, and therefore require different settings than what you would use on a PS1 playing the same game. Subtle differences between PS1 consoles and PS2 consoles playing the same games result in additional dithering or incorrect transparency effects. PS1 games play identically on both consoles otherwise.
Sony PlayStation Portable
| RGB/Component ADC | |
|---|---|
| Samples per Line | 3432 (2880 Act.) |
| Decimation Factor | 4 (858.000) |
| Scaling/Crop Setup | |
| Aspect Correction | 1:1 (Sq Pixel) |
| Scaling mode: | Auto Fill Integer |
PSP models PSP-2000, PSP-3000, and PSP-N1000 (aka PSP GO) can output to a display. It is highly recommended you use component cables with the RT4K.
PSP games are rendered at 480x272p. When they are displayed on a television with component cables, they render a 480x272p picture inside of a 720x480p canvas. You can use the RT4K to upscale the image to fit the screen. You will get the sharpest integer scaled picture at the expense of cutting off 2 vertical pixels.
[Picture here: PSP left alone (4.5x scale) vs PSP scaled to 8x]
PSone Classics on PSP
PSone Classics are PS1 games played on the PSP, and use a different set of optimal sampling numbers than the PS1 and PS2 consoles.
- PSone Classics can be output at their original resolution. On the PSP, go to Settings > Connected Display Settings, then set Component / D-Terminal Output to "Interlace".
| [Pending picture of Street Fighter Alpha 3 on PS1 DAR | [Pending picture of SF Alpha 3 on PSP PSOne Classics] |
Sony PlayStation 3
The PS3 supports HDMI® output, which is recommended for the sharpest possible picture with the RT4K.
- The PS3 supports outputting PS3 games at 720p, 1080i and 1080p, which the RT4K supports. However if you do not have an option enabled (such as 720p), the PS3 will use a different one. To avoid this, on the PS3 go to Settings > Display Settings, then pick "Video Output Settings". In the new menu, choose "HDMI", then "Custom". In the list, ensure that 720p, 1080i and 1080p are all selected, then press Right and then X to save your settings.
- While the PS3 does support up to 1080p using component cables, it's softer compared to HDMI® output. However many users choose it anyway, as the PS3's HDMI® output always uses HDCP (High-bandwidth Digital Content Protection) with no option to disable it like on PS4 and PS5.
PSone Classics on PS3
PSone Classics on PS3 render in 480p, but scale the image in a bilinear, non-integer manner. For the sharpest picture, use these settings below.
| PS3 XMB Game Settings | |
|---|---|
| PS/PS2 - Upscaler | Off |
| PS/PS2 - Smoothing | Off |
| [Pending Street Fighter Alpha 3 on PS1 10x DAR] |
|---|
PS2 Disk Games on Full Backwards compatible CECHA and CECHB PS3 Models
This is for early release PS3 models with full PS2 compatibility (some games are still incompatible, similar to late model PS2 Slims ie SCPH-9000x). Partial compatibility models may differ. More testing is necessary, but the PS3 will scale all games to 640 pixels wide, so it's possible to use HDMI decimation settings to restore the original 512px horizontal resolution.
Pending Confirmation: games that are 240p will be bilinearly scaled to 480p, so you cannot use the vertical prescale option to restore the 240p resolution.
| PS3 XMB Game Settings | |
|---|---|
| PS/PS2 - Upscaler | Off |
| PS/PS2 - Smoothing | Off |
| RT4K Settings for PS2 Games with 512px Wide Only | |
| HDMI Receiver Setup | |
| Input Pixels | 5 |
| Output Pixels | 4 |
Sony PlayStation TV
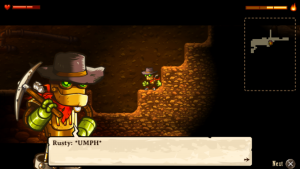
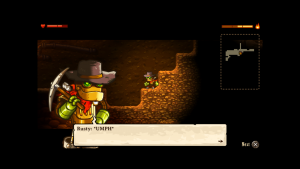
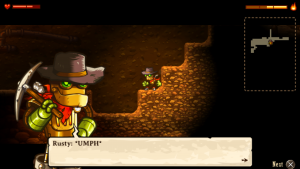
The PlayStation TV (called the Vita TV in Asia) allows you to play Vita, PSP, and PSone Classics on your TV through HDMI®. By default, all output from the PlayStation TV is soft because of the following factors:
- All software has a bilinear filter applied
- All software is scaled to the PSTV's selected output resolution
- Vita software is internally scaled to 960x544p regardless of its original rendering resolution. This applies to Vita handhelds as well
- PS1 Classics are unevenly, horizontally scaled to 4:3.
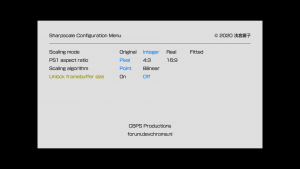
To counteract this for the sharpest possible picture, we highly recommend installing custom firmware on your PSTV and installing the Sharpscale plugin to counteract all the above effects applied to the PSTV.
Sharpscale Plugin
See an overview of sharpscale here. The following suggestions only work when sharpscale is enabled with the following options:
| Option Name | Option Choice |
|---|---|
| Scaling Mode | Integer |
| PS1 Aspect Ratio | Pixel |
| Scaling Algorithm | Point |
| Unlock Framebuffer Size | Off |
Vita Games
When Playing a Vita Game, the PSTV outputs a 960x544p picture inside of a 1280x720p canvas. Use the following settings to get the sharpest integer scaled picture for Vita Games. These settings cut off 4 vertical pixels from Vita games.
| Scaling/Crop Setup | ||||
|---|---|---|---|---|
| Top Trim | -90 | |||
| Bottom Trim | -90 | |||
| Scaling Mode | Auto Fill Integer | |||
PSP Games
The PSTV also outputs a 960x544p picture inside of a 1280x720p canvas. Use the following settings to get the sharpest integer scaled picture for PSP games. These settings cut off 2 vertical pixels from PSP games.
| HDMI® Receiver | ||||
|---|---|---|---|---|
| Input Pixels | 2 | |||
| Scaling/Crop Setup | ||||
| Top Trim | -45 | |||
| Bottom Trim | -45 | |||
| Vert. Pre-Scale | 1/2 | |||
| Scaling Mode | Auto Fill Integer | |||
PSone Classics on PSTV
Sharpscale will allow you to get the sharpest picture for PS1 games, but the behavior is not optimal. With the Integer Scaling Mode setting enabled in Sharpscale, some resolutions will use the full vertical space, and others will only scale to 480 vertical pixels inside 720p. it is recommended you look at the resolutions supported by your game before you use sharpscale with the RT4K and see if it is worth avoiding the headache. If you set PS1 Aspect Ratio to 4:3 in the PSTV's settings, the PSTV will force all games to fit, but they will not evenly scale horizontally, resulting in shimmering pixels. Please also note PS1 classics may be cropped beyond their original pixels and that can't be fixed in software.
| [Pending Street Fighter Alpha 3 on ps1 10x DAR Screenshot] |
Sony PlayStation 4
The base PlayStation 4 model's output modes are all compatible with the RetroTINK-4K.
The PlayStation 4 Pro's 2160p resolution is NOT compatible with the RetroTINK-4K, and will only display a black screen. The PS4 Pro also loses the 480p resolution from the base PS4.
Sony PlayStation 5
If you intend on using the PlayStation 5 with the RetroTINK-4K, you can only set the output to 1080p, 1080i or 720p. 1440p and 2160p will NOT work with the RT4K.
Xbox Systems
Microsoft Xbox
Preferred output: YPbPr.
Up to 720p available with custom firmware
OG XboxHDMI/XboxHD+ basic no Stellar
These are settings for Xbox's with the XboxHDMI/XboxHD+ without Stellar. Software, BIOS Patch, and Firmware version 2.2.2. It should be similar for systems with Stellar.
- System Settings:
- Video Modes: Enable all 480p, 720p, 1080i
- Aspect Ratio: Widescreen (or Normal for 4:3)
- Video Settings:
- Target Resolution (Upscale): 480P
- 4:3 Widescreen: Auto (Allows widescreen games but you will also have to change aspect ratio in the scaling menu of Tink4k. Set to Never if you only want games to display as 4:3)
- Pre-scale 480p Correction: Disable (gray/grey)
- Assume 16:9 480p(HD): Disable (gray/grey)
- Advanced Settings:
- HDMI Colorspace: YCBCR/RGB (Doesn't matter because this is a bug, outputs YCbCr 444 no matter what you select)
- Upscaling Interpolation: Bilinear
- Auto Video Blanking: Enable (green)
- Auto Region Switching: Enable (green)
- Advance Interpolation: X & Y Scale Bilinear, X & Y Weight Round
Microsoft Xbox 360
The cable you should use for your Xbox 360 may vary by model.
- For Xbox 360 models made in 2007 or later, HDMI® output is available and should be your first choice, since HDMI® cables are readily available.
- The earliest Xbox 360 models only offer A/V video output. Unlike the PS3 and WiiU however, the 360's component video is quite sharp, so it's a good alternative to HDMI® if that's what you need / prefer. A/V output was standard alongside HDMI® for most of the 360's life, except for the 360 E revision.
Xbox 360 HDMI Settings
These are some settings to get extra crispy pixels out of the Xbox 360. There is debate regarding the Reference Levels and HDMI Color Space, but these are safe settings for the Tink4K default profile.
Display Settings:
- HDTV Settings (Resolution): 720p (most games run at native 720p resolution, setting it to 1080p will cause the 360 to upscale and add softness to your image)
- Reference Levels: (Choose one, either will work)
- Standard (RGB Limited, this is the 360 default)
- Expanded - (RGB Full - This requires a setting override below in the Tink4k as the Xbox 360 always send the HDMI metadata flag as RGB Limited for whatever reason)
- Requires change in Tink4k setting menu: Advanced Settings -> Acquisition -> HDMI Receiver -> Colorspace -> Input Range -> RGB Full
- HDMI Color Space: Source
Other Systems
NEO GEO MVS
| RGB/Component ADC Setup | |
|---|---|
| Samples per Line | 3840 (3222 Act.) |
| Decimation Factor | 10 (384.000) |
320 vs 320 + Pillarbox Games
Neo Geo will always output 320x240p. SNK, however, advised that developers only use the middle 304 horizontal pixels and treat the excess 16 pixels as overscan, and included BIOS level pillar boxes that would draw over the leftmost and rightmost 8 pixels. Not every developer, including SNK, took advantage of this feature and drew graphics in the overscan area. You are free to manually crop these with the RT4K's scaling settings. A list of games may be found here.
Compatibility (Firmware v1.0.8)
NEO GEO has given RT4K users issues with correctly grabbing sync from the system. As of 1.0.8 a "Wide Tolerance" setting was added to the RGB/Component ADC Setup help with Neo Geo. Upgrade to firmware v1.0.8 or above to access this feature, and then turn it on.
TurboGrafx-16 / PCEngine
| Sample Rate Detection | |||
|---|---|---|---|
| Auto Dec. Factor | On | ||
| Auto Dec. Phase | Auto | ||
| ADC Sample Rate | 2730 dots/line | ||
| Enable | 341.250 | 455.000 | 682.500 |
| Manual Sample Detection (256) | |||
| RGB/Component ADC Setup | |||
| Samples per Line | 2730 (2290 Act.) | ||
| Decimation Factor | 8 (341.250) | ||
| Manual Sample Detection (384) | |||
| RGB/Component ADC Setup | |||
| Samples per Line | 2730 (2290 Act.) | ||
| Decimation Factor | 6 (455.000) | ||
| Manual Sample Detection (512) | |||
| RGB/Component ADC Setup | |||
| Samples per Line | 2730 (2290 Act.) | ||
| Decimation Factor | 4 (682.500) | ||
MiSTER
You can use your MiSTER with the RT4K directly using HDMI. As of stable firmware version 1.1.0 the RT4K will automatically engage decimation and cropping features when it detects a MiSTER core transmitting HDMI Metadata. These features can be turned off if you wish to manually apply the settings yourself. To enable these features, please do the following:
- Locate the MiSTER.ini file on your MiSTER SD Card
- Open the MiSTER.ini file using a text editor
- Locate the line that says "Direct_Video"
- Change the value after the "=" to "1"
- Save the file.
Analogue Consoles
Analogue DAC Support (HDMI Input)
Analogue consoles have support for their Analogue DAC, which forces the console to 240p mode for use on a CRT. More importantly, it forces the console to output original timings and also turns off any buffering on the console side. The RT4K can mimic the DAC and you can use these features without the DAC by connecting with HDMI, retaining the sharpness of digital picture. Please follow these instructions to get original video signals from your Analogue consoles:
- Enter the HDMI Receiver Menu.
- Make your way down to the A/DAC option and switch Enable to match the region of the games you are trying to play.
- Turn your Analogue Console on after you enable that setting. Turning it on before will not make the console kick into DAC mode.
You may want to turn Auto-Decimate off if you wish to manually adjust your picture for sharper picture.
Troubleshooting DAC Mode
If you cannot activate DAC Mode consider the following:
- Is your DAC on its newest firmware?
- Is your Analogue Console on its newest firmware?
- Is the console connected directly to the RT4K? Are there any HDMI switches or splitters between the console and the DAC? If so, try eliminating devices from the chain to narrow down the issue.
Analogue Pocket + Dock
The Analogue Pocket doesn't currently have Analogue DAC support so you can only use the HDMI connection for the dock. As of Pocket firmware update 1.2, integer scaling is available for Pocket OpenFPGA cores so you may use decimation and prescale features to extract the original resolution of any game you're playing.
