SNES:SNES Jr DIY S-RGB Mod: Difference between revisions
Jump to navigation
Jump to search
No edit summary |
m (Derf moved page SNES:SNES Jr S-RGB Mod to SNES:SNES Jr DIY S-RGB Mod) |
(No difference)
| |
Revision as of 22:22, 29 July 2022
This guide shows you how to enable RGB output on a SNES Mini / Jr using its built-in RGB amp.
Materials Required
- The 4.5mm tool that opens the SNES
- Philips head screwdriver
- Soldering iron, solder, and flux
- 26-30 AWG wire
- Three 75 Ohm resistors, the lowest tolerance possible
- Three 1.2k resistors, the lowest tolerance possible
Installation
The mod is pretty easy, however soldering to the S-RGB chip can be challenging.
- Disassemble the console and remove the heatsink. Locate the S-RGB chip:

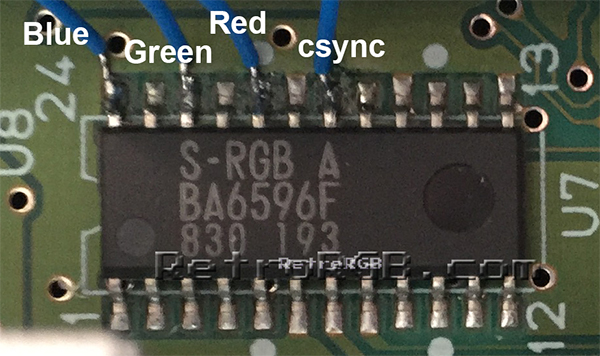
- Solder four wires to the pins on the “S-RGB A” chip shown below. Use a soldering tip that's extremely thin, as well as very thin solder. Make sure to tin each pin and each wire before trying to solder them together:
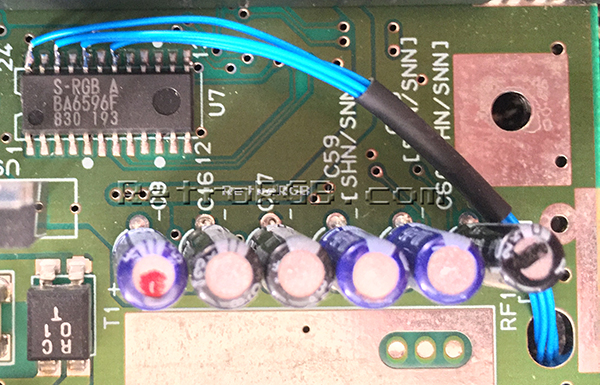
- It's recommended to use heatshrink tubing to keep the wires together and also protect them from touching any other components. Run the cables through the hole pictured below on the right:
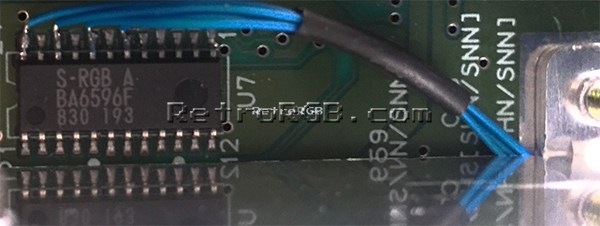
- Carefully replace the heatsink. Run the wires under the heatsink, since there's enough room. The wires will touch the heatsink but won't be crushed
- Cut the wires to size, add the 75 Ohm resistors to the RGB lines, then solder them to the corresponding pins on the multi-out.
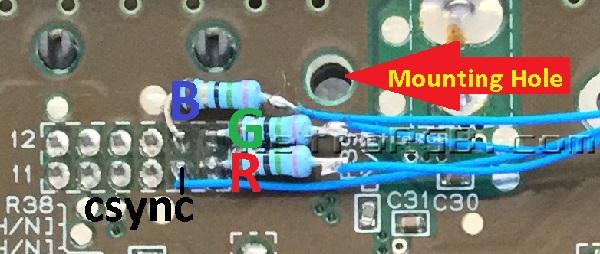
Brightness Fix
It's recommended to add resistors to the RGB inputs that adjust the brightness. The mod will work without these resistors, but it's recommended you add them.
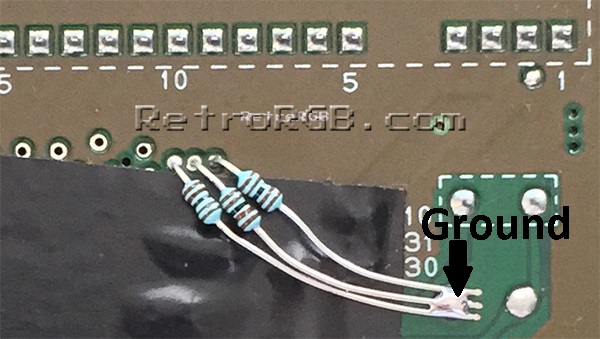
- Solder three 1.2k resistors between the three holes located directly under pin 10 of the cartridge port and a ground point. The picture below shows non-conductive tape covering the components under the resistor, however using heatshrink tubing is a better solution overall.
- Flip the motherboard over and trim the extra length of the leads off of the resistors, as they can short to something if not trimmed.
