AV:RetroTINK-4K: Difference between revisions
(helped flesh out →Console Specific Methodology) |
(replaced HDMI with "Digital Video") |
||
| Line 5: | Line 5: | ||
'''Output''' | '''Output''' | ||
* | * Digital Video up to 4K60 at 8 bits | ||
* HDR10 output with full color correction to Rec. 2020 | * HDR10 output with full color correction to Rec. 2020 | ||
* High frame rate output modes: 1440p120, 1080p120 | * High frame rate output modes: 1440p120, 1080p120 | ||
| Line 18: | Line 18: | ||
** Front Composite | ** Front Composite | ||
** Front S-Video | ** Front S-Video | ||
* | * Digital Video Input supporting up to 1080p60 | ||
* Analog audio input sampled at up to 96kHz/24-bit | * Analog audio input sampled at up to 96kHz/24-bit | ||
* Optical TOSLINK audio input supporting 2-Ch LPCM or compressed surround | * Optical TOSLINK audio input supporting 2-Ch LPCM or compressed surround | ||
* | * Digital Video audio supports up to 8-ch LPCM<br> | ||
'''Analog Video''' | '''Analog Video''' | ||
| Line 339: | Line 339: | ||
|} | |} | ||
==== | ====Digital Video==== | ||
{| class="wikitable" | {| class="wikitable" | ||
|+ | |+Digital Video Input | ||
|style="background-color:#ffffff;"|[[File:HDMI In.png|150px|none]] | |style="background-color:#ffffff;"|[[File:HDMI In.png|150px|none]] | ||
|The Tink 4k supports many resolutions digitally up to 1080p 60fps (10Gbps) via its | |The Tink 4k supports many resolutions digitally up to 1080p 60fps (10Gbps) via its Digital Video line. | ||
|} | |} | ||
| Line 361: | Line 361: | ||
===== Selecting audio input: ===== | ===== Selecting audio input: ===== | ||
You can override the audio from any analog source over all video sources in the RetroTINK 4k-Pro. Make your way to the Advanced Settings, select "Audio Input" under "Acquisition" and make your way to the "Input Override" option under "Source" and select the audio source you want to use. The only exception is you cannot override an analog video source with audio from | You can override the audio from any analog source over all video sources in the RetroTINK 4k-Pro. Make your way to the Advanced Settings, select "Audio Input" under "Acquisition" and make your way to the "Input Override" option under "Source" and select the audio source you want to use. The only exception is you cannot override an analog video source with audio from Digital Video. All other combinations work. Here's a brief description of the different possible audio sources for this option: | ||
{| class="wikitable" | {| class="wikitable" | ||
|+Audio Input Override Sources | |+Audio Input Override Sources | ||
| Line 390: | Line 390: | ||
===Output=== | ===Output=== | ||
The RetroTINK 4K-Pro '''''<u>only</u>''''' outputs via the | The RetroTINK 4K-Pro '''''<u>only</u>''''' outputs via the Digital Video output port. It does not output through any of its analog ports and this functionality will not be added at a later time. | ||
====Output Resolutions==== | ====Output Resolutions==== | ||
| Line 489: | Line 489: | ||
|- | |- | ||
| OUT | | OUT | ||
| | | Digital Video Output menu | ||
| MENU | | MENU | ||
| RetroTINK-4K Main Menu | | RetroTINK-4K Main Menu | ||
| Line 702: | Line 702: | ||
====== GameBoy Player + GameBoy Interface ====== | ====== GameBoy Player + GameBoy Interface ====== | ||
Gameboy Interface is homebrew that can help unlock the full potential of the GameBoy Player. A specific flavor of GBI was created to take advantage of the Insurrection Industries Carby and the TINK 4K's Digital Video input. Please use files <code>gbihf-rt4k- | Gameboy Interface is homebrew that can help unlock the full potential of the GameBoy Player. A specific flavor of GBI was created to take advantage of the Insurrection Industries Carby and the TINK 4K's Digital Video input. Please use files <code>gbihf-rt4k-HDMI.cli</code>, <code>gbihf-rt4k-HDMI.dol+cli</code> or <code>gbihf-rt4k-HDMI.gci</code> included with GBI and follow the instructions noted [https://www.gc-forever.com/wiki/index.php?title=Game_Boy_Interface/High-Fidelity_Edition#RetroTINK-4K here]. On top of that, set decimation factor to 2 and prescale to 2, and set Aspect Correction to 1:1 | ||
Profiles included for 13x scaled GBA games and 15x scaled GBC games. | Profiles included for 13x scaled GBA games and 15x scaled GBC games. | ||
| Line 766: | Line 766: | ||
===== Sony PlayStation 3 ===== | ===== Sony PlayStation 3 ===== | ||
The PS3 supports HDMI output with HDCP Enabled. This method will give the sharpest output. The PS3 also supports YPbPr | |||
PS3 will automatically switch games to their highest automatically supported and selected resolution. | |||
===== Sony Playstation TV ===== | ===== Sony Playstation TV ===== | ||
| Line 1,194: | Line 1,194: | ||
|Download 1 | |Download 1 | ||
| Use with mini consoles that output a 3x integer scale of 8:7 aspect ratio games. | | Use with mini consoles that output a 3x integer scale of 8:7 aspect ratio games. | ||
Primarily used by NES and Super NES Classic Mini consoles. Note: The Famicom Classic Mini needs | Primarily used by NES and Super NES Classic Mini consoles. Note: The Famicom Classic Mini needs Digital Video Color space changed to "Limited" | ||
|- | |- | ||
| 320 | | 320 | ||
| Line 1,385: | Line 1,385: | ||
|} | |} | ||
{| class="wikitable" | {| class="wikitable" | ||
! colspan="2" style="text-align:left;" | | ! colspan="2" style="text-align:left;" |Digital Video | ||
|- | |- | ||
|thing a | |thing a | ||
| Line 1,394: | Line 1,394: | ||
|} | |} | ||
==== | ====Digital Video Output==== | ||
More information concerning outputs can be found in the [[RetroTINK-4K#Outputs|Outputs]] section. | More information concerning outputs can be found in the [[RetroTINK-4K#Outputs|Outputs]] section. | ||
{| class="wikitable" | {| class="wikitable" | ||
Revision as of 22:33, 11 November 2023
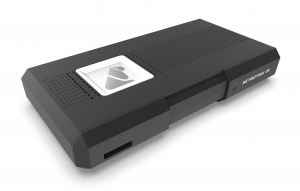
The RetroTINK-4K is an advanced video scaler from Mike Chi / RetroTINK LLC. Building on the functionality of the RetroTINK-2X and RetroTINK-5X, the RetroTINK-4K offers high-end video scaling and processing at resolutions up to 4K/60hz.
RetroTINK-4K User's Manual
Overview
The RetroTINK-4K is the latest evolution of the RetroTINK line of video line doublers and upscalers. Below is a list of a few standout features:
Output
- Digital Video up to 4K60 at 8 bits
- HDR10 output with full color correction to Rec. 2020
- High frame rate output modes: 1440p120, 1080p120
- Up to 8-ch LPCM audio
- Supports user-defined custom modelines on the SD card
Inputs
- Supports for virtually all analog formats:
- HD15/VGA: RGBHV, RGBS, RGsB, YPbPr, S-video and Composite
- SCART: RGBS, RGsB, YPbPr, S-video and Composite
- Rear RCA: RGsB, YPbPr and Composite
- Front Composite
- Front S-Video
- Digital Video Input supporting up to 1080p60
- Analog audio input sampled at up to 96kHz/24-bit
- Optical TOSLINK audio input supporting 2-Ch LPCM or compressed surround
- Digital Video audio supports up to 8-ch LPCM
Analog Video
- Automatic gain calibration
- Automatic phase calibration
- Automatic input cropping to trim borders
- Full control of gain, offset and sample rate
- Console specific automatic sample rate detection (experimental feature)
- Support for a wide variety of off-spec arcade and PC boards (may require custom profiles to properly trim and center the image)
Scaling
- Fully flexible, custom cropping and zooming in the horizontal and vertical space independent of other settings
- Automatic aspect ratio correction to 4:3 or 16:9
- Motion adaptive deinterlacing including film modes for 3:2 and 2:2 inverse telecine (experimental feature)
- RoTATE 90 deg CW or CCW (for 240p, 288p and 360p inputs)
Image Processing
- End to end RGB pipeline with 12-bit precision (truncated to 8 or 10 bits for final output)
- Optional linear light mode
- Advanced CRT simulation modes with multiple scanline beam patterns and masks
- Black frame insertion engine with customizable pattern and intensity
- Advanced color correction supporting custom matrices for RGB to XYZ conversion
User Interface
- Advanced OSD menu based system
- SD Card for saving profiles, custom modelines and firmware updates
- Custom premium remote control
Inputs
The RetroTINK-4K features inputs for a wide variety of signals and connector types.
Front
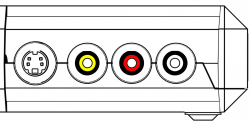
The Tink 4K offers S-Video (over Mini-Din) and Composite (over RCA) inputs in the front. The red and white RCA jacks are stereo audio inputs. Red/White front audio inputs are active when either the Front Composite or S-Video input is selected (assuming audio input override is not used).
Rear RCA
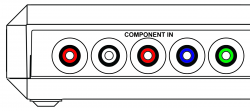
The rear RCA jacks support YPbPr (component), RGsB, and CVBS (composite) inputs.
| Rear RCA Input | ||
|---|---|---|
| YPbPr | To use YPbPr (Component Video), connect the Red, Green and Blue YPbPr video cables to their corresponding colored RCA connectors, noting that the Red/White pair to the left is for stereo audio input. The maximum resolution supported is 1920x1080p 60fps, or 148.5Mhz | |
| RGsB | The Rear RCA input also supports RGsB, a flavor of RGB that sends the sync alongside the Green signal. To use RGsB (aka RGB Sync on Green), connect the Red, Green and Blue RGsB signals to their corresponding colored RCA connectors, noting that the Red/White pair to the left is for stereo audio input. The maximum resolution supported is 1920x1080p 60fps, or 148.5Mhz | |
| CVBS on Green | Composite video (CVBS) can be used with the Rear RCA input. To use CVBS, connect the composite signal connector to the Green RCA jack. The Red/White pair of jacks furthest left is for stereo audio input. The maximum supported resolution is 480i. | |
SCART
| SCART Input | ||
|---|---|---|
| RGBS (75 ohm) | RGBS is a form of RGB where sync is sent through a discrete line. The TINK 4k accepts the following RGBS signal formats via SCART: Composite Sync (attenuated), Sync-on-Luma, and Sync-on-composite. They all work by sending information down the Red, Green, Blue, and "Sync" lines. The maximum resolution supported is 1920x1080p 60fps, or 148.5Mhz | |
| RGsB | RGsB sends sync down the green input, using only 3 cables. This RGB format is notably used by the PS2 when in 480p mode via SCART. The maximum resolution supported is 1920x1080p 60fps, or 148.5Mhz | |
| YPbPr | YPbPr is sent through the Green, Blue, and Red pins, respectively. The maximum resolution supported is 1920x1080p 60fps, or 148.5Mhz | |
| CVBS on Pin 20 | Composite video sent through Pin 20. If you use a composite/s-video scart adapter, composite will go down this line. (sic) The maximum resolution supported is 480i. | |
| CBVS on Green | Composite video can be sent through the Green pin. This would be useful if you use a component (YPbPr) to SCART adapter, just plug composite (yellow) into the Y RCA jack (Green). The maximum resolution supported is 480i. | |
| Y/C on Pin 20/Red | S-Video (Y/C) is broken out into 2 pins, Green and Red. This is useful if you wish to connect S-Video with a SCART Switch using an adapter. The maximum resolution supported is 480i. | |
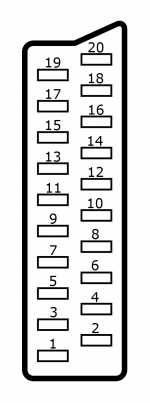
| SCART Jack Pinout | |||||||
|---|---|---|---|---|---|---|---|
| Pin # | RGBS (75 Ohm) |
RGsB | YPbPr | CVBS on Pin 20 | CBVS on Green | Y/C on Pin 20/Red | |
| 1 | Unused | ||||||
| 2 | Audio In - Right | ||||||
| 3 | Unused | ||||||
| 4 | Ground | ||||||
| 5 | Ground | ||||||
| 6 | Audio In - Left | ||||||
| 7 | Blue | Blue | Pb | ||||
| 8 | Unused | ||||||
| 9 | Ground | ||||||
| 10 | Unused | ||||||
| 11 | Green | Green+Sync | Y | CVBS | |||
| 12 | Unused | ||||||
| 13 | Ground | ||||||
| 14 | Unused | ||||||
| 15 | Red | Red | Pr | Chroma (C) | |||
| 16 | Unused | ||||||
| 17 | Ground | ||||||
| 18 | Ground | ||||||
| 19 | Unused | ||||||
| 20 | Sync | CVBS | Luma (Y) | ||||
HD-15
| HD-15 Input | ||
|---|---|---|
| RGBHV | RGBHV is a form of RGB where information is sent through 5 lines: Red, Green, Blue, Horizontal Sync, and Vertical Sync. The maximum resolution supported is 1920x1080p 60fps, or 148.5Mhz | |
| RGBS | RGBS is a form of RGB where sync is sent through one line, instead of two. The Tink 4k HD-15 connection supports these forms of RGBS: Composite Sync, Sync-on-Luma, and Sync-on-composite. They all work by sending information down the Red, Green, Blue, and "H-Sync" lines. The maximum resolution supported is 1920x1080p 60fps, or 148.5Mhz | |
| RGsB | RGsB sends sync down the green input, using only 3 cables. This RGB format is notably used by the PS2 when in 480p mode via RGB. The maximum resolution supported is 1920x1080p 60fps, or 148.5Mhz | |
| YPbPr | YPbPr is sent through the Green, Blue, and Red pins, respectively. The maximum resolution supported is 1920x1080p 60fps, or 148.5Mhz | |
| CBVS on Hsync | Composite video sent through the HSync pin ofthe HD-15 connection. If you use a composite/s-video scart adapter, composite will go down this line. (sic) The maximum resolution supported is 480i. | |
| CBVS on Green | Composite video can be sent through the Green pin. This would be useful if you use a component (YPbPr) to VGA adapter, just plug composite (yellow) into the Y RCA jack (Green). The maximum supported resolution is 480i. | |
| Y/C on Green/Red | S-Video (Y/C) is broken out into 2 pins, Green and Red. This is useful if you wish to connect S-Video with a VGA Switch using an adapter. The maximum supported resolution is 480i. | |
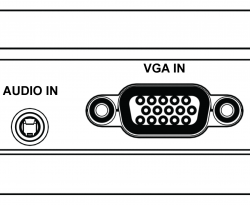
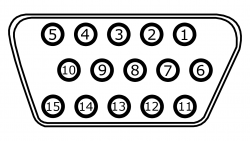
| HD-15 Jack Pinout | |||||||||
|---|---|---|---|---|---|---|---|---|---|
| Pin # | RGBHV | RGBS | RGsB | YPbPr | CBVS on Hsync | CBVS on Green | Y/C on Green/Red | Data | |
| 1 | Red | Red | Red | Pr | Chroma(C) | ||||
| 2 | Green | Green | Green+Sync | Y | CVBS | Luma(Y) | |||
| 3 | Blue | Blue | Blue | Pb | |||||
| 4 | Unused | ||||||||
| 5 | Ground | ||||||||
| 6 | Ground | ||||||||
| 7 | Ground | ||||||||
| 8 | Ground | ||||||||
| 9 | Unused | ||||||||
| 10 | Ground | ||||||||
| 11 | Unused | ||||||||
| 12 | External Transmit (EXT TX) | ||||||||
| 13 | Horizontal Sync | Sync | CVBS | ||||||
| 14 | Vertical Sync | ||||||||
| 15 | External Receive (EXT RX) | ||||||||
Digital Video
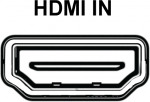
| The Tink 4k supports many resolutions digitally up to 1080p 60fps (10Gbps) via its Digital Video line. |
3.5mm TRS Audio
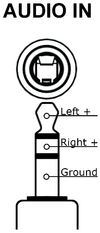
| The RetroTINK 4k-Pro allows for audio through a 3.5mm TRS input. This accepts stereo audio sound. |
Optical Audio
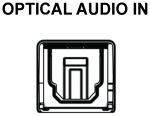
| The RetroTINK 4K-Pro offers a discrete optical audio Toslink input. This input 2-channel LPCM and compressed surround sound. |
Selecting audio input:
You can override the audio from any analog source over all video sources in the RetroTINK 4k-Pro. Make your way to the Advanced Settings, select "Audio Input" under "Acquisition" and make your way to the "Input Override" option under "Source" and select the audio source you want to use. The only exception is you cannot override an analog video source with audio from Digital Video. All other combinations work. Here's a brief description of the different possible audio sources for this option:
| Picture | Name | Description |
|---|---|---|
| RCA | The leftmost two RCA inputs in the rear. White and Red, | |
| HD15 | The 3.5mm TRS input in the rear. | |
| SCART | The SCART input on the side. Audio is fed in through pins 2 and 6. | |
| Front | The red and white RCA inputs in the front of the unit. | |
| SPDIF | Optical audio fed through a Toslink input. |
Output
The RetroTINK 4K-Pro only outputs via the Digital Video output port. It does not output through any of its analog ports and this functionality will not be added at a later time.
Output Resolutions
The following outputs are readily supported by the RetroTINK 4K-Pro. Also noted are resolutions available by pushing their respective button on the remote. If you are unsure which resolution to use, use the buttons on the remote.
| Resolution | Description | Remote Button? |
|---|---|---|
| 4k60 | Default resolution and framerate for 4k displays, aka 3840x2160p.
Default Resolution for the TINK 4K-PRO |
Yes |
| 4k50 | No | |
| 1080p60 | Default resolution for 1080p displays. | Yes |
| 1080p50 | No | |
| 1440p60 | Default resolution and framerate for 1440p monitors, aka 2560x1440p. | Yes |
| 1440p50 | No | |
| 1080p100 | No | |
| 1440p100 | No | |
| 1080p120 | No | |
| 1440p120 | No | |
| 480p60 | Minimum suggested output resolution for modern displays, aka 720x480p. | Yes |
| 2880x2160p70.00 | No | |
| 1920x2160p60.00 | No | |
| 800x600P60.00 | No | |
| 1920x1200p60 | No |
Remote
| RetroTINK-4K Remote Diagram | ||||||
|---|---|---|---|---|---|---|
| Code | Description | Code | Description | Code | Description | |
| Power | Powers on / off the Tink 4K | 11 | Profile 11 | 4K | Switches to 3840x2160p 60Hz | |
| INPUT | Input Source Selection Menu | 12 | Profile 12 | 1080p | Switches to 1920x1080p 60Hz | |
| OUT | Digital Video Output menu | MENU | RetroTINK-4K Main Menu | 1440p | Switches to 2560x1440p 60Hz | |
| SCL | Scaling/Crop Setup | BACK | Back button | 480p | Switches to 720x480p 60Hz | |
| SFX | Image Processing | △ | Up | RES1 | ||
| ADC | Enters Acquisition menu matching the current input | ◁ | Left | RES2 | ||
| PROF | Profiles | ENTER | Enter | RES3 | ||
| 1 | Profile 1 | ▷ | Right | RES4 | ||
| 2 | Profile 2 | ▽ | Down | AUX1 | ||
| 3 | Profile 3 | DIAG | Diagnostic Console | AUX2 | ||
| 4 | Profile 4 | STAT | Status | AUX3 | ||
| 5 | Profile 5 | AUTO-GAIN | Auto Calibrate Gain | AUX4 | ||
| 6 | Profile 6 | AUTO-PHASE | Auto Calibrate Phase | AUX5 | ||
| 7 | Profile 7 | PLAY/PAUSE | Pause current screen | AUX6 | ||
| 8 | Profile 8 | SAFE | AUX7 | |||
| 9 | Profile 9 | SYNC-GEN | Sync Lock Gen | AUX8 | ||
| 10 | Profile 10 | SYNC-BUF | Sync Lock Triple Buffer | - | ||
Profiles
Profile Management
Included Profiles
Community Profiles
Profile Troubleshooting
Advanced Settings
Automatic Settings
Automatic Sampling Detection
The RetroTINK 4k can take advantage of sampling and scaling algorithms to seamlessly change settings when it detects a horizontal resolution change. This is useful for most analog retro gaming consoles, but requires knowledge of their "Master Sampling Rate," noted below.
| Console Name | Master Sampling Rate | Available Resolutions |
|---|---|---|
| Super NES | 3410 | 256x224, 256x239, 512x224 |
| Sega Genesis/Mega Drive | 256x224, 320x224 | |
| Sega Saturn | ||
| Turbo Grafx 16/PCEngine | 2730 | 256x224, 320x224 |
| Sony Playstation | 256x224, 320x224, 384x224, 512x224, 640x224 | |
| Sony Playstation 2 |
Once you know the master Sampling rate of your console, set that console's ADC Sample rate in the "Sample Rate Detection" menu under ADC Sample Rate, and turn both "Auto Dec. Factor" and "Auto Dec. Phase" to "On." Once you enable those options, if you know which resolutions you'll use, scroll down to that resolution to enable that horizontal resolution's detection and the RetroTINK 4K-Pro should automatically switch to a different set of settings whenever it detects that particular resolution is used. This process will help automatically set Decimation Factor and Decimation Phase in the ADC setup.
Automatic Color Calibration
For RGB and YPbPr sources ONLY. If you are able to find a sufficiently large patch of color that should be white in your game screen, make your way to the RGB/Component Setup page (click the ADC button on the remote) and make your way down to the "Auto Calibrate" option. Selecting this makes the RetroTINK 4K-Pro automatically calibrate your color based on that white patch. You may need to manually adjust the individual colors a few ticks more to get the true RGB code 255,255,255 for a color.
Automatic Phase
Any game screen is sufficient for automatic phasing, but it is recommended to use the 240p Test Suite or other sufficiently patterned screen for eyeballing results. whether you've set automatic sample detection using that menu, or you manually selected Decimation Factor in the ADC page, selecting Auto-Calibrate Phase makes the RetroTINK 4K-Pro automatically select the best Decimation Phase and Sub-Phase for your current picture and should give you the sharpest results. It is recommended you run this 3-5 times to make sure the same factors and phases are consistently chosen.
CP Auto Crop
The RetroTINK 4K-Pro can automatically crop and set aspect ratio for an input if it is fed a sufficient game screen. Letterboxed, pillar-boxed, and window-boxed screens are not recommended. Please see what the options do below:
| Name | Effect |
|---|---|
| Vertical Only | Automatically adjusts "Top Trim" and "Bottom Trim" to the top and bottom of the game image. Does not adjust Left Trim or Right Trim, and does not change Aspect Correction |
| Full Crop to 4:3 | Automatically adjusts Left, Right, Top, and Bottom Trim to the image, and changes Aspect Correction to 4:3 (PAR) |
| Full Crop to 16:9 | Automatically adjusts Left, Right, Top, and Bottom Trim to the image, and changes Aspect Correction to 16:9 (PAR) |
Image Scaling
Console Specific Methodology
Nintendo NES/Famicom
Resolution: 256x224
Best stock video option: Composite/CVBS
Audio: Mono. you will need an RCA splitter to fill both left and right channels.
Super NES/Super Famicom
Resolutions: 256x224 and 512x224. Most games will play in 256x224, some games will play in 512x224, and some games will have 512x224 assets in a scene that is otherwise 256x224 (https://consolemods.org/wiki/AV:RetroTINK-5X_Pro#512_%22Hi_Res%22_Games)
Output: all SNS-001 models work with sync-on-luma RGBS, 1-Chip-03 does not work with Composite Sync, and SNS-101 only supports composite
1-chip vs non-1-chip plus ADC correction (https://consolemods.org/wiki/AV:RetroTINK-5X_Pro#1CHIP_Vs_3CHIP_Video_Output) Moro provided pics
Profile included for automatic switching between 512 and 256 in Display Aspect Ratio, for both SCART and HDRV YPbPr cables.
Super GameBoy
uses 256x239 resolution, assume square pixels. Profile provided for 15x scale with horizontal borders showing.
N64
All stock N64 support Composite, all NTSC N64 support S-Video, some PAL N64 do not support S-Video, and French N64 support SECAM S-Video.
All N64 have 3 levels of video processing that keeps it from being sharp:
Scaling all games to 640 horizontal. Some games will be 320 wide scaled to 640, so you can manually double the decimation factor to get the correct aspect for these games
software level AA, and hardware level blur. https://consolemods.org/wiki/AV:RetroTINK-5X_Pro#Counteracting_N64_Anti-Aliasing
Pokemon Stadium GameBoy Tower
It's never going to look right, it is a 256x239 window internally scaled to 640x239.
Nintendo GameCube
Preferred method to output GameCube games: OEM YPbPr cables or Insurrection Industries Carby HDMI for DOL-001. See here for 3rd party YPbPr Cables. S-Video is supported in all NTSC GameCubes and RGB is supported in all PAL GameCubes. Entire video pipeline is in 4:2:2.
Swiss and the anti-flicker filter.
240p Games
Megaman X Collection and Zelda Collection output games in 240p, nothing else is normally 240p.
GameBoy Player + GameBoy Interface
Gameboy Interface is homebrew that can help unlock the full potential of the GameBoy Player. A specific flavor of GBI was created to take advantage of the Insurrection Industries Carby and the TINK 4K's Digital Video input. Please use files gbihf-rt4k-HDMI.cli, gbihf-rt4k-HDMI.dol+cli or gbihf-rt4k-HDMI.gci included with GBI and follow the instructions noted here. On top of that, set decimation factor to 2 and prescale to 2, and set Aspect Correction to 1:1
Profiles included for 13x scaled GBA games and 15x scaled GBC games.
Nintendo Wii
Recommended ouput: YPbPr
The Wii only supports 3 resolutions: 720x240p, 720x480i, and 720x480p.
Profile included for basic generic output
480p LPF
USBLoader GX
480p pixel fix
anti-flicker filter
Video width: framebuffer
profile included for VC games using framebuffer option
Nintendo WiiU
Best Video Output: HDMI.
Nintendo Switch
NSO Games
Sega Master System
Recommended output: RGB
Sega Genesis/Mega Drive
Recommended output: RGB
Composite effects. see this portion of the 5x wiki https://consolemods.org/wiki/AV:RetroTINK-5X_Pro#Genesis_Dithering
Sega Saturn
Recommended output: RGB
Sega Dreamcast
Recommended Output: RGBHV
Sony PlayStation
Recommended output: RGB
Resolution switching: see this part of the 5x wiki https://consolemods.org/wiki/AV:RetroTINK-5X_Pro#Resolution_Switching
Profiles included will automatically switch to all resolutions. You may want to consider looking through your game collection and see if you can turn off any resolutions that you won't use, for faster response from the auto sampling detection.
Sony PlayStation 2
Recommended Output: YPbPr because it automatically works with 15kHz and 31kHz. SCART will work but you will need to switch to RGsB if you use 31kHz
PS1 games on PS2 use a different set of optimal sampling numbers
Sony PlayStation Portable
Recommended output: YPbPr
PSP games output 480x272p inside of a 720x480p canvas. Use the Tink to upscale the image to fit the screen. You will cut off 2 vertical pixels at the expense of the sharpest pixels
PlayStation Classics will use the full 720x480 canvas. Use Decimation Factor 2 and Prescale 1/2
Sony PlayStation 3
The PS3 supports HDMI output with HDCP Enabled. This method will give the sharpest output. The PS3 also supports YPbPr
PS3 will automatically switch games to their highest automatically supported and selected resolution.
Sony Playstation TV
Sharpscale plugin
Recommended to hack your playstation television to get the sharpest picture out of it. See an overview of sharpscale here.
Vita and PSP Games
Outputs a 960x544p picture inside of a 1280x720p canvas. Scale to match your screen's horizontal resolution. You will cut off 4 vertical pixels a the expense of sharpness. Use decimation factor 2 and prescale 1/2 for PSP.
PS1 Classics: Sharpscale will allow you to get the sharpest picture for ps1 games, but the behavior is not optimal. Profile included for each possible horizontal resolution. If you don't want to mess around with that, use the generic profile.
Sony Playstation 4
TurboGrafx-16/PCEngine
Microsoft Xbox
Preferred output: YPbPr.
Up to 720p available with custom firmware
Microsoft Xbox 360
Preferred Output: HDMI where available
Alternate Output: YPbPr for any Xbox 360 that doesn't support HDMI.
Microsoft Xbox One
Troubleshooting
Profile Repository
Generic Profiles
| Profile Name 1 | Download 1 | Description |
| Profile Name 2 | Download 2 | Description |
Downscaling
| Profile Name 1 | Download 1 | Description |
| Profile Name 2 | Download 2 | Description |
Console Specific
3DO Interactive Multiplayer
| Profile Name 1 | Download 1 | Description |
| Profile Name 2 | Download 2 | Description |
Atari Jaguar
| Profile Name 1 | Download 1 | Description |
| Profile Name 2 | Download 2 | Description |
Microsoft Xbox
| Profile Name 1 | Download 1 | Description |
| Profile Name 2 | Download 2 | Description |
Microsoft Xbox 360
| Profile Name 1 | Download 1 | Description |
| Profile Name 2 | Download 2 | Description |
Neo Geo AES
| Profile Name 1 | Download 1 | Description |
| Profile Name 2 | Download 2 | Description |
Nintendo Entertainment System (NES)
| Profile Name 1 | Download 1 | Description |
| Profile Name 2 | Download 2 | Description |
Super Nintendo / Super Famicom
| Profile Name 1 | Download 1 | Description |
| Profile Name 2 | Download 2 | Description |
Nintendo 64
| Profile Name 1 | Download 1 | Description |
| Profile Name 2 | Download 2 | Description |
Nintendo Gamecube
| Profile Name 1 | Download 1 | Description |
| Profile Name 2 | Download 2 | Description |
Nintendo Wii
| Profile Name | Download 1 | Profile Description |
|---|---|---|
| Generic | Download 2 | Recommended for use with an unhacked Wii, optimized for 240p, 480i, and 480p. |
| VC 256 | Recommended for use with the NES and Super NES Virtual Console games that output 256 wide pixels on a hacked Wii. Make sure to switch "Video Width" to Framebuffer in USBLoader GX. | |
| VC ~256 | Recommended for use with games that should be 256 pixels wide but are scaled to 320 pixels a hacked Wii. Make sure to switch "Video Width" to Framebuffer in USBLoader GX. DO NOT USE with games that actually output 256 pixels wide. | |
| VC 320 | Recommended for use with Virtual Console games that output 320 pixels wide on a hacked Wii. Make sure to switch "Video Width" to Framebuffer in USBLoader GX. |
Nintendo Wii U
| Profile Name 1 | Download 1 | Description |
| Profile Name 2 | Download 2 | Description |
Nintendo Switch
| Profile Name | Profile Description | |
|---|---|---|
| N64 720 | Download 1 | Set the Switch to 720p to use this profile. NSO N64 games render at 720p. This profile is for use with scanlines to approximate the look on a CRT, not for additional sharpness. If you want a sharper picture, use the default profile. |
| NSO 256 | Download 2 | To be used with the NES, Super NES, and Sega Genesis Nintendo Switch Online emulators when the game has an 8:7 aspect ratio. |
| NSO 320 | Download 3 | To be used with the Sega Genesis Nintendo Switch Online emulator when the game has a 10:7 aspect ratio |
| GBA | This profile is for use with any GBA game on Switch, including the NSO GBA app as well as ports of GBA games that are scaled 6x to 1080p. This allows for a 13x scale to 2160p, where a default profile would only scale games 12x. | |
| GBC | This profile is for use with any GBC game on Switch, including the NSO GBC app as well as ports of GBC games that are scaled 7x to 1080p. This allows for a 15x scale to 2160p, where a default profile would only scale games 14x. |
Phillips CDi
| Profile Name 1 | Download 1 | Description |
| Profile Name 2 | Download 2 | Description |
Pioneer LaserActive
| Profile Name 1 | Download 1 | Description |
| Profile Name 2 | Download 2 | Description |
Sega Master System
| Profile Name 1 | Download 1 | Description |
| Profile Name 2 | Download 2 | Description |
Sega Genesis / Megadrive
| Profile Name 1 | Download 1 | Description |
| Profile Name 2 | Download 2 | Description |
Sega Saturn
| Profile Name 1 | Download 1 | Description |
| Profile Name 2 | Download 2 | Description |
Sega Dreamcast
| Profile Name 1 | Download 1 | Description |
| Profile Name 2 | Download 2 | Description |
Sony PlayStation 1
| Profile Name 1 | Download 1 | Description |
| Profile Name 2 | Download 2 | Description |
Sony PlayStation 2
| Profile Name 1 | Download 1 | Description |
| Profile Name 2 | Download 2 | Description |
Sony PlayStation 3
| Profile Name 1 | Download 1 | Description |
| Profile Name 2 | Download 2 | Description |
Sony PSP
| Profile Name 1 | Download 1 | Description |
| Profile Name 2 | Download 2 | Description |
Sony PlayStation TV/Vita TV
The Playstation TV profiles require a hacked PSTV and the Sharpscale plugin to take advantage of the potential sharpness the PSTV can give. If your PSTV is not hacked, please use the default profile.
For the following profiles, please set the following options in Sharpscale:
| Option Name | Option Choice |
|---|---|
| Scaling Mode | Integer |
| PS1 Aspect Ratio | Pixel |
| Scaling Algorithm | Point |
| Unlock Frame Buffer Size | Off |
| Profile Name | Description | |
|---|---|---|
| PSVita | Download 1 | The PlayStation TV outputs a 544p window onto a 720p canvas.
Upscaled 4x to fit 2160p. Cuts off 4 pixels vertically |
| PSP | Download 2 | Sets Decimation Factor to 2 and Prescale to 1/2
The Playstation TV outputs a line-doubled 272p window into a 720p canvas. Upscaled 8x to 2160p. Cuts off 4 pixels vertically. |
| PS1 Generic | The Playstation TV will output the PS1 game to an integer scale of its signal that will fit inside 1280x720p.
Use this profile for PS1 games that switch between many resolutions often. 480i will scale 1x. 512x224p and 640x224p will scale 2x. 384x224, 320x224, and 256x224 will scale 3x. |
The following profiles require a slight change in Sharpscale settings. These profiles are best used with games that stick to one resolution for the majority of their gameplay. Do not use these with Chrono Cross or Silent Hill, their menus will cut off vertically
| Option Name | Option Choice |
|---|---|
| Scaling Mode | Real |
| PS1 Aspect Ratio | Pixel |
| Scaling Algorithm | Point |
| Unlock Frame Buffer Size | Off |
| Profile Name | Profile Descriptions | |
|---|---|---|
| PS1 256 | Download 3 | Use for PS1 games that are primarily 256x224. |
| PS1 320 | Download 3 | Use for PS1 games that are primarily 320x224. |
| PS1 384 | Download 4 | Use for PS1 games that are primarily 384x224. |
| PS1 512 | Download 4 | Use for PS1 games that are primarily 512x224 |
| PS1 640 | Download 5 | Use for PS1 games that are primarily 640x224 |
TurboGrafx-16 / PC Engine
| Profile Name 1 | Download 1 | Description |
| Profile Name 2 | Download 2 | Description |
Classic Mini Consoles
| 256 | Download 1 | Use with mini consoles that output a 3x integer scale of 8:7 aspect ratio games.
Primarily used by NES and Super NES Classic Mini consoles. Note: The Famicom Classic Mini needs Digital Video Color space changed to "Limited" |
| 320 | Download 2 | Use with mini consoles that output a 3x integer scale of 10:7 aspect ratio games.
Primarily used by Sega Genesis Classic Mini. |
Analogue Pocket
| GBA | Download 1 | Set Scale size to 6x in Pocket GBA settings. Outputs 13x scaled GBA games where the default profile would normally scale to 12x. Do not use with Pocket scanline effects. |
| GBC | Download 2 | Set Scale Size to 7x in Pocket GBC settings. Outputs 15x scaled GBC games where the default profile would normally scale to 14x. Do not use with Pocket scanline effects. |
Computer Specific
FM Towns
FM Towns computers once hitting white desktop variants output different video displays with some models performing internal upscaling conversions from 24khz to 31khz as well as some models performing 15khz to 31khz with adjustments in the TBIOS configuration file. EA and Pentium type desktops only output 31khz video modes.
The below profiles are meant for all towers, UX, UG, UR, HG and HR models which are all models that do not perform internal conversion.
FM Towns will require a custom profile for any displays at 24khz
| 24Khz | Download 1 | 24Khz Display Mode |
Sharp X68000
Sharp X68000 is unique with its outputs primarily being 15khz and 31khz. A few games have hidden selectable 24khz display modes.
| Profile Name 1 | Download 1 | 24Khz Mode in XXXX Game. |
| Profile Name 2 | Download 2 | 24Khz mode |
PC-8801
PC-8801 computers will output either 15khz or 24khz depending on the game requirements and dipswitch settings in the back. If dipswitch settings are incorrect, games will refuse to boot and crash the computer.
| Profile Name 1 | Download 1 | 24Khz Mode in XXXX Game. |
| Profile Name 2 | Download 2 | 15Khz mode |
Advanced Features
Deinterlacer / Film Mode Setup
Motion Adaptive Settings
Motion Adaptive settings apply only to the Motion Adaptive Deinterlacing mode, allowing you to adjust it to your liking.
- Sensitivity - Adjusts the sensitivity of Motion Adaptive, between Min, Medium, High and Max. The higher this is set, the more weaving will be present for moving parts of the screen, at the benefit of a stabler look for static parts of the screen. Many games will look just fine on the Min. setting, however several games may require Medium or higher. For example, Burnout 3: Takedown on PlayStation 2 has a subtle flickering and animated noise that throws off the Motion Adaptive Deinterlacer for still parts of the screen.
Notes
Deinterlacer -> -> Motion Adaptive Settings -> Sensitivity
(medium and high options might be might be reversed) Controls combing effect at costs of sharpness. Low = less combing.
Deinterlacer -> -> Motion Adaptive Settings -> Interpolator:
Basically controls how the "bob" portion of the MA is calculated. The bob is either taken from the line above, line below or the average of the upper and lower lines BFI. It's a matter of preference. I think either Top or Bottom interpolator looks a little sharper. Average is softer In the end it doesn't matter too much because Bob is only used during motion when it is hard to see detail anwyays
Deinterlacer -> Motion Adaptive Settings -> Detector:
This is a little complicated to explain... but let me try basically symmetric adds one frame of lag but the motion detection may be better. Because it is looking "one field into the future" idk if its really better tho in real life
HDMI -> BFI Control
-Strobe: How much the frame is divided down (i.e. 1 = divide by 2, 2 = divide by 3, 3 = divide by 4) from input to output -Blur: How many frames are ON vs OFF. So let's say we are converting 60 Hz -> 240 Hz. Blur = 1, ON, OFF, OFF, OFF. Blur = 2 is ON, ON, OFF, OFF -LCD Saver - inverts the pattern of the BFI to avoid renetion. But every few minutes u will see a flicker
Custom Mode Lines
#RT4K Custom Mode Line Format
#H active, H front porch, H sync, H total blank, polarity (1 = pos, 0 = neg)
#V active, V front porch, V sync, V total blank, polarity (1 = pos, 0 = neg)
#Nominal frame rate (floating point)
#Text name
Launch Information
https://www.retrotink.com/post/introducing-the-retrotink-4k
User Guides
Custom Scanline Overlays
Explain that here
Downscaling (pre-scale) Basics
Explain Downscaling here
RetroTINK-4K GUI Map
Basic Setup
Input Selection
More information concerning inputs can be found in the Inputs section.
| Front | |
|---|---|
| Composite | Selects the front composite input. |
| S-Video | Selects the front s-video input. |
| RCA | |
|---|---|
| YPbPr | Selects the rear RCA YPbPr input. |
| RGsB | Selects the rear RCA RGsB input. |
| CVBS on Green | Selects the rear RCA CVBS input. |
| SCART | |
|---|---|
| RGBS (75 ohm) | information |
| RGsB | information |
| YPbPr | information |
| CVBS on Pin 20 | information |
| CBVS on Green | information |
| Y/C on Pin 20/Red | information |
| HD-15 | |
|---|---|
| RGBHV | information |
| RGBS | information |
| RGsB | information |
| YPbPr | information |
| CBVS on Hsync | information |
| CBVS on Green | information |
| Y/C on Green/Red | information |
| Digital Video | |
|---|---|
| thing a | information |
| thing b | information |
Digital Video Output
More information concerning outputs can be found in the Outputs section.
| Transmitter | |
|---|---|
| Deep Color | information |
| HDR | information |
| Sync Lock | information |
| Vrr | information |
| BFI Control | |
|---|---|
| Strobe | information |
| Blur | information |
| LCD Saver | information |
| Output Resolution | |
|---|---|
| 4K60 | information |
| 4K50 | information |
| 1080p60 | information |
| 1080p50 | information |
| 1080p100 | information |
| 1440p100 | information |
| 1080p120 | information |
| 1440p120 | information |
| 480p60 | information |
Scaling/Cropping
| Input Crop | |
|---|---|
| Left Trim | information |
| Right Trim | information |
| Top Trim | information |
| Bottom Trim | information |
| Vert. Pre-Scale | information |
| Scaler | |
|---|---|
| Aspect Correction | information |
| Scaling Mode | information |
| Vert. Factor | information |
| Hori. Factor | information |
| Interpolation | |
|---|---|
| Vert. Kernel | information |
| Hori. Kernel | information |
| Buffer | |
|---|---|
| Length | information |
Image Processing
| Scanline | |
|---|---|
| Function | information |
| Strength | information |
| Modulation | information |
| Red Bleed | information |
| Red Convergence | information |
| Blue Convergence | information |
| Mask | |
|---|---|
| Enable | information |
| Strength | information |
| Load from File | Select a Mask File, RGB Masks:, Mono Masks: |
| Horizontal Blur | |
|---|---|
| Function | information |
| Boost | information |
| Gamma/Linear Light/HDR | |
|---|---|
| Input Factor | information |
| Output Factor | information |
| SMPTE 2048 PQ | information |
Deinterlacer
| Mode | |
|---|---|
| Algorithm: | information |
| Field Inversion: | information |
| Motion Adaptive Settings | |
|---|---|
| Sensitivity | information |
| Interpolator | information |
| Detector | information |
| Bob Settings | |
|---|---|
| Offset | information |
System
| On Screen Display | |
|---|---|
| Position | information |
| Auto-Off | information |
| Load Banner | information |
| Enable Debug OSD | information |
| Blanking Color: | |
|---|---|
| Red | information |
| Green | information |
| Blue | information |
| Firmware Update | |
|---|---|
| Check SD Card | information |
Advanced Setup:
RGB/Component ADC
| Sampling | |
|---|---|
| Sampling Rate | information |
| Decimation Factor | information |
| Decimation Phase | information |
| Sub-Phase | information |
| Anti-Alias | information |
| Sync | |
|---|---|
| SoG Threshold | information |
| Pre-coast | information |
| Post-coast | information |
| Gain | |
|---|---|
| Pre-ADC | information |
| Red | information |
| Green | information |
| Blue | information |
| Auto Calibrate | |
|---|---|
| Phase | information |
| Gain | information |
HDMI Receiver
| Receiver | |
|---|---|
| Decimation Factor | information |
| Decimation Phase | information |
| Color Space | |
|---|---|
| 4:2:2 Upsampler | information |
| CSC Mode: | information |
| Input RGB Range | information |
SDP Decoder
| Gain/Balance | |
|---|---|
| Brightness | information |
| Contrast | information |
| Chroma | information |
| Phase | information |
| Blue Only | information |
| Setup | information |
| Processing | |
|---|---|
| Y/C Filter | information |
| Comb Bandwidth | information |
| Chroma Bandwidth | information |
| Sharpness | information |
| CTIE | information |
| Sync | |
|---|---|
| H-Lock Speed | information |
| Standard | information |
Audio Input
| Sampling | |
|---|---|
| Sampling Rate | information |
| Pre-amp Gain | information |
| Source | |
|---|---|
| Input Override | information |
| Input Swap | information |
Profiles
| Load Profile | |
|---|---|
| Load Default | information |
| Load From File | (opens file selector window titled "Select Profile") |
| Save Profile | |
|---|---|
| Save Current | information |
| Save As New | information |
| Assign Profile | |
|---|---|
| Button 1 | information |
| Button 2 | information |
| Button 3 | information |
| Button 4 | information |
| Button 5 | information |
| Button 6 | information |
| Button 7 | information |
| Button 8 | information |
| Button 9 | information |
| Button 10 | information |
| Button 11 | information |
| Button 12 | information |
| Power Up | information |
Device
Status
System Status Page 1:
| Video Source | |
|---|---|
| Video Source | CP Proc. (I assume CP Proc will change based on selection) |
| Input Timing | information |
| Pixel Clock | information |
| Freq | information |
| Detected Mode | information |
| Audio Input | |
|---|---|
| Audio Input | I2S (I assume will change based on audio input) |
| Measured Freq | information |
| Measured Freq | information |
| HDMI N / CTS | information |
| FPGA Core | |
|---|---|
| Scaler Clock | information |
| PLL VCO | information |
| Pipeline | information |
| SDRAM Clock | information |
| SDRAM Load | information |
| HDMI Transmitter | |
|---|---|
| Output Timing | information |
| Active Size | information |
| Pixel Clock | information |
| HDMI Standard | information |
| PIC32MX MCU | |
|---|---|
| System Clock | information |
| Uptime | information |
| Loop Time | information |
| Last IR Code | information |
| SD Card Free | information |
System Status Page 2:
| HDMI Input Protocol Analyzer | |
|---|---|
| TMDS | information |
| Mode | information |
| Resolution | information |
| Colorspace | information |
| H. Timing | information |
| V. Timing (F0) | information |
| V. Timing (F1) | information |
| Audio | information |
| AVI Infoframe | information |
| Aud. Infoframe | information |
| VS Infoframe | information |
| ACP Infoframe | information |
System Status Page 3:
| HDMI TX Information | |
|---|---|
| TX Mode | information |
| Hot Plug | information |
| Scrambling | information |
| Clock Factor | information |
| Ch 0 Error | information |
| Ch 1 Error | information |
| Ch 2 Error | information |
| Sink EDID Dump | information |
Diagnostic Console
to do
About
| About | |
|---|---|
| Device: | information |
| FW Version | information |
| Device ID: | information |
