Open Broadcast Software (OBS) Lossless Captures
This page shows you how to use a custom-configured "portable" build of the Open Broadcast Software to get excellent quality, lossless game captures. You won't be able to dial in the exact fps of the console, but some people might prefer this software over others, as it's free and open-source. If you find OBS useful, please consider supporting their team: https://www.patreon.com/obsproject
Required Software
This capture method uses mostly free software. Please download and install the following:
OBS Lossless RGB: https://www.retrorgb.com/assets/OBS\_Datapath\_Capture\_2022-01-27.zip
No codecs are needed for recording, but if you have trouble playing the UTVideo files back, use MPC-HC, no installation needed: https://portableapps.com/apps/music\_video/mpc-hc-portable
There are no code changes to OBS. This isn't a fork, just a custom-configured, "portable" build of OBS. This is hosted here for free, in accordance with the OBS team's license.
**Installation and Configuration:**
- Extract the zip file to a permanent location on your PC.
- The main exe is "OBS Capture\\bin\\64bit\\obs64.exe".
- Right click on "obs64.exe" and hit "create shortcut"
- Drag that shortcut to your desktop. It's recommended to rename it something like "OBS Uncompressed" so you don't confuse it with other OBS installations.
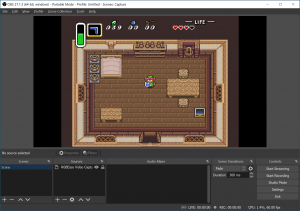
- Open the software and you'll be at the main window. If you're using a Datapath Vision capture card, you'll need to use beeanyew's "RGBEasy" plugin to capture video, not "Video Capture Device" - which is pre-installed.
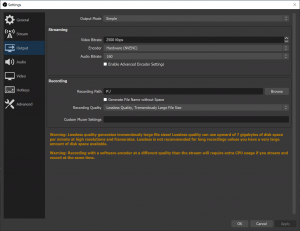
- Hit "Settings" in the lower right, then "Output" on the left.
- Now set your recording path. Also, make sure "Lossless" is selected for uncompressed captures:
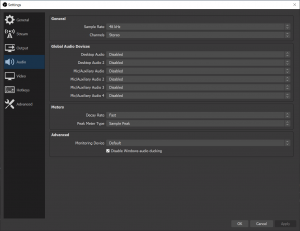
- Click "Audio" on the left and set your settings. You might want to set it to "mono" for non-stereo consoles:
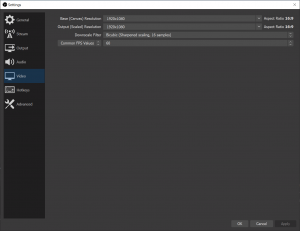
- Now click the "Video" option on the left.
- Set the resolution to match _exactly_ what your source is. Then set your framerate:
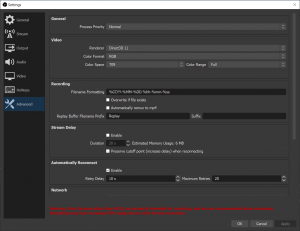
- Click on the "Advanced" tab on the left.
- Set the Color Format to RGB, Color Space to 709 and Color Range to Full. You may need to adjust space and range based on your source, but its s recommended to set them as seen below.


Capture Card Direct-Capture Method
Warning: If you're using the Datapath direct capture method, make SURE you're using beeanyew's "RGBEasy" plugin (included in the above zip) and you've completed this page and your Vision window is loaded and configured before starting!!!
There are three changes to make, each time you capture via this method:
- Add a video source by pressing the + button and selecting "Video Capture Device" (unless you're using a Datapath card, then choose RGBEasy as shown in the first picture on this page): [[[File:OBS_AddVideoSource.jpg)](https://cdn.retrorgb.com/wp-content/uploads/2019/03/OBS_AddVideoSource.jpg]]
- You can name this anything you'd like, or leave it as default [[[File:OBS_AddVideoSource2.jpg)](https://cdn.retrorgb.com/wp-content/uploads/2019/03/OBS_AddVideoSource2.jpg]]
- Now here's the _very_ important capture settings that you need to get exactly right! - Set the "Device" to the capture card you're using. - Resolution/FPS Type = Custom - Enter the _exact_ resolution that's being sent to your capture card. If you're doing analog capture via a Datapath card, make _sure_ the resolution matches what's listed on the Input tab of the Vision window! - FPS = Highest FPS - Video Format should be set to what you're capturing. In most cases it will be XRGB. - YUV Color Space should be set to match the source device - YUV Color Range = Full - Buffering = Auto-Detect. [[[File:OBS_VideoCaptureDeviceConfig.jpg)](https://cdn.retrorgb.com/wp-content/uploads/2019/03/OBS_VideoCaptureDeviceConfig.jpg]]
- Hit OK
- Right click on the video inside the OBS window and set your preview scaling. If you just need to view the window, I recommend leaving it at "Scale to Window" so the entire image will fit. If you need to use the screen for calibration, you can set it to "Canvas" and get a 100% "zoom" of the image. [[[File:OBS_ScaleToWindow.jpg)](https://cdn.retrorgb.com/wp-content/uploads/2019/03/OBS_ScaleToWindow.jpg]]
- Make sure your audio device is listed and working. You might need to add another source and configure your Audio Input Device.
- Hit "Start Recording" and your uncompressed video will save to the target directory.
- Here's a quick example of the results of this 720p capture, uploaded directly to YouTube with no other post-processing:
Window Capture
Another method of video capture that's often used is recording the preview window of your capture card. This logic is that you can properly calibrate all of the settings directly via the capture card and not have any calibration via the recording software.
- Fully configure your capture card and leave the preview window open.
- In OBS, add a new source and select Window Capture, then name it whatever you'd like.
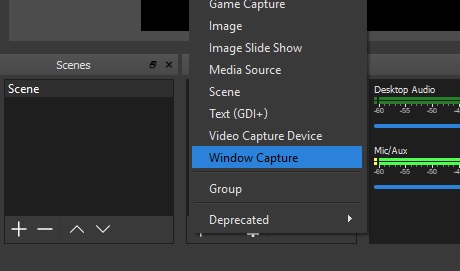

- Next, select your capture card's window from the drop-down menu. Uncheck "Capture Cursor", so you won't accidentally get an arrow in your recording.
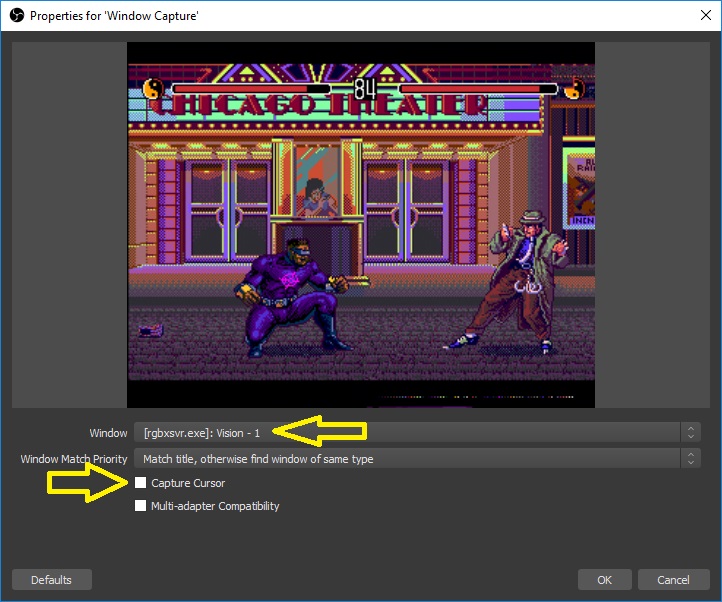 Then hit OK.

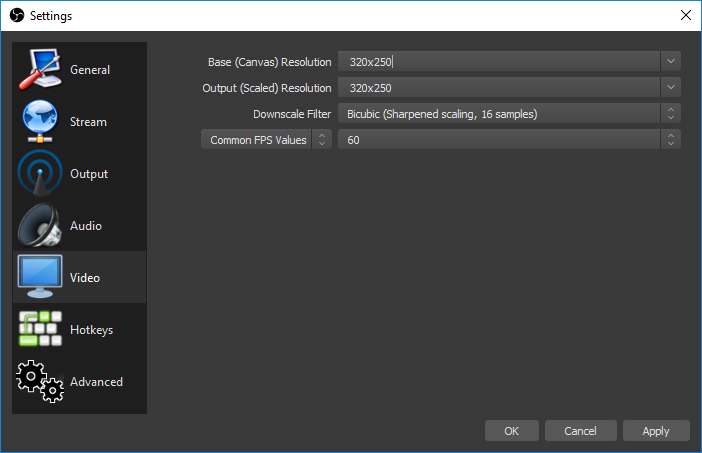
- Go into the Settings menu and select Video
- Make sure the Base (Canvas) and Output (Scaled) Resolutions are both set to _exactly_ the same as what your video capture device shows!
 - Hit OK to go back to the main OBS screen.

- Right click on the video inside the OBS window and set your preview scaling. For low-resolution sources, you should leave it set to "Canvas" to get the sharpest image. If you'd like a bigger preview window, you can set it to "Scale to Window", then adjust the size of the program:[[[File:OBS_ScaleToWindowLowRez.jpg]]
- Make sure your audio device is listed and working. You might need to add another source and configure your Audio Input Device.
- Then just hit "Start Recording" to begin capturing. Here's an example of a Sega Genesis game captured with this method, then scaled.