AV:Amarec Lossless Captures: Difference between revisions
No edit summary |
No edit summary |
||
| (2 intermediate revisions by the same user not shown) | |||
| Line 1: | Line 1: | ||
This page shows you how to use the Amarec software to get excellent quality, uncompressed game captures. If you'd like to try it, it's recommended to use v3.10 or higher, as there are weird bugs with the software including recording at incorrect frame rates on earlier versions. | |||
See [https://www.retrorgb.com/videocapture.html RetroRGB's write-up] comparing this video capture method to others. | |||
This | == Required Software == | ||
This capture method uses mostly free software. Download and install the following: | |||
* [http://www.amarectv.com/english/top_e.html Amarec (latest version, 3.10 or higher)] | |||
* [https://sourceforge.net/projects/x264vfw/ x264 Codec] ([https://www.videolan.org/developers/x264.html mirror download]) | |||
** Or, use an alternative codec: | |||
*** [https://lags.leetcode.net/codec.html Lagorith] | |||
*** [https://www.videohelp.com/software/Ut-Video-Codec-Suite UT Video] | |||
{{Warning:If you're using the Datapath direct capture method, make SURE you've completed the instructions on [[RetroRGB_Migration:Datapathcapture|this page]] and your Vision window is loaded and configured before starting.}} | |||
== Video Capture == | |||
You'll need to configure Amarec to your computer and devices. Luckily, once the main setup is complete, the only thing you'll need to change in the future is capture resolution. | |||
** | # Open Amarec and click the top-left button to open configuration options. | ||
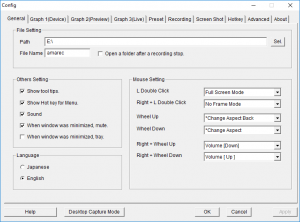
# In the "General" tab, you may want to change the "Path": This is where you file will be saved. <br> [[File:AmaRecGeneral-300x222.png]] | |||
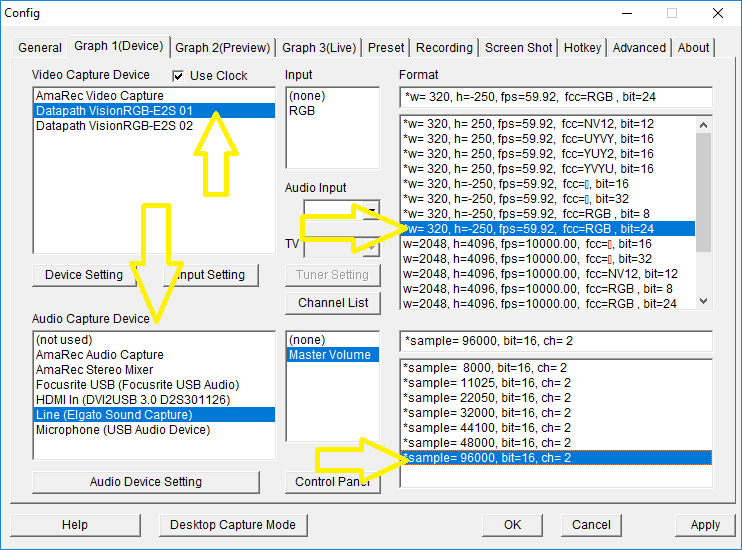
# Graph1 Has some of the most important settings. | |||
#* First, make sure your capture card is selected. | |||
#* Chose whichever resolution matches your source. For Vision direct, this will be the EXACT resolution shown in the Vision window. HDMI sources can show incorrectly, so you may want to manually set it if that happens. For direct RGB captures, you'll want, RGB 24-bit and YUV for component. | |||
#* The capture card can automatically detect the refresh rate. | |||
#* Select your audio device as well. It may be mislabelled, but try different options until you hear sound. | |||
#* Choose your audio samplerate <br> [[File:AmaRecGraph1.png]] | |||
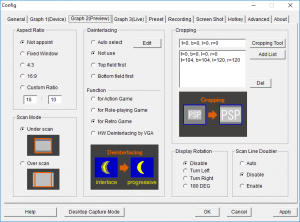
# Below are good settings for Graph2: <br> [[File:AmaRecGraph2-300x222.png]] | |||
# "Live" settings are just for the preview window, no need to mess with them. | |||
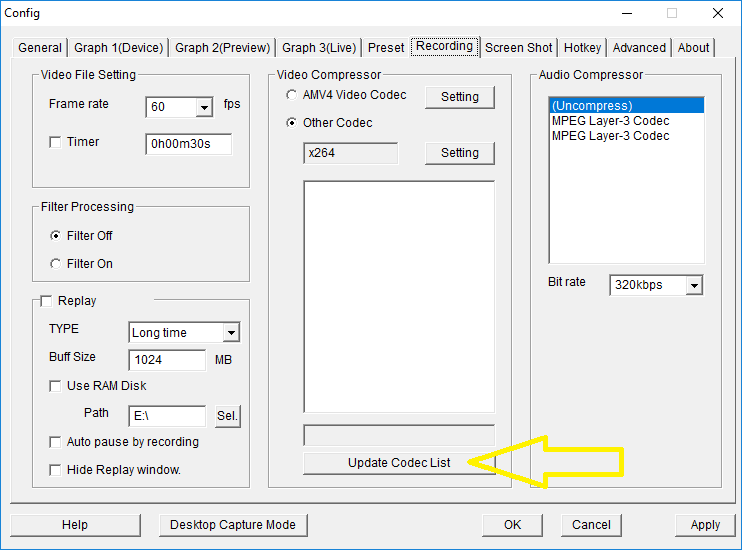
# The Recording window has some important settings. | |||
#* First, make sure the Frame rate is set to 60 fps. | |||
#* Set the Filter Processing to Off. | |||
#* Leave audio uncompressed. | |||
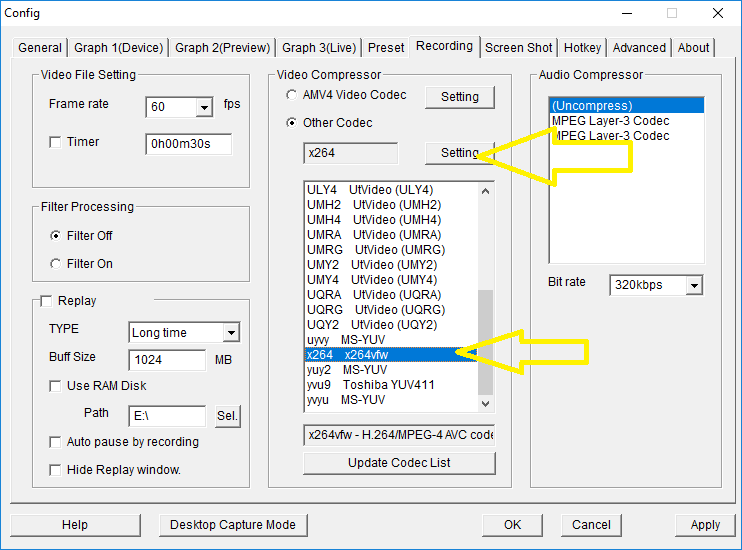
#* Press the "Update Codec List" button (see below): <br> [[File:AmaRecRecording.png]] | |||
#* Scroll down and select "x264", which is a codec you installed earlier. | |||
#* Click Setting. <br> [[File:AmarecCodec1.png]] | |||
#** You likely want to set it to "Single pass - lossless". You can add compression here if you'd like, but for the best quality, you want to leave everything uncompressed until the very last step. However, this will result in very large file sizes. <br> [[File:AmarecCodec2.png]] | |||
# The rest of the settings tabs can be left on their defaults. | |||
# Click OK and you'll be back at the main window. | |||
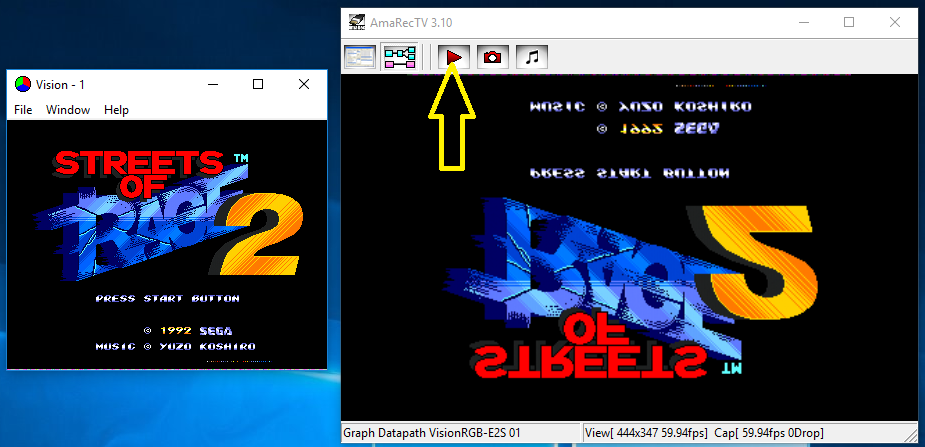
#* If you're using Vision direct capture, the image might be upside down. That's perfectly normal — you can just watch the Vision window, not Amarec's. | |||
# Hit record! <br> [[File:AmarecUpsideDown.png]] | |||
All of your settings should save after exiting. That means once you've configured Amarec, all you'll need to do when you need to record video is launch the program, go into settings and select the proper resolution. <br> [[File:AmarecResolution.png]] | |||
Latest revision as of 13:58, 14 July 2023
This page shows you how to use the Amarec software to get excellent quality, uncompressed game captures. If you'd like to try it, it's recommended to use v3.10 or higher, as there are weird bugs with the software including recording at incorrect frame rates on earlier versions.
See RetroRGB's write-up comparing this video capture method to others.
Required Software
This capture method uses mostly free software. Download and install the following:
{{Warning:If you're using the Datapath direct capture method, make SURE you've completed the instructions on this page and your Vision window is loaded and configured before starting.}}
Video Capture
You'll need to configure Amarec to your computer and devices. Luckily, once the main setup is complete, the only thing you'll need to change in the future is capture resolution.
- Open Amarec and click the top-left button to open configuration options.
- In the "General" tab, you may want to change the "Path": This is where you file will be saved.
- Graph1 Has some of the most important settings.
- First, make sure your capture card is selected.
- Chose whichever resolution matches your source. For Vision direct, this will be the EXACT resolution shown in the Vision window. HDMI sources can show incorrectly, so you may want to manually set it if that happens. For direct RGB captures, you'll want, RGB 24-bit and YUV for component.
- The capture card can automatically detect the refresh rate.
- Select your audio device as well. It may be mislabelled, but try different options until you hear sound.
- Choose your audio samplerate
- Below are good settings for Graph2:
- "Live" settings are just for the preview window, no need to mess with them.
- The Recording window has some important settings.
- First, make sure the Frame rate is set to 60 fps.
- Set the Filter Processing to Off.
- Leave audio uncompressed.
- Press the "Update Codec List" button (see below):
- Scroll down and select "x264", which is a codec you installed earlier.
- Click Setting.
- You likely want to set it to "Single pass - lossless". You can add compression here if you'd like, but for the best quality, you want to leave everything uncompressed until the very last step. However, this will result in very large file sizes.
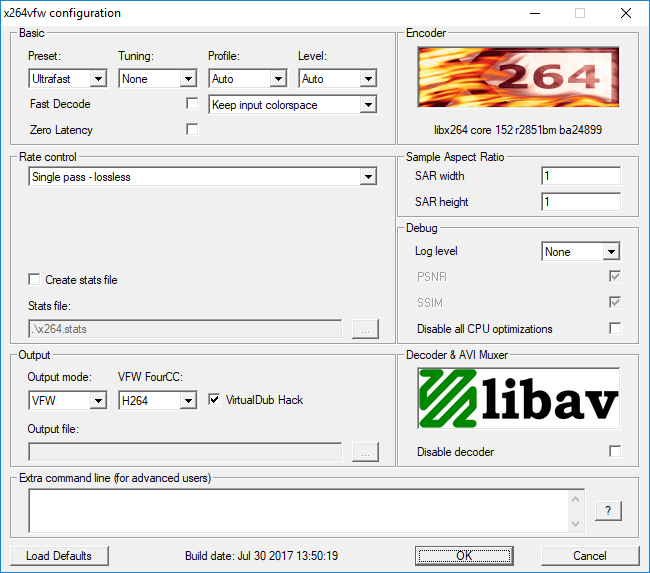
- You likely want to set it to "Single pass - lossless". You can add compression here if you'd like, but for the best quality, you want to leave everything uncompressed until the very last step. However, this will result in very large file sizes.
- The rest of the settings tabs can be left on their defaults.
- Click OK and you'll be back at the main window.
- If you're using Vision direct capture, the image might be upside down. That's perfectly normal — you can just watch the Vision window, not Amarec's.
- Hit record!


All of your settings should save after exiting. That means once you've configured Amarec, all you'll need to do when you need to record video is launch the program, go into settings and select the proper resolution.
