Game Boy:Creating Game Backups: Difference between revisions
m (Fixing formatting) |
(Added GBxCartRW guide.) |
||
| Line 1: | Line 1: | ||
[[Category:Game_Boy]] | [[Category:Game_Boy]] | ||
{{tooltip|Always verify your ROM/save file is working correctly in an emulator like BGB before proceeding with restoring another file or another cartridge. '''''Genuine game cartridges can not be rewritten/flashed with a different ROM.'''''}} | |||
There is a wide variety of methods/hardware/software needed to create game backups for Game Boy family games. Each major method/hardware specific guides will be broken down into subcategories below. | There is a wide variety of methods/hardware/software needed to create game backups for Game Boy family games. Each major method/hardware specific guides will be broken down into subcategories below. | ||
= Dedicated Flash/Backup Devices: = | = Dedicated Flash/Backup Devices: = | ||
== <small>Joey JR/Joey Gen 4 (BennVenn)</small> == | == <small>[https://bennvenn.myshopify.com/products/usb-gb-c-cart-dumper-the-joey-jr?variant=39474232983655/ Joey JR/Joey Gen 4 (BennVenn)]</small> == | ||
<div class="mw-collapsible mw-collapsed"> | <div class="mw-collapsible mw-collapsed"> | ||
<small>This is BennVenn's "ultra rugged" and "ultra portable" cart reader. Unlike the gen 3, this unit does not require installing custom software and using unsigned drivers (on Windows PCs) and thus makes setup and use even easier. When plugged into a computer with a cart inserted, the Joey shows up as a removable drive with the game files on that drive. From there, you can just add or copy files to backup ROM/RAM or to restore RAM. Flashing support has been added to close the feature gap between gen 3 readers and gen 4 readers. The Joey Jr. will also </small> | <small>This is BennVenn's "ultra rugged" and "ultra portable" cart reader. Unlike the gen 3, this unit does not require installing custom software and using unsigned drivers (on Windows PCs) and thus makes setup and use even easier. When plugged into a computer with a cart inserted, the Joey shows up as a removable drive with the game files on that drive. From there, you can just add or copy files to backup ROM/RAM or to restore RAM. Flashing support has been added to close the feature gap between gen 3 readers and gen 4 readers. The Joey Jr. will also </small> | ||
| Line 40: | Line 41: | ||
</div> | </div> | ||
== <small>GBxCart RW (insideGadgets)</small> == | == <small>[https://shop.insidegadgets.com/product/gbxcart-rw/ GBxCart RW (insideGadgets)]</small> == | ||
<div class="mw-collapsible mw-collapsed"> | <div class="mw-collapsible mw-collapsed"> | ||
<small>This is functionally similar to the Joey gen 3 except that the device is completely open source. Compatibility is largely the same but the GBx device does support a few carts that the joey gen 3 does not and vice versa. All original carts are supported on both devices. he Pro model is identical to the standard model except that the PCB is shaped differently to allow you to install the the reader in a Game Boy Advance cartridge shell (aftermarket shells fit better). You can buy one from [https://shop.insidegadgets.com/product/gbxcart-rw/ insideGadgets].</small> | |||
'''<small>Resources required:</small>''' | |||
{| class="toccolours" style="width:200px;" | |||
|- | |||
| [https://shop.insidegadgets.com/product/gbxcart-rw/ GBxCartRW] | |||
|- | |||
| USB-C Cable | |||
|- | |||
| PC/Laptop | |||
|- | |||
|Compatible Cartridge | |||
|- | |||
| [https://github.com/lesserkuma/FlashGBX/ FlashGBX by Lesserkuma] | |||
|} | |||
[[File:GBxCartRW-Guide-001.png|700px]] | |||
===<small>Backup Procedures:</small>=== | |||
<div class="mw-collapsible mw-collapsed"> | |||
# Ensure that FlashGBX is installed and the software is opened on your computer. | |||
# Without the GBxCartRW being connected to your computer, insert your cartridge into the GBxCartRW | |||
# Plug the GBxCartRW in via the USB-C cable connected to your computer. | |||
# Press the Okay button in the FlashGBX window. | |||
# Select the GameBoy option in the top right, the cartridge information will appear. | |||
# Press the '''BACKUP ROM''' button and select the location you would like to save the ROM file. | |||
## '''<small>If you would like to backup your '''SAVE FILE''', press the '''BACKUP SAVE DATA''' button instead.</small>''' | |||
# FlashGBX will prompt you when the backup is complete. | |||
# Verify that the ROM you backed up is functioning via an emulator such as GBG. | |||
</div> | |||
===<small>Flashing Procedures:</small>=== | |||
<div class="mw-collapsible mw-collapsed"> | |||
# Complete steps 1-5 of the Backup Procedures. | |||
# Press the '''WRITE SAVE DATA''' button. | |||
#* '''<small>If you have a flash cart or repro. cartridge and would like to flash it with a new ROM press the '''WRITE ROM''' button instead.</small>''' | |||
# Press the '''Restore from save data file''' button. | |||
# Navigate to the location of your save data file and select it. | |||
# FlashGBX will prompt you to let you know that the save file has been restored. | |||
</div> | </div> | ||
</div> | |||
== <small>Cart Flasher for GameBoy (J. Rodrigo)</small> == | == <small>Cart Flasher for GameBoy (J. Rodrigo)</small> == | ||
Revision as of 21:48, 2 February 2022
There is a wide variety of methods/hardware/software needed to create game backups for Game Boy family games. Each major method/hardware specific guides will be broken down into subcategories below.
Dedicated Flash/Backup Devices:
Joey JR/Joey Gen 4 (BennVenn)
This is BennVenn's "ultra rugged" and "ultra portable" cart reader. Unlike the gen 3, this unit does not require installing custom software and using unsigned drivers (on Windows PCs) and thus makes setup and use even easier. When plugged into a computer with a cart inserted, the Joey shows up as a removable drive with the game files on that drive. From there, you can just add or copy files to backup ROM/RAM or to restore RAM. Flashing support has been added to close the feature gap between gen 3 readers and gen 4 readers. The Joey Jr. will also
Resources required:
| Joey JR (Joey Gen 4) |
| USB-C Cable |
| PC/Laptop |
| Compatible Cartridge |
| Most errors/issues with the Joey Jr. are the result of dirty contacts on cartridges. It is recommended that the contacts on the cartridge are cleaned before attempting to dump ROM/SAV files. |
Backup Procedures:
- Ensure Joey Jr. is not connected to your computer
- Insert the game cartridge into the Joey Jr. and ensure it is fully seated.
- Connect the USB-C Cable from your computer to your Joey Jr.
- Your Joey Jr. should show up on your computer as a USB Drive labeled BENNVENN.
- Inside the drive you will see a handful of files. The only files we care about for the sake of dumping carts/saves are *.GB, *.GBC, *.SAV, *.RTC
POKEMONR.GBC is the ROM. POKEMONR.SAV is the save file. Games that use the RTC clock will also have a *.RTC file.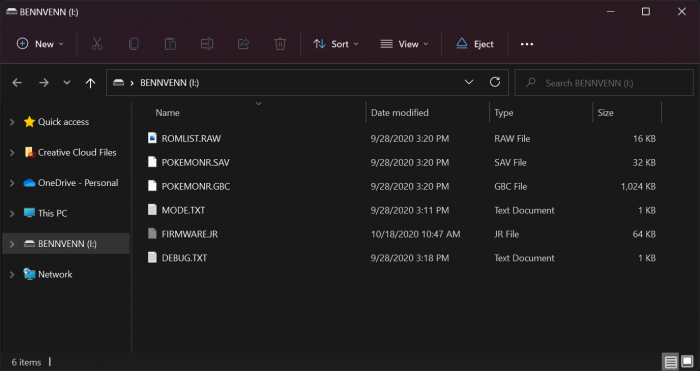
- Drag the files you want to keep (GBC, SAV, RTC) to a folder on your computer.
- Utilize an Emulator such as BGB to verify that your SAV/ROM files were corrected saved/backed up and usable.

| It is STRONGLY RECOMMENDED that you test your ROM/SAV file using an emulator such as BGB to verify that the files were correctly saved/backed up. |
Flashing Procedures:
- Follow steps 1-5 from the Backup Procedures above.
- Drag the files from your computer back to the "BENNVENN" USB drive. JoeyJr. will automatically delete the old files and replace them with the new ones you dragged over.
GBxCart RW (insideGadgets)
This is functionally similar to the Joey gen 3 except that the device is completely open source. Compatibility is largely the same but the GBx device does support a few carts that the joey gen 3 does not and vice versa. All original carts are supported on both devices. he Pro model is identical to the standard model except that the PCB is shaped differently to allow you to install the the reader in a Game Boy Advance cartridge shell (aftermarket shells fit better). You can buy one from insideGadgets.
Resources required:
| GBxCartRW |
| USB-C Cable |
| PC/Laptop |
| Compatible Cartridge |
| FlashGBX by Lesserkuma |

Backup Procedures:
- Ensure that FlashGBX is installed and the software is opened on your computer.
- Without the GBxCartRW being connected to your computer, insert your cartridge into the GBxCartRW
- Plug the GBxCartRW in via the USB-C cable connected to your computer.
- Press the Okay button in the FlashGBX window.
- Select the GameBoy option in the top right, the cartridge information will appear.
- Press the BACKUP ROM button and select the location you would like to save the ROM file.
- If you would like to backup your SAVE FILE, press the BACKUP SAVE DATA button instead.
- FlashGBX will prompt you when the backup is complete.
- Verify that the ROM you backed up is functioning via an emulator such as GBG.
Flashing Procedures:
- Complete steps 1-5 of the Backup Procedures.
- Press the WRITE SAVE DATA button.
- If you have a flash cart or repro. cartridge and would like to flash it with a new ROM press the WRITE ROM button instead.
- Press the Restore from save data file button.
- Navigate to the location of your save data file and select it.
- FlashGBX will prompt you to let you know that the save file has been restored.
Cart Flasher for GameBoy (J. Rodrigo)
ALTANE
This device is very similar to the Reiner Ziegler based flashers above and has similar compatibility and features. Does not support bootleg or repro cart flashing but will flash homebrew carts like the device above. See this site for more info or you can buy one from Retromodding.
Arduino Based DIY Flash/Backup:
GB Cart Read (InsideGadgets)
Coming Soon https://github.com/insidegadgets/GBCartRead
Cartridge Reader for Arduino Mega2560
Coming Soon https://github.com/sanni/cartreader
Flash/Backup as secondary function:
RetroN5 (Hyperkin)
Coming soon
Nintendo 64 + Everdrive 64 + Transfer Pak (u/Saturnu)
Deprecated/Hard to find
These are listed for reference only: