General Cleaning Tips: Difference between revisions
Jump to navigation
Jump to search
mNo edit summary |
No edit summary |
||
| Line 1: | Line 1: | ||
[[Category:RetroRGB Migration WIP]] Derf | [[Category:RetroRGB Migration WIP]] Derf | ||
Note that this will not reverse yellowing of white or grey plastic. For that you would need to [[RetroBrite]] your console. | |||
== Required Materials == | |||
* A fully disassembled console or controller | |||
* GooGone spray gel | |||
* Kitchen brush with plastic bristles (''not'' metal!) or large paintbrush | |||
* Any dish detergent | |||
* Compressed air or handheld electric duster blower | |||
* A video game console or controller that’s had all of the metal and electronics removed | |||
== Cleaning Plastic == | |||
# | {{Note|If you are working in a sink, plug the drain first so that small parts are not lost down the drain.}} | ||
# | |||
# | # Remove as many metal parts from the console or controller as possible. | ||
# Use compressed air or blower to remove as much dust as possible from the surface of the electronic components. | |||
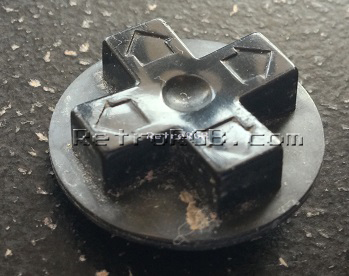
# Working one piece at a time, spray GooGone directly on the dirtiest areas, especially where there is dirt build-up as demonstrated in the picture below: <br> [[File:CleaningConsoles03.jpg]] | |||
# Splash a little bit of water around the GooGone. | # Splash a little bit of water around the GooGone. | ||
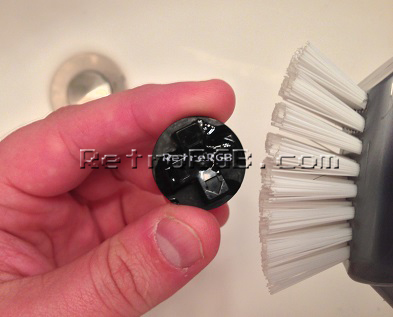
# Use the | # Use the brush and thoroughly scrub the entire console or controller for as long as it takes to get clean. | ||
# | # Clean all individual pieces well, such as controller buttons, expansion doors, etc. Avoid scrubbing any labels or text unless you are trying to remove it. | ||
# Squirt some dish detergent and scrub once again, making sure to get a good lather and scrub every bit of your system or controller (that's not a label). | # Repeat the spraying, wetting, and scrubbing process as needed. Tight spots can be reached with a cotton swab covered in GooGone. <br> [[File:CleaningConsoles04.jpg]] | ||
# Once it seems as clean as it will get, rinse off as much GooGone as possible. | |||
# Squirt some dish detergent and scrub once again, making sure to get a good lather and scrub every bit of your system or controller (that's not a label or text). This will remove the residue left behind by the GooGone. | |||
# Once again, wash off the console and make sure you get all of the soap out. | # Once again, wash off the console and make sure you get all of the soap out. | ||
# Shake off the excess water. Dab (not rub) the labels with a towel. You should dry the labels as quickly as possible, so they don't get discolored. | |||
# Use compressed air to get the water out of hard to reach spots. | |||
# Leave everything to dry for at least a few hours. | |||
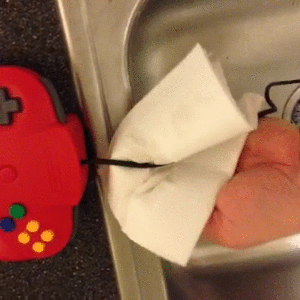
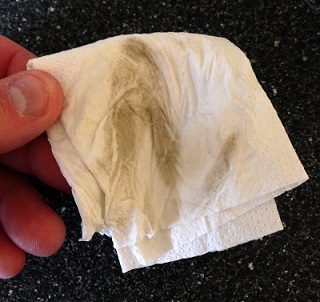
# If cleaning a controller, you may wish to clean the controller cable and connector as well. You can do this by spraying some GooGone on a paper towel, squeezing it around the cable, and pulling the cable through your hand. Repeat with water to remove the GooGone. <br> [[File:Cord%20Cleaning.gif]] [[File:CleaningConsoles06.jpg]] | |||
# | # After everything is completely dry, re-assemble it and enjoy your "brand new" console or controller! | ||
== Media == | |||
<youtube>https://www.youtube.com/embed/kzkv4E1X_LY</youtube> | |||
[[File:CleaningConsoles07.jpg]] [[File:CleaningConsoles09.jpg]] | |||
Revision as of 06:17, 18 June 2022
Derf
Note that this will not reverse yellowing of white or grey plastic. For that you would need to RetroBrite your console.
Required Materials
- A fully disassembled console or controller
- GooGone spray gel
- Kitchen brush with plastic bristles (not metal!) or large paintbrush
- Any dish detergent
- Compressed air or handheld electric duster blower
- A video game console or controller that’s had all of the metal and electronics removed
Cleaning Plastic
| If you are working in a sink, plug the drain first so that small parts are not lost down the drain. |
- Remove as many metal parts from the console or controller as possible.
- Use compressed air or blower to remove as much dust as possible from the surface of the electronic components.
- Working one piece at a time, spray GooGone directly on the dirtiest areas, especially where there is dirt build-up as demonstrated in the picture below:
- Splash a little bit of water around the GooGone.
- Use the brush and thoroughly scrub the entire console or controller for as long as it takes to get clean.
- Clean all individual pieces well, such as controller buttons, expansion doors, etc. Avoid scrubbing any labels or text unless you are trying to remove it.
- Repeat the spraying, wetting, and scrubbing process as needed. Tight spots can be reached with a cotton swab covered in GooGone.
- Once it seems as clean as it will get, rinse off as much GooGone as possible.
- Squirt some dish detergent and scrub once again, making sure to get a good lather and scrub every bit of your system or controller (that's not a label or text). This will remove the residue left behind by the GooGone.
- Once again, wash off the console and make sure you get all of the soap out.
- Shake off the excess water. Dab (not rub) the labels with a towel. You should dry the labels as quickly as possible, so they don't get discolored.
- Use compressed air to get the water out of hard to reach spots.
- Leave everything to dry for at least a few hours.
- If cleaning a controller, you may wish to clean the controller cable and connector as well. You can do this by spraying some GooGone on a paper towel, squeezing it around the cable, and pulling the cable through your hand. Repeat with water to remove the GooGone.
- After everything is completely dry, re-assemble it and enjoy your "brand new" console or controller!


Media
Provided ID could not be validated.

