Neo Geo:Audio Bypass Mod (AES): Difference between revisions
Jump to navigation
Jump to search
(WIP) |
mNo edit summary |
||
| (One intermediate revision by the same user not shown) | |||
| Line 11: | Line 11: | ||
* Two ceramic 1000pF 50V capacitors. | * Two ceramic 1000pF 50V capacitors. | ||
== Fixing the | == Fixing the Issues == | ||
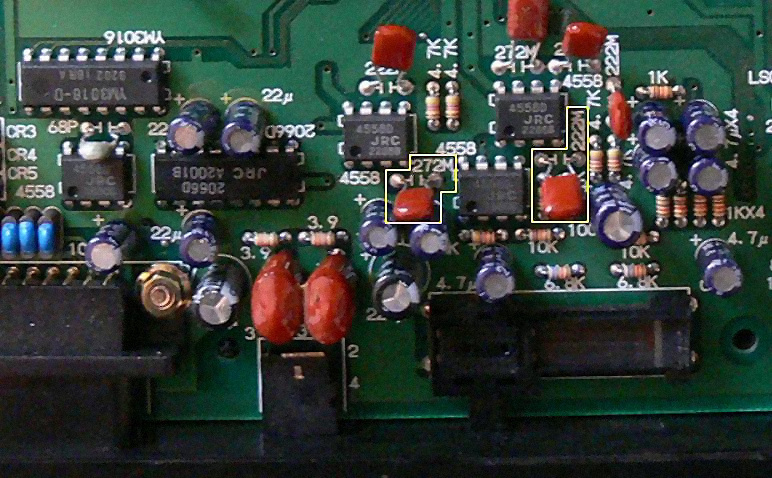
# | # Solder the seven ceramic capacitors on the underside of the mainboard exactly as shown below. <br> [[File:AES3-3-3-4-audiofix-03.jpg|400px]] | ||
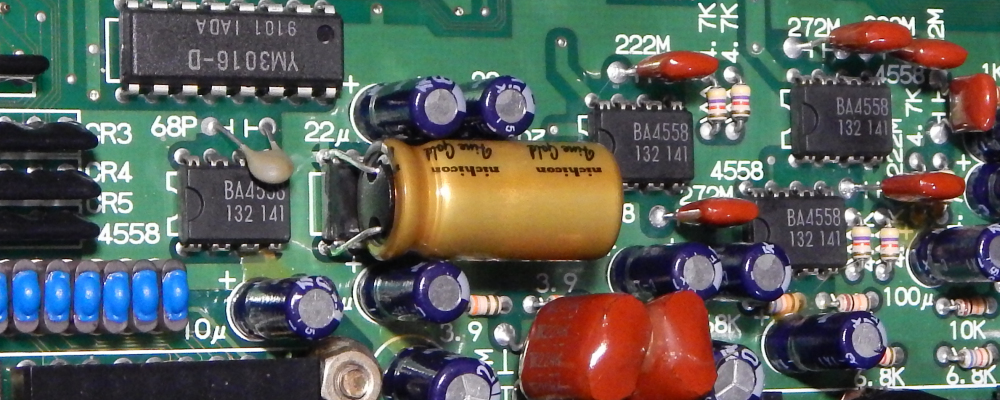
# Solder the 470uF capacitor in place by laying it on the JRC 2066D chip, bending the legs of the capacitor to line up with the legs of the chip and solder them in place. <br> [[File:AES3-3-3-4-audiofix-04.jpg]] | |||
# The polyester capacitors or the left channel are swapped by mistake. Simply desolder and swap the following capacitors: [[File:AES3-3-3-4-audiofix-05.jpg]] | |||
Latest revision as of 22:01, 16 July 2023
Unfortunately, motherboard revisions 3-3 and 3-4 had flaws in their audio circuits causing audio buzz through the headphone jack, requiring a mod to bring it back up to full quality. Luckily, FirebrandX made a detailed guide to fix the audio issues, which was used as the basis for this page.
All other revision AES consoles have good quality audio and only require that you use the front audio jack to get high-quality stereo audio. RGB cables generally have separate audio cables to address this issue.
Required Items
DigiKey list of the following items
- Five ceramic 0.1uF 50V capacitors.
- One aluminum 470uF 35V capacitors.
- Two ceramic 1000pF 50V capacitors.
Fixing the Issues
- Solder the seven ceramic capacitors on the underside of the mainboard exactly as shown below.

- Solder the 470uF capacitor in place by laying it on the JRC 2066D chip, bending the legs of the capacitor to line up with the legs of the chip and solder them in place.
- The polyester capacitors or the left channel are swapped by mistake. Simply desolder and swap the following capacitors: