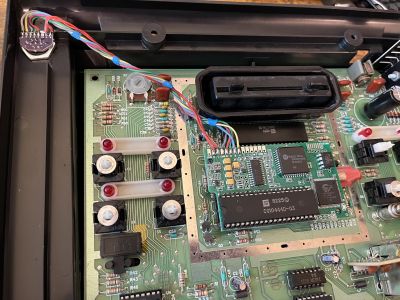
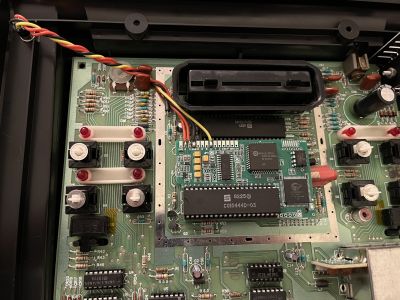
2600RGB Sears Video Arcade II Install
Jump to navigation
Jump to search
Although not "officially" supported, it is possible to install a 2600RGB in a Sears Video Arcade II or Atari 2800 console. The installation is fairly similar to that in a 4-switch console and does not require any special adapter PCB like the 6-switch or Jr.
Materials and Tools
- Materials
- 2600RGB kit
- Leaded solder
- Flux (not required but highly recommended)
- Hookup wire
- Machined 2.54 mm male pin headers
- Tools
- Phillips head screwdriver
- Soldering iron
- Desoldering iron or desoldering braid
- Flush cutters
- Wire stripper
- Cordless drill with step bit
- Needlenose pliers
Installation
- Flip over the console and unscrew the five screws securing the case. Remove the top case and set it aside.
- Remove the washers sitting on the eight top buttons and put them in a safe place, as they can be easily lost.
- Disconnect the RF cable on the lower right corner and carefully lift the motherboard out of the case. Set the lower case aside.
- Use a set of needlenose pliers to carefully straighten the four tabs holding the RF shielding together. Pull the shielding off to reveal the three major chips (RIOT, 6507 and TIA).
- Locate the TIA chip, which is towards the front and is farthest away from the cartridge port. Very carefully remove it from its socket using a flathead screwdriver or (preferably) a chip puller.
- Before the 2600RGB board can be installed, several components must be relocated as they stick up too high and will prevent the board from being inserted.
- Desolder the 0.22 uF green chiclet capacitor located to the immediate right of the TIA socket. It can be relocated and soldered remotely with wires, or can be relocated to the underside of the motherboard. Note that the bottom RF shield will not fit as well if the cap is on the underside.
- Desolder the clock crystal. The leads can be bent in such a way that it can be reinstalled horizontally, or it can also be soldered remotely using wires.
- Desolder the red audio coil located to the right of the 6507 CPU. It is not necessary to reinstall it unless the original RF output is to be preserved. Without it, audio will not be carried into the RF output.
- The male pin headers supplied with the 2600RGB kit are too thick to be used in the TIA socket, so different pin headers must be used. Firmly insert two 20-pin machined pin headers into the TIA socket.
- Although it is not necessary, the original 7805 regulator can be replaced with the switching regulator supplied in the kit. It will not fit horizontally with the supplied right angle pin header, so it must be soldered in using a vertical pin header.
- Prep the 2600RGB by soldering the socket for the 8-pin palette EEPROM, paying attention to its orientation. The EEPROM can also be soldered directly to the 2600RGB.
- If you are using 75 ohm sync, solder jumper JP1 closed.
- Solder jumper JP3 closed, which sets the 2600RGB's video encoder's chroma trap filter into NTSC mode. This is only necessary if you are using composite video.
- Place the 2600RGB on the pin headers so that they go into the inner rows of vias of the board. Note that these rows have slightly smaller vias so pay close attention. Solder the pin headers while holding the 2600RGB down so the pin headers are flush.
- Once the pin headers are soldered, carefully remove the 2600RGB. Take the 40-pin chip socket supplied with the 2600RGB kit and place it in the other via rows (the ones with slightly larger vias). Solder the socket into place and insert the TIA chip into it.
- Tin the output pads of the 2600RGB with plenty of solder.
- Insert the finished 2600RGB board into the motherboard.
- Now it's time to install the output connector(s) of your choice. Space is rather tight in the 2800/SVA II case, though the best places for output connectors are on the overhangs on the side and on the side of the "pedestal" underneath the motherboard. Use a step bit to get the appropriate size hole(s).
- Wire up the connectors to the appropriate pins on the 2600RGB board. Route the wires so that they do not interfere with the top case.
- The RF shielding may be discarded, though it will fit with some trimming to accommodate the output wires.
- Reassemble the console and test with a known working game.

