RGH & JTAG Identification
This is a basic guide on how to properly identify what method was used to modify your Xbox 360. Proper identification is necessary when updating/building a new image with XeBuild for your console.
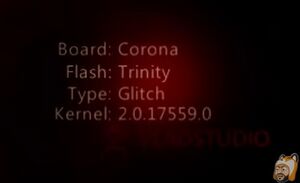
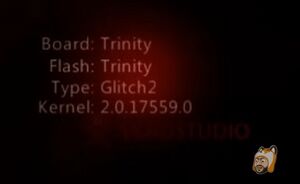
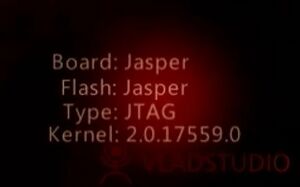
When loading Dashlaunch, in the bottom right corner you will see basic information about your console such as motherboard, flash, glitch type, and kernel. The flash and glitch type can be helpful in identifying what installation method your console has.
| Relying solely on Dashlaunch to verify your RGH/JTAG type is not recommended. Disassembly of the console and examining the installation is the only certain way to completely verify your installation type. |
Winbond 2K RAM
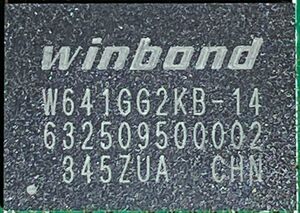
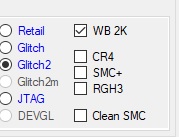
Before covering RGH and JTAG types, a quick warning for Stringray motherboards. If you have a Stingray and you have Winbond 2K RAM on your motherboard (RAM will display model number W641GG2KB-14) you MUST check the box for it in JRunner no matter what RGH method your console is using.
RGH3
Dashlaunch
A RGH3 installation will display Trinity next to Flash, no matter your motherboard revision, and will display Glitch next to Type.
Install
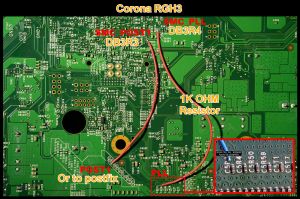
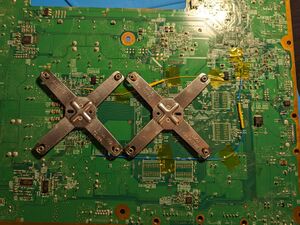
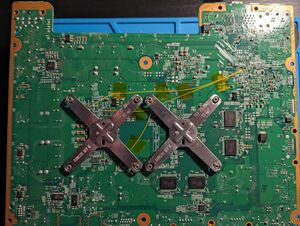
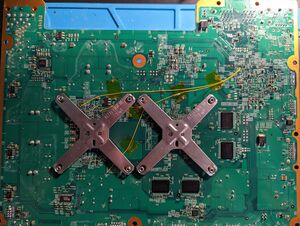
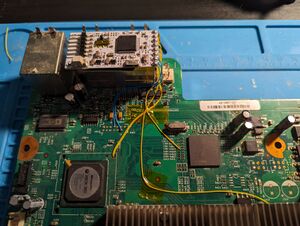
A RGH3 install can be identified by the lack of a glitch chip, as RGH3 does not require one. A typical RGH3 install will have 2 wires on the bottom of the motherboard. In most cases you can verify an RGH3 install without disassembly of the console. Glitch chips have a debug LED that will flash while the console is booting; if your console matches the description listed above in Dashlaunch, look into the top vent of your console immediately after powering it on. If you see a quickly flashing LED (typically green, red, or blue) that stops flashing once the console is booted then you have a glitch chip and do not have RGH3. If no flashing LED is present then it is a good assumption you have an RGH3 install.
JRunner Settings
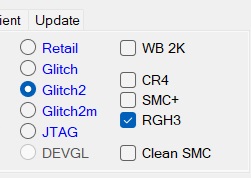
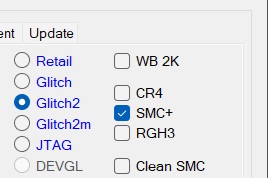
To build/update a NAND image with RGH3, use these settings in JRunner:
RGH1.2 / RGH1
Dashlaunch
A console with RGH1.2 will have matching names under Board and Flash (Ex: Board: Falcon, Flash: Falcon) and will be listed as Glitch2, however a RGH1 console will be listed as Glitch while still having a matching Board and Flash.
Install
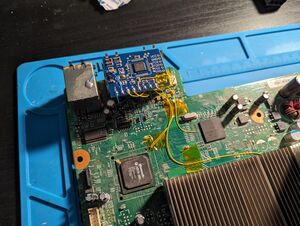
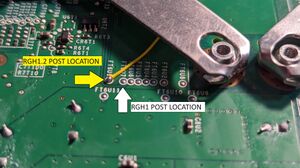
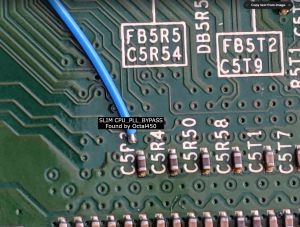
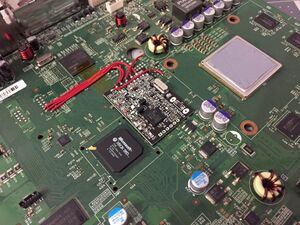
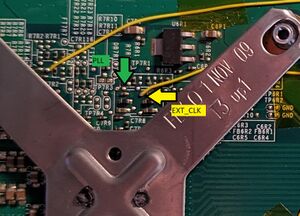
RGH1.2 and RGH1 utilize a glitch chip, use PLL slow-down, and will have a nearly identical install on Phats, but will use different connections for POST. The install may have varying points for RST and STBY_CLK, but the two constants will be PLL and POST. RGH1 is not possible on Slim consoles, so if your Slim has a glitch chip and uses PLL you have a RGH1.2 install.
Summary:
Phat + Glitch2 + PLL = RGH1.2
Phat + Glitch + PLL = RGH1
Slim + Glitch2 + PLL = RGH1.2
JRunner Settings
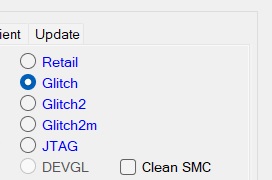
To build/update a NAND image with RGH1, use these settings in JRunner:
To build/update a NAND image with RGH1.2, use these settings in JRunner:
S-RGH / RGH2
Dashlaunch
S-RGH and RGH2 will appear the same as RGH1.2 in Dashlaunch, with a matching Board/Flash and Glitch2. Please reference the example image in the RGH1.2 guide.
Install
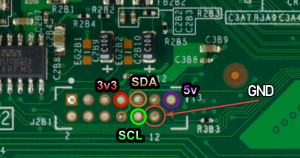
While S-RGH and RGH2 will match the details of RGH1.2 in Dashlaunch, the installs are vastly different. RGH2 and S-RGH use i2C slowdown and can be quickly identified by the glitch chip connections going to SDA and SCL on the J2B1 header on Phats, and the J2C3 header on Slims. S-RGH and RGH2 are technically the same install, but S-RGH utilizes SMC Speed-Up (SMC+).
JRunner Settings
To build/update a NAND image with RGH2 or S-RGH, use these settings in JRunner:
EXT_CLK
Dashlaunch
EXT_CLK can only be preformed on Xenon and Zephyr motherboards. The information for EXT_CLK will appear the same as RGH1.2/S-RGH/RGH2 in Dashlaunch with Board/Flash matching and Flash as Glitch2.
Install
An EXT_CLK install will appear nearly identical to a RGH1.2 install, but instead of using PLL it will use EXT_CLK. If your console has a glitch chip, is a Xenon or Zephyr, and is using the EXT_CLK point then you have a EXT_CLK install.
JRunner Settings
To build/update a NAND image with EXT_CLK, use these settings in JRunner:
WARNING: Leave SMC+ unchecked if you have a Xenon motherboard.
JTAG / R-JTAG / R-JTOP
Dashlaunch
A console with a JTAG install will be the most uncommon install we cover in this guide. A JTAG install requires a phat console on dashboard 7371 or lower and an unpatched CB, and does not use a glitch chip. A R-JTAG or R-JTOP install uses a glitch chip and RGH to re-enable the JTAG exploit on phat consoles with a dashboard higher than 7371. You can identify if you have a JTAG/R-JTAG/R-JTOP console if Dashlaunch has JTAG listed as the Type.
Install
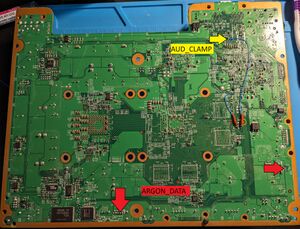
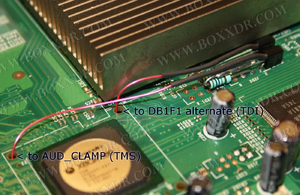
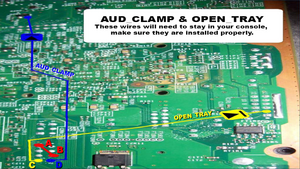
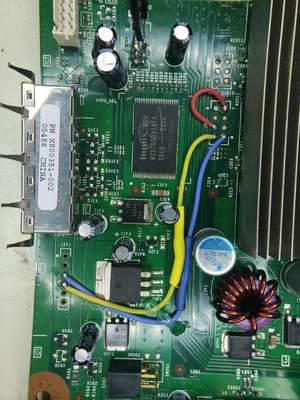
There are 2 different types of JTAG installs, ARGON_DATA and AUD_CLAMP. If you have a Xenon motherboard, it will be ARGON_DATA. Falcon, Zephyr, and Jasper motherboards can use both ARGON_DATA and AUD_CLAMP. On these motherboards your install type can be identified by where your J2D2.2 connection is going. AUD_CLAMP also has 3 different variations; AUD_CLAMP, Boxxdr, and Open Tray.
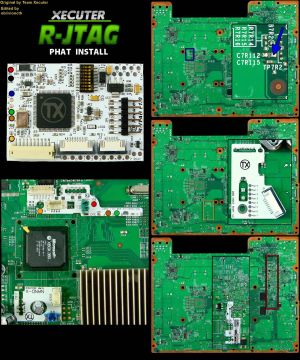
A R-JTAG or R-JTOP install will have a JTAG install on the motherboard, and will show as JTAG in Dashlaunch, but will also have a glitch chip in place.
JRunner Settings
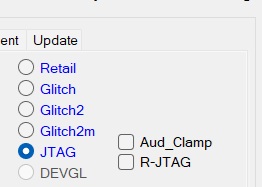
To build/update a NAND image with JTAG ARGON_DATA, use these settings in JRunner:
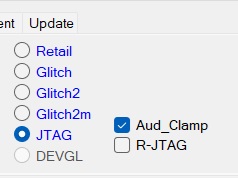
To build/update a NAND image with JTAG AUD_CLAMP, use these settings in JRunner:
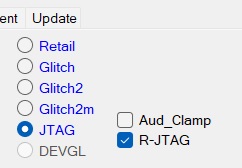
To build/update a NAND image with R-JTAG or R-JTOP, use these settings in JRunner:
WARNING: Confirm if you have an AUD_CLAMP or ARGON_DATA install with your R-JTAG/JTOP install. If your install is AUD_CLAMP, ensure you check the box for it along with the box for R-JTAG.
