WiiU:WUP Installer GX2: Difference between revisions
mNo edit summary |
m (Text replacement - "Category:WiiU" to "Category:Wii U") |
||
| Line 21: | Line 21: | ||
If you get error code `199-9999` when trying to run a newly installed title, that means you are not running custom firmware/a Sig Patch. You have to use either of these to run titles installed using WUP Installer GX2. | If you get error code `199-9999` when trying to run a newly installed title, that means you are not running custom firmware/a Sig Patch. You have to use either of these to run titles installed using WUP Installer GX2. | ||
[[Category: | [[Category:Wii U]] | ||
Latest revision as of 22:56, 4 September 2024
WUP Installer GX2 is a homebrew application developed by djskaul for the Wii U. Named after the GX2 graphics API that it uses for graphics, its main use is to install "titles" to the Wii U system memory; you have to use Custom Firmware to do so. This application can be downloaded here.
Installation
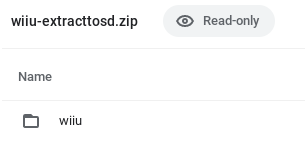
You can install WUP Installer GX2 as you would any other Wii U homebrew application by copying the "wiiu" folder into the root of your storage device, allowing it to merge files. It can also be downloaded and installed via the Homebrew App Store.
Installation of "Titles"
"Titles" are the apps that show up on the Wii U system menu. Using WUP Installer GX2, you can install more of these. You can even install WUP Installer GX2 as a title. Titles are in a format that make them unique. They come in varying amounts of .app and .h3 files depending on how big your app is in file size; they also contain a .tik file, a .cert file, and a .tmd file, all named "title". All of these files are needed to install a given title. To install a title:
- Place the files in the
/install/[name of your app]folder on the root of your storage device. Keep in mind that you do need different folders for each app, if you have multiple that you desire to install. - Run WUP Installer GX2. On the main menu, you should see the name(s) of the folder(s) you put your title(s) in.
- Select the folder (or select multiple at once, if you want to install multiple titles) and then click "Install". There will be a prompt asking you whether you want to install your title(s) to the NAND storage or your USB storage device. Choose whichever works best for you. Your title(s) will then install.
- After the process is done, exit back to the Wii U Menu to see (a) new title(s) on your screen.
Notes
If you get error code 199-9999 when trying to run a newly installed title, that means you are not running custom firmware/a Sig Patch. You have to use either of these to run titles installed using WUP Installer GX2.
