Comparison of Power Supplies: Difference between revisions
(Added 3DO information.) |
|||
| (135 intermediate revisions by 8 users not shown) | |||
| Line 1: | Line 1: | ||
Retro gaming has seen a resurgence in popularity in recent years, with gamers increasingly seeking out original consoles to play classic games on. However, one common issue that arises with these consoles is the availability and reliability of their power supplies. Original equipment manufacturer (OEM) power supplies are often no longer in production, making them scarce and expensive. This has led many gamers to turn to aftermarket power supplies, which can vary greatly in terms of performance and specifications. This guide aims to provide an overview of the power supply requirements and specifications for various retro consoles, and to offer advice on choosing aftermarket power supplies that are as close as possible to the original equipment. | |||
Specifications should be confirmed by a member of wiki community, or a trustworthy source (See "Confirmed By" column). | |||
<gallery> | |||
Power_brick.jpg | |||
PS1_PSU.jpg | |||
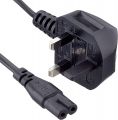
Figure_8_cable.jpg | |||
</gallery> | |||
==Explanation of Terms== | ==Explanation of Terms== | ||
An asterisk symbol (`*`) beside a console's name means that a Triad brand replacement power supply is listed by Firebrandx and/or Castlemania Games for this console. See the [[AV:Triad Power Supplies|Triad Power Supplies]] page for more information. | ''' ''<span style="font-size: larger;">Console:</span>'' ''' | ||
The name of the gaming console can be found in this column. An asterisk symbol (`*`) beside a console's name means that a Triad brand replacement power supply is listed by Firebrandx and/or Castlemania Games for this console. See the [[AV:Triad Power Supplies|Triad Power Supplies]] page for more information. | |||
''' ''<span style="font-size: larger;">Voltage:</span>'' ''' | |||
A good analogy for “output voltage” (measured in "Volts", symbol: V) might be water flowing through a hose. Just like how the pressure of the water determines how fast water flows through the hose, the “output voltage” of a power supply determines how much electrical current can flow through a device. If the output voltage is too low, the console may not work properly, just like how a low-pressure hose may not be able to wash away dirt effectively. On the other hand, if the output voltage is too high, it may damage the console, just like how a high-pressure hose can damage delicate plants. The output voltage on the power supply must be within a specified range for the console to function correctly. | |||
Generally speaking, the "Voltage" figure on the replacement power supply should match the specs of the OEM unit (see tables below) as closely as possible. There will be exceptions to this rule, and they will be highlighted in the "Notes" column. | |||
''' ''<span style="font-size: larger;">Amps:</span>'' ''' | |||
Amperage, which is measured in amps (A) or milliamps (mA), refers to the amount of potential electrical current that can be supplied by a power supply. To go back to the water pipe analogy, the amperage is like the width of the pipe, and determines how much water (electricity) can flow through at once. A higher amperage figure means that more current can flow, which is important for powering consoles or devices that require more energy. | |||
It’s important to choose a power supply with enough amperage for your device – the console will only draw as much current as needed, so the A (or mA) figure on the replacement power supply can be higher than what the console requires (see below). However, the A/mA figure should not be lower than what the console requires, or else the power supply may overheat or even damage the console. | |||
The figures below are taken from the console’s OEM power supply, and do not account for additional power draw caused by various modifications, flashcart devices, wireless controllers or similar after-market additions. | |||
''' ''<span style="font-size: larger;">Polarity:</span>'' ''' | |||
Polarity refers to the orientation of the positive and negative voltage in the power supply; kind of like the direction of traffic on a road. Just as traffic moves in one direction on a one-way street and in two directions on a two-way street, power also flows in a specific direction depending on the polarity. | |||
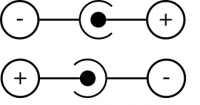
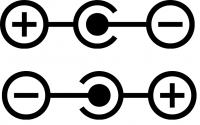
There are two types of polarities: positive center polarity (C+) and negative center polarity (C-). They can be distinguished by the symbols which can be found, usually either on the power brick, or on the plug. | |||
In the same way that cars going the wrong way on a one-way street can cause an accident, connecting a power supply with the wrong polarity can damage your console. To avoid damage to the console, the user should inspect the symbol on their power supply and ensure that it [https://itp.nyu.edu/physcomp/lessons/electronics/understanding-dc-power-supplies/ polarity] matches the polarity of the corresponding console (see table below). | |||
<div class="white-background"> [[File:Centre_positive_symbol.png|200px]] </div> | |||
''Examples of a Centre-positive symbol'' | |||
<div class="white-background"> [[File:Centre_negative_symbol.png|200px]] </div> | |||
''Examples of a Centre-negative symbol'' | |||
Note that centre-positive and centre-negative diagrams are differentiated from each other not by the left-to-right sequence (as seen above, either polarity can be displayed from left to right), but by which sign (positive + or negative -) is directly connected to the centre circle. The central circle's direct association with the plus or minus sign indicates whether the central pin of the connector carries a positive or negative charge, respectively. | |||
''' ''<span style="font-size: larger;">Avg Power Draw:</span>'' ''' | |||
Average power supply, which is measured in watts (W), can be obtained using the formula W = V x A (watts = volts x amps) to calculate the instantaneous power draw of a console at any given moment. However, this formula may not give an accurate representation of the console's average power draw over time as power consumption can vary depending on the device's activities and usage patterns. For example, a gaming console may consume more power while running a graphics-intensive game than when it's in standby mode. | |||
Therefore, by looking at the average wattage drawn by a console over time, obtained from either manufacturer-provided statistics or direct measurement using a device such as a "[http://www.p3international.com/products/p4400.html Kill A Watt]," users can better estimate the console's actual power consumption. This article's columns display the wattage drawn by the console over time, including when powered on and running a game, when powered off, and (if applicable) when in standby or sleep mode, using only measurements taken with the original power supply. | |||
''' ''<span style="font-size: larger;">Original PN:</span>'' ''' | |||
The OEM power supply for a given console will have a part number printed on it. Therefore, if one console had several different models of power supply produced for it during its lifetime, the manufacturer can differentiate between the different models (as each model may have different specifications such as the output voltage, amperage or plug size). Customers can also use the part number to find a replacement power supply online or by contacting the manufacturer directly. | |||
The part | The numbers in the "Original PN" column refer to the part numbers for the original stock power supply for a given console. | ||
'''''Replacement PN:''''' | ''' ''<span style="font-size: larger;">Replacement PN:</span>'' ''' | ||
Gamers may consider getting a third-party power supply for their console in a few situations. Firstly, if the original power supply is damaged or lost and needs to be replaced, a third-party power supply may be a more affordable option than purchasing a new original power supply from the manufacturer. | |||
Secondly, some customers may prefer to use a third-party power supply that has additional features or specifications that the original power supply does not have. For example, a third-party power supply may have a longer cord, a higher wattage rating, or additional surge protection. | |||
'' | It's important to note that using a third-party power supply may void the console's warranty and may also carry the risk of damaging the console if the power supply is not of good quality or if it is not compatible with the console. Customers should do their research to ensure they are purchasing a reputable and compatible third-party power supply. Triad brand replacement power supplies that are listed by Firebrandx and/or Castlemania Games are generally recognized in the retro-gaming community as being a quality option. If a recommended replacement power supply for a given console is available, the part number will be listed in this column. | ||
''' ''<span style="font-size: larger;">Connection:</span>'' ''' | |||
In the context of retro gaming, a "connector" is the physical interface between the power supply and the console it is powering. It typically has a plug on one end that attaches to the power supply and a receptible (or a "jack") on the other end that receives the plug and provides power to the device. Connectors come in various shapes, sizes, and types - the main reason that console manufacturers use different connector types and barrel sizes is due to differences in power requirements, physical space limitations, and proprietary design choices. Console manufacturers may use proprietary designs for their power connectors in order to maintain control over the distribution of power supplies for their consoles. This can help ensure compatibility and prevent third-party companies from producing low-quality or unsafe power supplies that could damage the console or harm users. | |||
<div class="white-background"> [[File:1396280892.png|200px]] </div> | |||
'''''Notes:''''' | ''' ''<span style="font-size: larger;">Power Supply:</span>'' ''' | ||
Broadly speaking, there are two types of power supply: Internal and External. | |||
"External" (for example the Atari 2600) refers to power supplies with a "black power brick" (i.e. an AC adapter) attached to the cable. The "brick" is a device that converts the "AC power" from the wall outlet and converts it into the right kind of "DC power" that the console needs to work. It keeps the console safe from any electrical issues that might happen and ensure it gets the right amount of power to work properly. The reason that the power brick is often a separate device (rather than being built into the console itself) is because different regions of the world use different voltages and plug types for their wall outlets. The power brick is designed to work with the specific region where the console is being used, to ensure it doesn't get damaged. | |||
<div class="white-background"> [[File:Turbografx16_power_supply.jpg|200px]] </div> | |||
Sometimes, the console will have no visible power prick (for example, the Dreamcast or the PlayStation). In these cases, it is likely that the console has an "Internal" power supply board, inside the console, that connects directly to its motherboard. The internal power board performs basically the same function as an external power brick, which is to convert the incoming AC voltage from a wall outlet to the DC voltage required by the console. Many gaming consoles with internal power supplies will use a standard figure 8 cable to connect to the wall outlet, but this is not always the case; a guide to common connectors can be found [https://www.lindy.co.uk/iec-connector-cable-guide-i472 here] and on the IEC 60320 [https://en.m.wikipedia.org/wiki/IEC_60320 Wikipedia page]. The user should also ensure that the console's internal power supply is rated for the AC coming out of their wall. If your console's internal power supply does not match your country's AC voltage (for example, a North American gamer using a European Dreamcast), then step-up/step-down transformers to go up/down in voltage for the target device may be a good option. | |||
<div class="white-background"> [[File:DreamPort.jpg|200px]] </div> | |||
''' ''<span style="font-size: larger;">Notes:</span>'' ''' | |||
Any exceptions to the above guidelines, or idiosyncrasies related to an individual console, should be laid out in the "Notes" column. For example, there are exceptions to the rule that voltage on a replacement should be as close as possible to the voltage on the original power supply. The Sega Genesis for instance, uses a 7805 voltage regulator to step the input down from 9V to 5V. The 7805 expects a minimum voltage of 6.5V - the significance of this is that a Genesis 2 (whose original power supply outputs 10V) will work fine with a 9V power supply. | Any exceptions to the above guidelines, or idiosyncrasies related to an individual console, should be laid out in the "Notes" column. For example, there are exceptions to the rule that voltage on a replacement should be as close as possible to the voltage on the original power supply. The Sega Genesis for instance, uses a 7805 voltage regulator to step the input down from 9V to 5V. The 7805 expects a minimum voltage of 6.5V - the significance of this is that a Genesis 2 (whose original power supply outputs 10V) will work fine with a 9V power supply. | ||
Readers may also note that many early first-generation gaming consoles, such as the Magnavox Odyssey and the first versions of the Atari Home Pong, used batteries instead of AC adapters. This was because they were designed to be portable and used with a TV. At the time, AC adapters were typically large, heavy, and expensive, and would have made the consoles much less portable. Batteries, on the other hand, were readily available and allowed the consoles to be used anywhere without needing to be plugged into a wall outlet. Additionally, the relatively simple electronics of these early consoles required much less power than modern consoles, so batteries could provide sufficient power for extended periods of play. | |||
==First generation of consoles== | ==First generation of consoles== | ||
| Line 84: | Line 116: | ||
!align="left"| Notes | !align="left"| Notes | ||
!align="left"| Confirmed by | !align="left"| Confirmed by | ||
!align="left"| | !align="left"| Image | ||
|- | |- | ||
| [[Odyssey:Odyssey Mods Wiki|Magnavox Odyssey]] | | [[Odyssey:Odyssey Mods Wiki|Magnavox Odyssey]] | ||
|align="left"| Output: 9V DC | |align="left"| Output: 9V DC | ||
|align="left"| | |align="left"| 100 mA | ||
|align="left"| Tip positive | |align="left"| Tip positive | ||
|? | |? | ||
|? | |? | ||
|align="left"| | |align="left"| 1A9179 | ||
|align="left"| ? | |align="left"| ? | ||
|align="left"| 2.5 mm TS jack | |align="left"| 2.5 mm TS jack | ||
|align="left"| | |align="left"| External (or six internal "C" batteries) | ||
|align="left"| Odyssey can be powered by six "C" cell batteries, or an Atari 2600 power adapter with a 3.5-to-2.5 mm tip adapter | |align="left"| Odyssey can be powered by six "C" cell batteries, or an Atari 2600 power adapter with a 3.5-to-2.5 mm tip adapter. 400mA recommended for replacement PSU. | ||
|align="left"| | |align="left"| [[User:TheRealOC|TheRealOC]] | ||
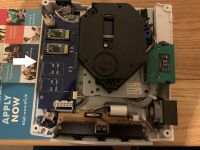
|align="right"|[[File:Odyssey batteries.jpg|200px]] | |align="right"| [[File:Odyssey batteries.jpg|200px]] | ||
|- | |- | ||
| [[Odyssey:Odyssey_Series_Wiki|Magnavox Odyssey 100]] | | [[Odyssey:Odyssey_Series_Wiki|Magnavox Odyssey 100]] | ||
| Line 109: | Line 141: | ||
|align="left"| ? | |align="left"| ? | ||
|align="left"| 3.5 mm TS jack | |align="left"| 3.5 mm TS jack | ||
|align="left"| | |align="left"| External (or six internal "C" batteries) | ||
|align="left"| Console is powered by either six "C" batteries or a 9V AC adapter. | |align="left"| Console is powered by either six "C" batteries or a 9V AC adapter. | ||
|align="left"| | |align="left"| | ||
| Line 123: | Line 155: | ||
|align="left"| ? | |align="left"| ? | ||
|align="left"| ? | |align="left"| ? | ||
|align= | |align="left"| External (or six internal "C" batteries) | ||
|align="left"| Console is powered by either six "C" batteries or a 9 volt AC adapter. | |align="left"| Console is powered by either six "C" batteries or a 9 volt AC adapter. | ||
|align="left"| | |align="left"| | ||
| Line 134: | Line 166: | ||
|? | |? | ||
|? | |? | ||
|align="left"| AG 9004 BK | |||
|align="left"| ? | |align="left"| ? | ||
|align="left"| ? | |align="left"| ? | ||
|align="left"| | |align="left"| External (or six internal "C" batteries) | ||
|align="left"| Console is powered by either six "C" batteries or a 9 volt AC adapter. | |align="left"| Console is powered by either six "C" batteries or a 9 volt AC adapter. | ||
|align="left"| | |align="left"| | ||
| Line 148: | Line 180: | ||
|? | |? | ||
|? | |? | ||
|align="left"| AG 9004 BK | |||
|align="left"| ? | |align="left"| ? | ||
|align="left"| ? | |align="left"| ? | ||
|align="left"| | |align="left"| External (or six internal "C" batteries) | ||
|align="left"| Console is powered by either six "C" batteries or a 9 volt AC adapter. | |align="left"| Console is powered by either six "C" batteries or a 9 volt AC adapter. | ||
|align="left"| | |align="left"| | ||
| Line 165: | Line 197: | ||
|align="left"| ? | |align="left"| ? | ||
|align="left"| ? | |align="left"| ? | ||
|align="left"| | |align="left"| External (or six internal "C" batteries) | ||
|align="left"| Console is powered by either six "C" batteries or a 9 volt AC adapter. | |align="left"| Console is powered by either six "C" batteries or a 9 volt AC adapter. | ||
|align="left"| | |align="left"| | ||
| Line 181: | Line 213: | ||
|align="left"| Internal/Chassis-mounted | |align="left"| Internal/Chassis-mounted | ||
|align="left"| The Odyssey 4305 is a 19” television (based on the chassis of the Magnavox T991 television) but with a built-in Odyssey. The device uses a chassis-mounted isolation transformer with no external brick (standard plug coming out the back). | |align="left"| The Odyssey 4305 is a 19” television (based on the chassis of the Magnavox T991 television) but with a built-in Odyssey. The device uses a chassis-mounted isolation transformer with no external brick (standard plug coming out the back). | ||
|align="left"| | |align="left"| [[User:TheRealOC|TheRealOC]] | ||
|align="right"|[[File: Rear of Magnavox Odyssey 4305 (4-4).jpeg|200px]] | |align="right"|[[File: Rear of Magnavox Odyssey 4305 (4-4).jpeg|200px]] | ||
|- | |- | ||
| Line 193: | Line 225: | ||
|align="left"| ? | |align="left"| ? | ||
|align="left"| ? | |align="left"| ? | ||
|align="left"| | |align="left"| External (or six internal "C" batteries) | ||
|align="left"| Console is powered by either six "C" batteries or a 9 volt AC adapter. | |align="left"| Console is powered by either six "C" batteries or a 9 volt AC adapter. | ||
|align="left"| | |align="left"| | ||
| Line 207: | Line 239: | ||
|align="left"| ? | |align="left"| ? | ||
|align="left"| ? | |align="left"| ? | ||
|align="left"| | |align="left"| External (or six internal "C" batteries) | ||
|align="left"| Console is powered by either six "C" batteries or a 9 volt AC adapter. | |align="left"| Console is powered by either six "C" batteries or a 9 volt AC adapter. | ||
|align="left"| | |align="left"| | ||
| Line 218: | Line 250: | ||
|? | |? | ||
|? | |? | ||
|align="left"| AG 9004 BK | |||
|align="left"| ? | |align="left"| ? | ||
|align="left"| ? | |align="left"| ? | ||
|align="left"| | |align="left"| External | ||
|align="left"| Unlike most Odyssey models, the AC adapter is necessary as the console does not use batteries. | |align="left"| Unlike most Odyssey models, the AC adapter is necessary as the console does not use batteries. | ||
|align="left"| | |align="left"| | ||
| Line 249: | Line 281: | ||
|align="left"| ? | |align="left"| ? | ||
|align="left"| ? | |align="left"| ? | ||
|align="left"| | |align="left"| External | ||
|align="left"| Unlike most Odyssey models, the AC adapter is necessary as the console does not use batteries. | |align="left"| Unlike most Odyssey models, the AC adapter is necessary as the console does not use batteries. | ||
|align="left"| | |align="left"| | ||
| Line 263: | Line 295: | ||
|align="left"| ? | |align="left"| ? | ||
|align="left"| ? | |align="left"| ? | ||
|align="left"| | |align="left"| External | ||
|align="left"| Unlike most Odyssey models, the AC adapter is necessary as the console does not use batteries. | |align="left"| Unlike most Odyssey models, the AC adapter is necessary as the console does not use batteries. | ||
|align="left"| | |align="left"| | ||
| Line 277: | Line 309: | ||
|align="left"| ? | |align="left"| ? | ||
|align="left"| ? | |align="left"| ? | ||
|align="left"| | |align="left"| Internal (batteries) | ||
|align="left"| Console is completely wireless; powered by four D size batteries. | |align="left"| Console is completely wireless; powered by four D size batteries. | ||
|align="left"| | |align="left"| | ||
| Line 539: | Line 571: | ||
!align="left"| Notes | !align="left"| Notes | ||
!align="left"| Confirmed by | !align="left"| Confirmed by | ||
!align="left"| | !align="left"| Image | ||
|- | |- | ||
| [[Atari_2600:Atari 2600 Mods Wiki|Atari 2600]] | | [[Atari_2600:Atari 2600 Mods Wiki|Atari 2600]] | ||
| Line 552: | Line 584: | ||
|align="left"| External | |align="left"| External | ||
|align="left"| Different styles of this AC adapter exist, but all have the same specs and part number | |align="left"| Different styles of this AC adapter exist, but all have the same specs and part number | ||
|align="left"| | |align="left"| [[User:ApolloBoy|ApolloBoy]] | ||
|align="right"|[[File:Atari-2600-power-supply.jpeg|200px]] | |align="right"|[[File:Atari-2600-power-supply.jpeg|200px]] | ||
|- | |- | ||
| [[Atari 2600:Atari 2600 Mods Wiki|Sears Video Arcade II/Atari 2800]] | | [[Atari 2600:Atari 2600 Mods Wiki|Sears Video Arcade II/Atari 2800]] | ||
|align="left"| 9V AC | |align="left"| 9V AC | ||
|align="left"| 750 mA | |align="left"| 750 mA (US), 1 A (JP) | ||
|? | |? | ||
|? | |? | ||
|align="left"| N/A | |align="left"| N/A | ||
|align="left"| C017539 | |align="left"| C017539 (US), N/A (JP) | ||
|align="left"| WSU090-1300-R | |align="left"| WSU090-1300-R | ||
|align="left"| 5.5 mm x 2.1 mm barrel jack | |align="left"| 5.5 mm x 2.1 mm barrel jack | ||
|align="left"| External | |align="left"| External | ||
|align="left"| The SVA II/2800 will accept a DC power supply so long as the voltage and current are within spec | |align="left"| The SVA II/2800 will accept a DC power supply so long as the voltage and current are within spec; JP 2800 supply outputs higher voltage on 120V and is not recommended for use outside Japan | ||
|align="left"| | |align="left"| [[User:ApolloBoy|ApolloBoy]] | ||
|align="right"| | |align="right"| | ||
|- | |- | ||
| Line 580: | Line 612: | ||
|align="left"| External | |align="left"| External | ||
|align="left"| Multiple revisions of the Odyssey 2 AC adapter exist, each with slightly different voltage and current ratings | |align="left"| Multiple revisions of the Odyssey 2 AC adapter exist, each with slightly different voltage and current ratings | ||
|align="left"| | |align="left"| [[User:ApolloBoy|ApolloBoy]] | ||
|align="left"| | |align="left"| | ||
|- | |- | ||
| Line 597: | Line 629: | ||
|align="right"|[[File:Philips Videopac G7000 power supply.jpeg|200px]] | |align="right"|[[File:Philips Videopac G7000 power supply.jpeg|200px]] | ||
|- | |- | ||
| Mattel Intellivision | | [[Intellivision:Intellivision_Mods_Wiki|Mattel Intellivision]] | ||
|align="left"| Input: 120V AC; Output: 5V DC, 12V DC, 16V DC (unregulated), -2.1V DC | |align="left"| Input: 120V AC; Output: 5V DC, 12V DC, 16V DC (unregulated), -2.1V DC | ||
|align="left"| ? | |align="left"| ? | ||
| Line 608: | Line 640: | ||
|align="left"| Internal | |align="left"| Internal | ||
|align="left"| The ribbon cable that connects the power supply to the motherboard is ''extremely'' fragile, be very careful! | |align="left"| The ribbon cable that connects the power supply to the motherboard is ''extremely'' fragile, be very careful! | ||
|align="left"| | |align="left"| [[User:ApolloBoy|ApolloBoy]] | ||
|align="left"| | |align="left"| | ||
|- | |- | ||
| Line 622: | Line 654: | ||
|align="left"| External | |align="left"| External | ||
|align="left"| Same for the Cassette Vision Jr. | |align="left"| Same for the Cassette Vision Jr. | ||
|align="left"| | |align="left"| [[User:ApolloBoy|ApolloBoy]] | ||
|align="left"| | |align="left"| | ||
|- | |- | ||
| Mattel Intellivision II | | [[Intellivision:Intellivision_Mods_Wiki|Mattel Intellivision II]] | ||
|align="left"| 16.7V AC | |align="left"| 16.7V AC | ||
|align="left"| 1 A | |align="left"| 1 A | ||
| Line 636: | Line 668: | ||
|align="left"| External | |align="left"| External | ||
|align="left"| A variation exists with slightly lower output voltage and current ratings (16.2V AC and 955 mA) | |align="left"| A variation exists with slightly lower output voltage and current ratings (16.2V AC and 955 mA) | ||
|align="left"| | |align="left"| [[User:ApolloBoy|ApolloBoy]] | ||
|align="left"| | |align="left"| | ||
|- | |- | ||
| Line 650: | Line 682: | ||
|align="left"| External | |align="left"| External | ||
|align="left"| | |align="left"| | ||
|align="left"| | |align="left"| [[User:ApolloBoy|ApolloBoy]] | ||
|align="right"|[[File:Colecovisionpsu.png|200px]] | |align="right"|[[File:Colecovisionpsu.png|200px]] | ||
|- | |- | ||
| Line 656: | Line 688: | ||
|align="left"| 11.5V DC | |align="left"| 11.5V DC | ||
|align="left"| 1.95 A | |align="left"| 1.95 A | ||
| | |~13 W | ||
| | |2.3 W | ||
|align="left"| Tip positive | |align="left"| Tip positive | ||
|align="left"| C018187 | |align="left"| C018187 | ||
| Line 664: | Line 696: | ||
|align="left"| External | |align="left"| External | ||
|align="left"| The four-port Atari 5200 had an interesting "one cable" design where both the RF signal and the power ran through one coaxial cable which was permanently attached to the system. A power mod is available that allows the console to use a conventional switch box or direct RF adapter. | |align="left"| The four-port Atari 5200 had an interesting "one cable" design where both the RF signal and the power ran through one coaxial cable which was permanently attached to the system. A power mod is available that allows the console to use a conventional switch box or direct RF adapter. | ||
|align="left"| | |align="left"| [[User:ApolloBoy|ApolloBoy]] | ||
|align="right"|[[File:52004portpsu.png|200px]] | |align="right"|[[File:52004portpsu.png|200px]] | ||
|- | |- | ||
| Line 678: | Line 710: | ||
|align="left"| External | |align="left"| External | ||
|align="left"| | |align="left"| | ||
|align="left"| | |align="left"| [[User:ApolloBoy|ApolloBoy]] | ||
|align="left"| | |align="left"| | ||
|- | |- | ||
| Line 692: | Line 724: | ||
|align="left"| Internal | |align="left"| Internal | ||
|align="left"| | |align="left"| | ||
|align="left"| | |align="left"| [[User:ApolloBoy|ApolloBoy]] | ||
|align="right"|[[File:Vectrex rear view.jpeg|200px]] | |align="right"|[[File:Vectrex rear view.jpeg|200px]] | ||
| Line 714: | Line 746: | ||
!align="left"| Notes | !align="left"| Notes | ||
!align="left"| Confirmed by | !align="left"| Confirmed by | ||
!align="left"| | !align="left"| Image | ||
|- | |- | ||
| [[NES:NES Mods Wiki|Nintendo Entertainment System (US)]] * | | [[NES:NES Mods Wiki|Nintendo Entertainment System (US)]] * | ||
| Line 727: | Line 759: | ||
|align="left"| External | |align="left"| External | ||
|align="left"| The NES will accept a DC power supply so long as the voltage and current are within spec | |align="left"| The NES will accept a DC power supply so long as the voltage and current are within spec | ||
|align="left"| | |align="left"| [[User:ApolloBoy|ApolloBoy]] | ||
|align="right"| [[File:Nespsu.png|200px]] | |align="right"| [[File:Nespsu.png|200px]] | ||
|- | |- | ||
| Line 741: | Line 773: | ||
|align="left"| External | |align="left"| External | ||
|align="left"| The NES will accept a DC power supply so long as the voltage and current are within spec | |align="left"| The NES will accept a DC power supply so long as the voltage and current are within spec | ||
|align="left"| | |align="left"| [[User:ApolloBoy|ApolloBoy]] | ||
|align="left"| | |align="left"| | ||
|- | |- | ||
| Line 754: | Line 786: | ||
|align="left"| 5.5 x 2.1 mm barrel jack | |align="left"| 5.5 x 2.1 mm barrel jack | ||
|align="left"| External | |align="left"| External | ||
|align="left"| | |align="left"| PSU outputs higher voltage on 120V and is not recommended for use outside Japan | ||
|align="left"| | |align="left"| [[User:ApolloBoy|ApolloBoy]] | ||
|align="right"| [[File:Famicompsu.png|200px]] | |align="right"| [[File:Famicompsu.png|200px]] | ||
|- | |- | ||
| Line 768: | Line 800: | ||
|align="left"| 5.5 x 2.1 mm barrel jack | |align="left"| 5.5 x 2.1 mm barrel jack | ||
|align="left"| External | |align="left"| External | ||
|align="left"| | |align="left"| PSU outputs higher voltage on 120V and is not recommended for use outside Japan | ||
|align="left"| | |align="left"| [[User:ApolloBoy|ApolloBoy]] | ||
|align="right"| [[File:Famicompsu.png|200px]] | |align="right"| [[File:Famicompsu.png|200px]] | ||
|- | |- | ||
| Line 783: | Line 815: | ||
|align="left"| External or six internal C-cell batteries | |align="left"| External or six internal C-cell batteries | ||
|align="left"| With a splitter it should be possible to run both a Famicom and Disk System from a single AC adapter without batteries; the WSU-090-2000-R is recommended for this | |align="left"| With a splitter it should be possible to run both a Famicom and Disk System from a single AC adapter without batteries; the WSU-090-2000-R is recommended for this | ||
|align="left"| | |align="left"| [[User:ApolloBoy|ApolloBoy]] | ||
|align="left"| | |align="left"| | ||
|- | |- | ||
| Line 796: | Line 828: | ||
|align="left"| 5.5 x 2.5 mm barrel jack | |align="left"| 5.5 x 2.5 mm barrel jack | ||
|align="left"| External | |align="left"| External | ||
|align="left"| Please note that the Twin Famicom's power circuitry is very sensitive to input voltage, anything higher than 7.6V causes the power transistor to run very hot | |align="left"| Please note that the Twin Famicom's power circuitry is very sensitive to input voltage, anything higher than 7.6V causes the power transistor to run very hot; PSU outputs higher voltage on 120V and is not recommended for use outside Japan | ||
|align="left"| | |align="left"| [[User:ApolloBoy|ApolloBoy]] | ||
|align="left"| | |align="left"| | ||
|- | |- | ||
| Line 810: | Line 842: | ||
|align="left"| 5.5 x 2.1 mm barrel jack | |align="left"| 5.5 x 2.1 mm barrel jack | ||
|align="left"| External | |align="left"| External | ||
|align="left"| | |align="left"| PSU outputs higher voltage on 120V and is not recommended for use outside Japan | ||
|align="left"| | |align="left"| [[User:ApolloBoy|ApolloBoy]] | ||
|align="left"| | |align="left"| | ||
|- | |- | ||
| Line 824: | Line 856: | ||
|align="left"| 5.5 x 2.1 mm barrel jack | |align="left"| 5.5 x 2.1 mm barrel jack | ||
|align="left"| External | |align="left"| External | ||
|align="left"| | |align="left"| PSU outputs higher voltage on 120V and is not recommended for use outside Japan | ||
|align="left"| | |align="left"| [[User:ApolloBoy|ApolloBoy]] | ||
|align="left"| | |align="left"| | ||
|- | |- | ||
| Line 838: | Line 870: | ||
|align="left"| 5.5 x 2.1 mm barrel jack | |align="left"| 5.5 x 2.1 mm barrel jack | ||
|align="left"| External | |align="left"| External | ||
|align="left"| | |align="left"| PSU outputs higher voltage on 120V and is not recommended for use outside Japan | ||
|align="left"| | |align="left"| [[User:ApolloBoy|ApolloBoy]] | ||
|align="left"| | |align="left"| | ||
|- | |- | ||
| Line 853: | Line 885: | ||
|align="left"| External | |align="left"| External | ||
|align="left"| Different styles of this AC adapter exist, but all have the same specs and part number | |align="left"| Different styles of this AC adapter exist, but all have the same specs and part number | ||
|align="left"| | |align="left"| [[User:ApolloBoy|ApolloBoy]] | ||
|align="left"| | |align="left"| | ||
|- | |- | ||
| Line 866: | Line 898: | ||
|align="left"| 5.5 x 2.1 mm barrel jack | |align="left"| 5.5 x 2.1 mm barrel jack | ||
|align="left"| External | |align="left"| External | ||
|align="left"| Different styles of this AC adapter exist, but all have the same specs and part number | |align="left"| Different styles of this AC adapter exist, but all have the same specs and part number; PSU outputs higher voltage on 120V and is not recommended for use outside Japan | ||
|align="left"| | |align="left"| [[User:ApolloBoy|ApolloBoy]] | ||
|align="left"| | |align="left"| | ||
|- | |- | ||
| Line 881: | Line 913: | ||
|align="left"| External | |align="left"| External | ||
|align="left"| Different styles of this AC adapter exist, but all have the same specs and part number | |align="left"| Different styles of this AC adapter exist, but all have the same specs and part number | ||
|align="left"| | |align="left"| [[User:ApolloBoy|ApolloBoy]] | ||
|align="right"| [[File:7800psu.png|200px]] | |align="right"| [[File:7800psu.png|200px]] | ||
|- | |- | ||
| Line 895: | Line 927: | ||
|align="left"| External | |align="left"| External | ||
|align="left"| | |align="left"| | ||
|align="left"| | |align="left"| [[User:ApolloBoy|ApolloBoy]] | ||
|align="right"| [[File:Pv1000psu.png|200px]] | |align="right"| [[File:Pv1000psu.png|200px]] | ||
|- | |- | ||
| Line 908: | Line 940: | ||
|align="left"| 5.5 x 2.1 mm barrel jack | |align="left"| 5.5 x 2.1 mm barrel jack | ||
|align="left"| External | |align="left"| External | ||
|align="left"| | |align="left"| PSU outputs higher voltage on 120V and is not recommended for use outside Japan | ||
|align="left"| | |align="left"| [[User:ApolloBoy|ApolloBoy]] | ||
|align="left"| | |align="left"| | ||
|- | |- | ||
| Line 923: | Line 955: | ||
|align="left"| External | |align="left"| External | ||
|align="left"| | |align="left"| | ||
|align="left"| | |align="left"| [[User:ApolloBoy|ApolloBoy]] | ||
|align="left"| | |align="left"| | ||
| Line 945: | Line 977: | ||
!align="left"| Notes | !align="left"| Notes | ||
!align="left"| Confirmed by | !align="left"| Confirmed by | ||
!align="left"| | !align="left"| Image | ||
|- | |- | ||
| [[Lynx:Lynx_Mods_Wiki|Atari Lynx]] | | [[Lynx:Lynx_Mods_Wiki|Atari Lynx]] * | ||
|align="left"| 9V DC | |align="left"| 9V DC | ||
|align="left"| 1A | |align="left"| 1A | ||
| Line 954: | Line 986: | ||
|align="left"| Centre positive | |align="left"| Centre positive | ||
|align="left"| C103891-001 | |align="left"| C103891-001 | ||
|align="left"| | |align="left"| WSU090-1300 | ||
|align="left"| Barrel size 3.5mm x 1.35mm | |align="left"| Barrel size 3.5mm x 1.35mm | ||
|align="left"| External | |align="left"| External | ||
|align="left"| | |align="left"| Users need a [https://castlemaniagames.com/products/triad-power-supply-ac-dc-9v-1-3a 9V 1.3A center-positive TRIAD] with a 2.1mm or 2.5mm inner diameter barrel (depending on the adapter barrel they purchase), as well as a [https://www.amazon.com/COOLM-Female-1-35mm-Socket-Adapter/dp/B07FJLZGPF/?th=1 "5.5mm x 2.1mm Female to 3.5mm x 1.35mm Male" Plug Socket DC Power Adapter]. The console can also be powered by six AA batteries. | ||
|align="left"| [ | |align="left"| [[User:TheRealOC|TheRealOC]] | ||
|align="right"| [[File:Atari_lynx_power_supply.JPG|200px]] | |align="right"| [[File:Atari_lynx_power_supply.JPG|200px]] | ||
|- | |- | ||
| Line 972: | Line 1,004: | ||
|align="left"| External | |align="left"| External | ||
|align="left"| | |align="left"| | ||
|align="left"| | |align="left"| [[User:ApolloBoy|ApolloBoy]] | ||
|align="right"| [[File:Turbografx16 power supply.jpg|200px]] | |align="right"| [[File:Turbografx16 power supply.jpg|200px]] | ||
|- | |- | ||
| Line 986: | Line 1,018: | ||
|align="left"| External | |align="left"| External | ||
|align="left"| Same information also applies to both Core Grafx models and the PC Engine Shuttle | |align="left"| Same information also applies to both Core Grafx models and the PC Engine Shuttle | ||
|align="left"| | |align="left"| [[User:ApolloBoy|ApolloBoy]] | ||
|align="left"| | |align="left"| | ||
|- | |- | ||
| Line 1,000: | Line 1,032: | ||
|align="left"| External | |align="left"| External | ||
|align="left"| Note that this is for the IFU-30 interface; the CD player portion (CDR-30) uses the same AC adapter as the PC Engine console when used as a standalone CD player | |align="left"| Note that this is for the IFU-30 interface; the CD player portion (CDR-30) uses the same AC adapter as the PC Engine console when used as a standalone CD player | ||
|align="left"| | |align="left"| [[User:ApolloBoy|ApolloBoy]] | ||
|align="left"| | |align="left"| | ||
|- | |- | ||
| Line 1,014: | Line 1,046: | ||
|align="left"| External | |align="left"| External | ||
|align="left"| Note that this is for the dock; the CD player portion (HES-CDR-01) uses the same AC adapter as the TG-16 console when used as a standalone CD player. Also note that the TG-CD dock will not power up properly with anything less than 10V, and the CD player will not read discs when docked | |align="left"| Note that this is for the dock; the CD player portion (HES-CDR-01) uses the same AC adapter as the TG-16 console when used as a standalone CD player. Also note that the TG-CD dock will not power up properly with anything less than 10V, and the CD player will not read discs when docked | ||
|align="left"| | |align="left"| [[User:ApolloBoy|ApolloBoy]] | ||
|align="left"| | |align="left"| | ||
|- | |- | ||
| Line 1,028: | Line 1,060: | ||
|align="left"| External | |align="left"| External | ||
|align="left"| | |align="left"| | ||
|align="left"| | |align="left"| [[User:ApolloBoy|ApolloBoy]] | ||
|align="left"| | |align="left"| | ||
|- | |- | ||
| Line 1,042: | Line 1,074: | ||
|align="left"| External or six internal AA-cell batteries | |align="left"| External or six internal AA-cell batteries | ||
|align="left"| | |align="left"| | ||
|align="left"| | |align="left"| [[User:ApolloBoy|ApolloBoy]] | ||
|align="left"| | |align="left"| | ||
|- | |- | ||
| Line 1,056: | Line 1,088: | ||
|align="left"| External | |align="left"| External | ||
|align="left"| NEC also released an external battery pack for the Duo in Japan only | |align="left"| NEC also released an external battery pack for the Duo in Japan only | ||
|align="left"| | |align="left"| [[User:ApolloBoy|ApolloBoy]] | ||
|align="left"| | |align="left"| | ||
|- | |- | ||
| Line 1,070: | Line 1,102: | ||
|align="left"| External | |align="left"| External | ||
|align="left"| The Super CD-ROM2 also has a jumper cable which passes through power to the connected PC Engine console. This cable plugs into a 3.5 mm x 1.35 mm barrel jack on the Super CD and then into the power jack on the PC Engine. | |align="left"| The Super CD-ROM2 also has a jumper cable which passes through power to the connected PC Engine console. This cable plugs into a 3.5 mm x 1.35 mm barrel jack on the Super CD and then into the power jack on the PC Engine. | ||
|align="left"| | |align="left"| [[User:ApolloBoy|ApolloBoy]] | ||
|align="left"| | |align="left"| | ||
|- | |- | ||
| Line 1,084: | Line 1,116: | ||
|align="left"| External | |align="left"| External | ||
|align="left"| ? | |align="left"| ? | ||
|align="left"| | |align="left"| [[User:ApolloBoy|ApolloBoy]] | ||
|align="left"| | |align="left"| | ||
|- | |- | ||
| Line 1,098: | Line 1,130: | ||
|align="left"| External | |align="left"| External | ||
|align="left"| | |align="left"| | ||
|align="left"| | |align="left"| [[User:ApolloBoy|ApolloBoy]] | ||
|align="left"| | |align="left"| | ||
|- | |- | ||
| [[ | |[[CD-i:CD-i_Mods_Wiki|Philips CD-i]] | ||
| | |? | ||
| | |? | ||
|? | |||
|? | |? | ||
|? | |? | ||
|align="left"| Tip negative | |? | ||
|align="left"| MK-1602 | |[https://github.com/jeffqchen/Philips-CDi-450-Power-Adapter Open source option] | ||
|? | |||
|? | |||
| | |||
| | |||
| | |||
|- | |||
|Pioneer LaserActive | |||
|Input: 100V AC (JP), 120V AC (US) | |||
| ? | |||
|? | |||
|? | |||
|N/A, power cord is hardwired | |||
|N/A | |||
|N/A | |||
|N/A | |||
|Internal | |||
| | |||
| ? | |||
| | |||
|- | |||
| [[Genesis:Genesis Mods Wiki|Sega Genesis (model 1)]] * | |||
|align="left"| 9V DC | |||
|align="left"| 1.2 A | |||
|? | |||
|? | |||
|align="left"| Tip negative | |||
|align="left"| MK-1602 | |||
|align="left"| WSU090-1300-R | |align="left"| WSU090-1300-R | ||
|align="left"| 5.5 x 2.1 mm barrel jack | |align="left"| 5.5 x 2.1 mm barrel jack | ||
|align="left"| External | |align="left"| External | ||
|align="left"| | |align="left"| | ||
|align="left"| | |align="left"| [[User:ApolloBoy|ApolloBoy]] | ||
|align="left"| | |align="left"| | ||
|- | |- | ||
| Line 1,126: | Line 1,186: | ||
|align="left"| External | |align="left"| External | ||
|align="left"| | |align="left"| | ||
|align="left"| | |align="left"| [[User:ApolloBoy|ApolloBoy]] | ||
|align="left"| | |align="left"| | ||
|- | |- | ||
| Line 1,140: | Line 1,200: | ||
|align="left"| External | |align="left"| External | ||
|align="left"| | |align="left"| | ||
|align="left"| | |align="left"| [[User:ApolloBoy|ApolloBoy]] | ||
|align="left"| | |align="left"| | ||
|- | |- | ||
| Line 1,154: | Line 1,214: | ||
|align="left"| External | |align="left"| External | ||
|align="left"| | |align="left"| | ||
|align="left"| | |align="left"| [[User:ApolloBoy|ApolloBoy]] | ||
|align="left"| | |align="left"| | ||
|- | |- | ||
| Line 1,168: | Line 1,228: | ||
|align="left"| External | |align="left"| External | ||
|align="left"| ? | |align="left"| ? | ||
|align="left"| | |align="left"| [[User:ApolloBoy|ApolloBoy]] | ||
|align="left"| | |align="left"| | ||
|- | |- | ||
| Line 1,182: | Line 1,242: | ||
|align="left"| External or six AA-cell batteries via clip-on pack or rechargeable battery via clip-on pack | |align="left"| External or six AA-cell batteries via clip-on pack or rechargeable battery via clip-on pack | ||
|align="left"| ? | |align="left"| ? | ||
|align="left"| | |align="left"| [[User:ApolloBoy|ApolloBoy]] | ||
|align="left"| | |align="left"| | ||
|- | |- | ||
| Line 1,196: | Line 1,256: | ||
|align="left"| External | |align="left"| External | ||
|align="left"| Exactly the same as the model 2 Genesis/Mega Drive | |align="left"| Exactly the same as the model 2 Genesis/Mega Drive | ||
|align="left"| | |align="left"| [[User:ApolloBoy|ApolloBoy]] | ||
|align="left"| | |align="left"| | ||
|- | |- | ||
| [[Genesis:Genesis Mods Wiki|Sega/Victor Wondermega RG-M1]] | |Sega Duo / Trio | ||
|align="left"| 9.5V DC | |10V DC | ||
|align="left"| 1.5 A | |3A | ||
|? | |||
| | |||
|Both | |||
|NA | |||
| ? | |||
|(5.5 x 2.1) + (4.75 x 1.75) +(6.9 x 4.1 barrel jack with 0.7 inner pin) | |||
|External | |||
|Aftermarket solutions. Adapter cable splits one power plug into two or three for powering Genesis and Sega CD and/or 32X. | |||
{| class="wikitable" |- | |||
| https://rondoproducts.com/products/rondo-products-tower-con-kit | |||
|- | |||
| http://retrogamecave.weebly.com/sega-trio.html | |||
|} | |||
| | |||
| | |||
|- | |||
| [[Genesis:Genesis Mods Wiki|Sega/Victor Wondermega RG-M1]] | |||
|align="left"| 9.5V DC | |||
|align="left"| 1.5 A | |||
|? | |? | ||
|? | |? | ||
|align="left"| Tip positive | |align="left"| Tip positive | ||
|align="left"| AA-S95 | |align="left"| AA-S95 | ||
|align="left"| | |align="left"| Sony AC-FX150; Sony SCPH-70100/SCPH-79100 | ||
|align="left"| EIAJ-03 barrel jack | |align="left"| EIAJ-03 barrel jack | ||
|align="left"| External | |align="left"| External | ||
|align="left"| | |align="left"| | ||
|align="left"| | |align="left"| [[User:ApolloBoy|ApolloBoy]] | ||
|align="left"| | |align="left"| | ||
|- | |- | ||
| Line 1,220: | Line 1,299: | ||
|align="left"| Tip positive | |align="left"| Tip positive | ||
|align="left"| MK-4122 | |align="left"| MK-4122 | ||
|align="left"| | |align="left"| Sony AC-FX150; Sony SCPH-70100/SCPH-79100 | ||
|align="left"| EIAJ-03 barrel jack | |align="left"| EIAJ-03 barrel jack | ||
|align="left"| External | |align="left"| External | ||
|align="left"| Do ''not'' use the MK-2103 AC adapter as it does not supply enough current | |align="left"| Do ''not'' use the MK-2103 AC adapter as it does not supply enough current | ||
|align="left"| | |align="left"| [[User:ApolloBoy|ApolloBoy]] | ||
|align="left"| | |align="left"| | ||
|- | |- | ||
| Line 1,234: | Line 1,313: | ||
|align="left"| Tip positive | |align="left"| Tip positive | ||
|align="left"| AA-S95 (JP), AA-S95J (US) | |align="left"| AA-S95 (JP), AA-S95J (US) | ||
|align="left"| Sony AC-FX150; Sony SCPH-70100/SCPH-79100 | |||
|align="left"| EIAJ-03 barrel jack | |||
|align="left"| External | |||
|align="left"| Same specs as the CDX AC adapter; as with the CDX do ''not'' use the MK-2103 AC adapter as it does not supply enough current | |||
|align="left"| [[User:ApolloBoy|ApolloBoy]] | |||
|align="left"| | |||
|- | |||
| [[Genesis:Genesis Mods Wiki|Sega Pico]] | |||
|align="left"| 10V DC | |||
|align="left"| 850 mA | |||
|align="left"| 8.4 W (VA2.3)<br>6.2 W (VA4) | |||
|align="left"| 2.8 W | |||
|align="left"| Tip positive | |||
|align="left"| MK-2103 (US) | |||
|align="left"| ? | |align="left"| ? | ||
|align="left"| EIAJ-03 barrel jack | |align="left"| EIAJ-03 barrel jack | ||
|align="left"| External | |align="left"| External | ||
|align="left"| | |align="left"| | ||
|align="left"| [[User:ApolloBoy|ApolloBoy]] | |||
|align="left"| | |align="left"| | ||
|- | |- | ||
| Line 1,252: | Line 1,345: | ||
|align="left"| External or six internal AA-cell batteries | |align="left"| External or six internal AA-cell batteries | ||
|align="left"| European and Japanese Game Gears use the same AC adapter as the model 1 Mega Drive, whereas (for some reason) US models use a different AC adapter which was later used for the model 2 Genesis/Mega Drive | |align="left"| European and Japanese Game Gears use the same AC adapter as the model 1 Mega Drive, whereas (for some reason) US models use a different AC adapter which was later used for the model 2 Genesis/Mega Drive | ||
|align="left"| | |align="left"| [[User:ApolloBoy|ApolloBoy]] | ||
|align="left"| | |align="left"| | ||
|- | |- | ||
| Line 1,286: | Line 1,379: | ||
|align="left"| 10V DC | |align="left"| 10V DC | ||
|align="left"| 850 mA | |align="left"| 850 mA | ||
| | |4.7 W (SNS-101) | ||
| | 7.0 W (SNS-CPU-GPM-02) | ||
|1.1 W | |||
|align="left"| Tip negative | |align="left"| Tip negative | ||
|align="left"| SNS-002 | |align="left"| SNS-002 | ||
| Line 1,308: | Line 1,402: | ||
|align="left"| External | |align="left"| External | ||
|align="left"| Exactly the same as the original Famicom | |align="left"| Exactly the same as the original Famicom | ||
|align="left"| | |align="left"| [[User:ApolloBoy|ApolloBoy]] | ||
|align="right"| [[File:Famicompsu.png|200px]] | |align="right"| [[File:Famicompsu.png|200px]] | ||
|- | |- | ||
| Line 1,322: | Line 1,416: | ||
|align="left"| External | |align="left"| External | ||
|align="left"| Exactly the same as the PAL NES; the PAL SNES has a charge pump circuit which generates 12V DC for SCART autoswitching, hence the use of an AC power supply | |align="left"| Exactly the same as the PAL NES; the PAL SNES has a charge pump circuit which generates 12V DC for SCART autoswitching, hence the use of an AC power supply | ||
|align="left"| | |align="left"| [[User:ApolloBoy|ApolloBoy]] | ||
|align="left"| | |align="left"| | ||
|- | |- | ||
| Line 1,336: | Line 1,430: | ||
|align="left"| External | |align="left"| External | ||
|align="left"| Older AES consoles used a regulated 5V DC AC adapter while newer models had an unregulated 10V supply. Be *very* careful! | |align="left"| Older AES consoles used a regulated 5V DC AC adapter while newer models had an unregulated 10V supply. Be *very* careful! | ||
|align="left"| | |align="left"| [[User:ApolloBoy|ApolloBoy]] | ||
|align="left"| | |align="left"| | ||
|- | |- | ||
| Line 1,350: | Line 1,444: | ||
|align="left"| External | |align="left"| External | ||
|align="left"| ? | |align="left"| ? | ||
|align="left"| | |align="left"| [[User:ApolloBoy|ApolloBoy]] | ||
|align="right"| [[File: Neo-Geo-CD.jpeg|200px]] | |align="right"| [[File: Neo-Geo-CD.jpeg|200px]] | ||
|} | |} | ||
| Line 1,386: | Line 1,465: | ||
!align="left"| Notes | !align="left"| Notes | ||
!align="left"| Confirmed by | !align="left"| Confirmed by | ||
!align="left"| | !align="left"| Image | ||
|- | |- | ||
| Commodore Amiga CD32 | | Commodore Amiga CD32 | ||
| Line 1,403: | Line 1,482: | ||
|- | |- | ||
| [[3DO:3DO Mods Wiki|Panasonic 3DO]] | | [[3DO:3DO Mods Wiki|Panasonic 3DO]] | ||
|align="left"| 100-120V AC (NTSC) | |||
|align="left"| ? | |align="left"| ? | ||
| | |~30 W | ||
|? | |? | ||
|align="left"| N/A | |||
|align="left"| ? | |align="left"| ? | ||
|align="left"| ? | |align="left"| ? | ||
|align="left"| | |align="left"| Built in cable on FZ-1 model, non-polarized C7 on FZ-10 model. | ||
|align="left"| | |align="left"| Internal | ||
|align="left"| ? | |align="left"| ? | ||
|align="left"| | |align="left"| | ||
| Line 1,427: | Line 1,506: | ||
|align="left"| External | |align="left"| External | ||
|align="left"| | |align="left"| | ||
|align="left"| | |align="left"| [[User:ApolloBoy|ApolloBoy]] | ||
|align="right"|[[File:Atari-Jaguar-power-supply.jpeg|200px]] | |align="right"|[[File:Atari-Jaguar-power-supply.jpeg|200px]] | ||
|- | |- | ||
| Line 1,441: | Line 1,520: | ||
|align="left"| External | |align="left"| External | ||
|align="left"| Exactly the same as the Jaguar itself | |align="left"| Exactly the same as the Jaguar itself | ||
|align="left"| | |align="left"| [[User:ApolloBoy|ApolloBoy]] | ||
|align="left"| | |align="left"| | ||
|- | |- | ||
| Line 1,459: | Line 1,538: | ||
|- | |- | ||
| [[Saturn:Saturn Mods Wiki|Sega Saturn]] | | [[Saturn:Saturn Mods Wiki|Sega Saturn]] | ||
|align="left"| | |align="left"| 100-120V AC (NTSC), 220-240V AC (PAL) | ||
|align="left"| ? | |align="left"| ? | ||
|? | |? | ||
| Line 1,465: | Line 1,544: | ||
|align="left"| N/A | |align="left"| N/A | ||
|align="left"| ? | |align="left"| ? | ||
|align="left"| | |align="left"| [https://rexusnexus.com/product/sega-saturn-resaturn-psu/ ReSaturn] (External PSU Mod) | ||
|align="left"| C7 | |align="left"| C7 polarized (NTSC-U) | ||
C7 non-polarized (All other regions) | |||
|align="left"| Internal | |align="left"| Internal | ||
|align="left"| | |align="left"| | ||
|align="left"| | |align="left"| | ||
|align="left"| | |align="left"| | ||
|- | |- | ||
| [[PS1:PS1 Mods Wiki|Sony PlayStation]] | | [[PS1:PS1 Mods Wiki|Sony PlayStation]] | ||
|align="left"| | |align="left"| 100-120V AC (NTSC), 220-240V AC (PAL) | ||
|align="left"| ? | |align="left"| ? | ||
|? | |? | ||
| Line 1,479: | Line 1,559: | ||
|align="left"| N/A | |align="left"| N/A | ||
|align="left"| ? | |align="left"| ? | ||
|align="left"| ? | |align="left"| [https://rexusnexus.com/product/sony-playstation1-repsx-psu/ RePSX] (External PSU Mod), [https://www.willsconsolemodifications.co.uk/index.php?route=product/product&path=59_67&product_id=111 PicoPSU] | ||
|align="left"| C7 | |align="left"| C7 polarized (NTSC-U) | ||
C7 non-polarized (All other regions) | |||
|align="left"| Internal | |align="left"| Internal | ||
|align="left"| | |align="left"| | ||
|align="left"| | |align="left"| | ||
|align="left"| | |align="left"| | ||
| Line 1,492: | Line 1,573: | ||
|align="left"| 0.7 W (no LCD) <br> 2.1 W (with LCD) | |align="left"| 0.7 W (no LCD) <br> 2.1 W (with LCD) | ||
|align="left"| Tip positive | |align="left"| Tip positive | ||
|align="left"| SCPH-112 (JP) | |align="left"| SCPH-112 (JP) | ||
SCPH-113 (US) SCPH-114 (EU) SCPH-115 (UK) | |||
|align="left"| ? | |align="left"| ? | ||
|align="left"| EIAJ-03 barrel jack | |align="left"| EIAJ-03 barrel jack | ||
|align="left"| External | |align="left"| External | ||
|align="left"| Do ''not'' use a PS2 slim AC adapter! | |align="left"| '''Do ''not'' use a PS2 slim AC adapter!''' | ||
|align="left"| | |align="left"| [[User:ApolloBoy|ApolloBoy]] | ||
|align="left"| | |align="left"| | ||
|- | |- | ||
| Line 1,553: | Line 1,635: | ||
|align="left"| External | |align="left"| External | ||
|align="left"| | |align="left"| | ||
|align="left"| | |align="left"| [[User:ApolloBoy|ApolloBoy]] | ||
|align="left"| | |align="left"| | ||
| Line 1,575: | Line 1,657: | ||
!align="left"| Notes | !align="left"| Notes | ||
!align="left"| Confirmed by | !align="left"| Confirmed by | ||
!align="left"| | !align="left"| Image | ||
|- | |- | ||
| [[GBA:Game_Boy_Advance_Mods_Wiki|Game Boy Advance]] | | [[GBA:Game_Boy_Advance_Mods_Wiki|Game Boy Advance]] | ||
| Line 1,588: | Line 1,670: | ||
|align="left"| External or two internal AA-cell batteries | |align="left"| External or two internal AA-cell batteries | ||
|align="left"| The original GBA does not have a dedicated AC adapter input like other Game Boy systems, all external AC adapters use the battery terminals | |align="left"| The original GBA does not have a dedicated AC adapter input like other Game Boy systems, all external AC adapters use the battery terminals | ||
|align="left"| | |align="left"| [[User:ApolloBoy|ApolloBoy]] | ||
|align="left"| | |align="left"| | ||
|- | |- | ||
| Line 1,599: | Line 1,681: | ||
|align="left"| AGS-002 | |align="left"| AGS-002 | ||
|align="left"| Unofficial 5 V USB cables | |align="left"| Unofficial 5 V USB cables | ||
Generic clones with same P/N | |||
|align="left"| Proprietary connector | |align="left"| Proprietary connector | ||
|align="left"| External | |align="left"| External | ||
|align="left"| | |align="left"| | ||
|align="left"| | |align="left"| [[User:ApolloBoy|ApolloBoy]], [[User:Ryccardo|Ryccardo]] | ||
|align="left"| | |align="left"| | ||
|- | |- | ||
| Line 1,613: | Line 1,696: | ||
|align="left"| OXY-002 | |align="left"| OXY-002 | ||
|align="left"| Unofficial 5 V USB cables | |align="left"| Unofficial 5 V USB cables | ||
Generic clones with same P/N | |||
|align="left"| Proprietary connector | |align="left"| Proprietary connector | ||
|align="left"| External | |align="left"| External | ||
|align="left"| | |align="left"| | ||
|align="left"| | |align="left"| [[User:ApolloBoy|ApolloBoy]] | ||
|align="left"| | |align="left"| | ||
|- | |- | ||
| Line 1,626: | Line 1,710: | ||
|align="left"| ? | |align="left"| ? | ||
|align="left"| ? | |align="left"| ? | ||
|align="left"| | |align="left"| [[Dreamcast:Replacement Power Supply|External PSU Replacements]] | ||
|align="left"| C7 | |align="left"| C7 polarized (NTSC-U) | ||
C7 non-polarized (All other regions) | |||
|align="left"| Internal | |align="left"| Internal | ||
|align="left"| | |align="left"| | ||
|align="left"| | |align="left"| | ||
|align="left"| | |align="left"| | ||
|- | |- | ||
| [[PS2:PS2 Mods Wiki|Sony PlayStation 2 (original)]] | | [[PS2:PS2 Mods Wiki|Sony PlayStation 2 (original)]] | ||
|align="left"| Input: 100V AC (JP), 120V AC (US), 220/240V AC (EU/UK) | |align="left"| Input: 100V AC (JP), 120V AC (US), 220/240V AC (EU/UK) | ||
|align="left"| | Output: 12V DC | ||
|align="left"| Various | |||
|align="left"| 28.5 to 34 W (SCPH-37000) | |align="left"| 28.5 to 34 W (SCPH-37000) | ||
|align="left"| 2.3 W (SCPH-37000) | |align="left"| 2.3 W (SCPH-37000) | ||
|align="left"| ? | |align="left"| ? | ||
|align="left"| | |align="left"| [https://www.psdevwiki.com/ps2/Power Various] | ||
|align="left"| | |align="left"| [https://rexusnexus.com/product/reps2/ RePS2](External PSU Mod) | ||
|align="left"| C7 | |align="left"| C7 polarized (NTSC-U) | ||
C7 non-polarized (All other regions) | |||
|align="left"| Internal | |align="left"| Internal | ||
|align="left"| | |align="left"| | ||
|align="left"| | |align="left"| [[User:ApolloBoy|ApolloBoy]] | ||
|align="left"| | |align="left"| | ||
|- | |- | ||
| [[PS2:PS2 Mods Wiki|Sony PlayStation 2 ( | | [[PS2:PS2 Mods Wiki|Sony PlayStation 2 Slim (SCPH-7xxxx)]] | ||
|align="left"| Input: 100V-240V AC | |align="left"| Input: 100V-240V AC | ||
Output: 8.5V DC | |||
|align="left"| Input: 1.5 A, Output: 5.65 A | |align="left"| Input: 1.5 A, Output: 5.65 A | ||
|align="left"| ~16 W (PS2 game) <br> ~15.5 W (PS1 game) | |align="left"| ~16 W (PS2 game) <br> ~15.5 W (PS1 game) | ||
| Line 1,654: | Line 1,742: | ||
|align="left"| Tip positive | |align="left"| Tip positive | ||
|align="left"| SCPH-70100 | |align="left"| SCPH-70100 | ||
|align="left"| | SCPH-79100 | ||
|align="left"| Generic clones with same P/N | |||
|align="left"| EIAJ-03 barrel jack | |align="left"| EIAJ-03 barrel jack | ||
|align="left"| External | |align="left"| External | ||
|align="left"| | |align="left"| | ||
|align="left"| | |align="left"| [[User:ApolloBoy|ApolloBoy]] | ||
|align="right"| [[File:PS2 (Slim, SCPH 7xxxx) power supply.jpeg|200px]] | |align="right"| [[File:PS2 (Slim, SCPH 7xxxx) power supply.jpeg|200px]] | ||
|- | |- | ||
| [[PS2:PS2 Mods Wiki|Sony PlayStation 2 ( | | [[PS2:PS2 Mods Wiki|Sony PlayStation 2 Slim (SCPH-9000x)]] | ||
|align="left"| Input: 100-240V AC | |align="left"| Input: 100-240V AC Output: 7.5V DC | ||
|align="left"| Output: 4.5 A | |align="left"| Output: 4.5 A | ||
|? | |? | ||
|? | |? | ||
|align="left"| N/A | |align="left"| N/A | ||
|align="left"| ? | |align="left"| EADP-34DF? | ||
|align="left"| ? | |align="left"| ? | ||
|align="left"| C7 non-polarized | |align="left"| C7 non-polarized | ||
|align="left"| Internal | |align="left"| Internal | ||
|align="left"| Power supply is multivoltage despite what is indicated on the outside of the console | |align="left"| Power supply is multivoltage despite what is indicated on the outside of the console | ||
|align="left"| | |align="left"| [[User:ApolloBoy|ApolloBoy]] | ||
|align="left"| | |align="left"| | ||
|- | |- | ||
| Line 1,694: | Line 1,783: | ||
|? | |? | ||
|? | |? | ||
|align="left"| | |align="left"| N/A | ||
|align="left"| | |align="left"| Various | ||
|align="left"| ? | |align="left"| ? | ||
|align="left"| C7 non-polarized | |align="left"| C7 non-polarized | ||
| Line 1,708: | Line 1,797: | ||
|? | |? | ||
|? | |? | ||
|align="left"| | |align="left"| Connector is keyed, rounded side is positive | ||
|align="left"| DOL-002 | |align="left"| DOL-002 | ||
|align="left"| ? | |align="left"| ? | ||
| Line 1,714: | Line 1,803: | ||
|align="left"| External | |align="left"| External | ||
|align="left"| | |align="left"| | ||
|align="left"| | |align="left"| [[User:Ryccardo|Ryccardo]] | ||
|align="right"| [[File:Gamecube-power-supply.jpeg|200px]] | |align="right"| [[File:Gamecube-power-supply.jpeg|200px]] | ||
| Line 1,724: | Line 1,813: | ||
! Console | ! Console | ||
!align="left"| Voltage | !align="left"| Voltage | ||
! align="left" | Amps | |||
!Avg Power | !Avg Power | ||
Draw (On) | Draw (On) | ||
!Avg Power | !Avg Power | ||
Draw (Off) | Draw (Off) | ||
!align="left"| Polarity | !align="left"| Polarity | ||
!align="left"| Original PN | !align="left"| Original PN | ||
| Line 1,736: | Line 1,825: | ||
!align="left"| Notes | !align="left"| Notes | ||
!align="left"| Confirmed by | !align="left"| Confirmed by | ||
!align="left"| | !align="left"| Image | ||
|- | |- | ||
| [[NDS:DS_Mods_Wiki|Nintendo DS]] | | [[NDS:DS_Mods_Wiki|Nintendo DS]] | ||
|align="left"| 5.2 V DC | |align="left"| 5.2 V DC | ||
| align="left" | 320 mA | |||
|? | |? | ||
|? | |? | ||
|align="left"| N/A, connector is keyed | |align="left"| N/A, connector is keyed | ||
|align="left"| AGS-002 | |align="left"| AGS-002 | ||
|align="left"| Unofficial 5 V USB cables | |align="left"| Unofficial 5 V USB cables | ||
Generic clones with same P/N | |||
|align="left"| Proprietary connector | |align="left"| Proprietary connector | ||
|align="left"| External | |align="left"| External | ||
|align="left"| Same as GBA SP except for console name removed from sticker | |align="left"| Same as GBA SP except for console name removed from sticker | ||
|align="left"| | |align="left"| [[User:ApolloBoy|ApolloBoy]], [[User:Ryccardo|Ryccardo]] | ||
!align="left"| | !align="left"| | ||
|- | |- | ||
| [[NDS:DS_Mods_Wiki|Nintendo DS Lite]] | | [[NDS:DS_Mods_Wiki|Nintendo DS Lite]] | ||
|align="left"| 5.2 V DC | |align="left"| 5.2 V DC | ||
|align="left" | 450 mA | |||
|? | |? | ||
|? | |? | ||
|align="left"| N/A, connector is keyed | |align="left"| N/A, connector is keyed | ||
|align="left"| USG-002 | |align="left"| USG-002 | ||
|align="left"| Unofficial 5 V USB cables | |align="left"| Unofficial 5 V USB cables | ||
Generic clones with same P/N | |||
|align="left"| Proprietary connector | |align="left"| Proprietary connector | ||
|align="left"| External | |align="left"| External | ||
|align="left"| Resembles Mini-USB B to the point a mangled connector can be directly and "correctly" connected | |align="left"| Resembles Mini-USB B to the point a mangled connector can be directly and "correctly" connected | ||
|align="left"| | |align="left"| [[User:ApolloBoy|ApolloBoy]], [[User:Ryccardo|Ryccardo]] | ||
!align="left"| | !align="left"| | ||
|- | |- | ||
| [[NDS:DS_Mods_Wiki|Nintendo DSi series]] | | [[NDS:DS_Mods_Wiki|Nintendo DSi series]] | ||
|align="left"| 4.6 V DC | |align="left"| 4.6 V DC | ||
|align="left" | 900 mA | |||
|? | |? | ||
|? | |? | ||
|align="left"| N/A, connector is keyed | |align="left"| N/A, connector is keyed | ||
|align="left"| WAP-002 | |align="left"| WAP-002 | ||
|align="left"| | |align="left"| Unofficial 5 V USB cables | ||
Generic clones with same P/N | |||
|align="left"| Proprietary connector | |align="left"| Proprietary connector | ||
|align="left"| External | |align="left"| External | ||
|align="left"| Originally invented for Nintendo/Buffalo WAP-001 Wi-Fi access point | |align="left"| Originally invented for Nintendo/Buffalo WAP-001 Wi-Fi access point | ||
|align="left"| | |align="left"| [[User:ApolloBoy|ApolloBoy]], [[User:Ryccardo|Ryccardo]] | ||
!align="left"| | !align="left"| | ||
|- | |- | ||
| [[PSP:PSP_Mods_Wiki|Sony PSP]] (except N1000/Go) | | [[PSP:PSP_Mods_Wiki|Sony PSP]] (except N1000/Go) | ||
|align="left"| 5 V DC | |align="left"| 5 V DC | ||
|align="left"| EP: 1500 mA, LP: 2000 mA | |||
|? | |? | ||
|? | |? | ||
|align="left"| Negative ground | |align="left"| Negative ground | ||
|align="left"| PSP-100 (two piece) | |align="left"| PSP-100 (two piece) | ||
|align="left"| Third party USB-based cables; official USB charging (if console can boot, not on 1000 series) | PSP-103 (fixed cable) | ||
PSP-383/384 ("Wall Wart" with fixed cable) | |||
|align="left"| Third party USB-based cables; official USB charging (if console can boot from battery, not on stock 1000 series motherboards) | |||
|align="left"| EIAJ-02 (4.0/1.7 mm barrel) | |align="left"| EIAJ-02 (4.0/1.7 mm barrel) | ||
|align="left"| External | |align="left"| External | ||
|align="left"| | |align="left"| | ||
|align="left"| | |align="left"| [[User:ApolloBoy|ApolloBoy]], [[User:Nadaman|Nadaman]], [[User:Ryccardo|Ryccardo]] | ||
!align="left"| | !align="left"| | ||
|- | |- | ||
| [[PSP:PSP_Mods_Wiki|Sony PSP-N1000 series]] (Go) | | [[PSP:PSP_Mods_Wiki|Sony PSP-N1000 series]] (Go) | ||
|align="left"| 5 V DC | |align="left"| 5 V DC | ||
| align="left" | 1500 mA | |||
|? | |? | ||
|? | |? | ||
|align="left"| USB-A | |align="left"| USB-A | ||
|align="left"| PSP-N100 ( | |align="left"| PSP-N100 (Three piece power supply) | ||
|align="left"| | PSP-N104 ("Wall Wart" two piece) | ||
|align="left"| | |||
PSP-N430 (USB cable) | |||
|align="left"| Generic USB power supply? | |||
Generic clones of N430 USB cable and/or PSP-N100/N104 | |||
|align="left"| USB-A to proprietary connector | |||
|align="left"| External | |align="left"| External | ||
|align="left"| | |align="left"| USB port on PSU is electrically USB-A, but in a recessed position requiring a specially notched plug | ||
|align="left"| | |align="left"| [[User:ApolloBoy|ApolloBoy]], [[User:Nadaman|Nadaman]] | ||
!align="left"| | !align="left"| | ||
|- | |- | ||
| [[Wii:Wii Mods Wiki|Nintendo Wii]] | | [[Wii:Wii Mods Wiki|Nintendo Wii]] | ||
|align="left"| 12V DC | |align="left"| 12V DC | ||
| align="left" | 3.7 A | |||
|16 W<ref name=":1">https://www.cmu.edu/ceic/assets/docs/publications/working-papers/ceic-11-01.pdf</ref> (WiFi on or off) | |16 W<ref name=":1">https://www.cmu.edu/ceic/assets/docs/publications/working-papers/ceic-11-01.pdf</ref> (WiFi on or off) | ||
|9 W, | |9 W, | ||
1.9 W (WiFi on) | 1.9 W (WiFi on) | ||
|align="left"| | |align="left"| Connector is keyed; cut corner is negative, as is the shield of the coaxial DC wire | ||
|align="left"| RVL-002 | |align="left"| RVL-002 | ||
|align="left"| | |align="left"| Generic clones with same P/N | ||
|align="left"| Proprietary connector | |align="left"| Proprietary connector | ||
|align="left"| External | |align="left"| External | ||
|align="left"| | |align="left"| | ||
|align="left"| | |align="left"| [[User:ApolloBoy|ApolloBoy]], [[User:Ryccardo|Ryccardo]] | ||
!align="left"| | !align="left"| [[File:Wii_power_brick_new_vs_old.jpg|200px]] | ||
|- | |||
| [[Mattel HyperScan:Mattel HyperScan Mods Wiki|Mattel HyperScan]] | |||
|align="left"| ? | |||
| align="left" | ? | |||
|align="left"| ? | |||
|align="left"| ? | |||
|align="left"| ? | |||
|align="left"| ? | |||
|align="left"| ? | |||
|align="left"| ? | |||
|align="left"| ? | |||
|align="left"| ? | |||
|align="left"| ? | |||
|align="left"| ? | |||
|- | |- | ||
| [[Xbox 360:Xbox 360 Mods Wiki|Microsoft Xbox 360]] (Xenon/Zephyr) | | [[Xbox 360:Xbox 360 Mods Wiki|Microsoft Xbox 360]] (Xenon/Zephyr) | ||
|align="left"| Output: 12V DC, 5V DC | |align="left"| Output: 12V DC, 5V DC | ||
| align="left" | 16.5 A (12V), 1 A (5V) | |||
|172 W<ref name=":1" /> | |172 W<ref name=":1" /> | ||
|2.2 W | |2.2 W | ||
|align="left"| N/A, connector is keyed | |align="left"| N/A, connector is keyed | ||
|align="left"| DPSN-186CB-1A | |align="left"| DPSN-186CB-1A | ||
|align="left"| | HP-AW205EF3 | ||
|align="left"| | |align="left"| Generic clones with same P/N | ||
|align="left"| C15 to proprietary connector with central and overline tabs | |||
|align="left"| External | |align="left"| External | ||
|align="left"| Forwards compatible | |align="left"| Forwards compatible (Requires adapter for S/E/One) | ||
HP-AW205EF3 version of this PSU doesn't have the latches on the connector | |||
|align="right"| [[File:Xbox 360 PAL power supply.jpg| | |align="left"| [[User:ApolloBoy|ApolloBoy]] | ||
|align="right"| [[File:Xbox 360 PAL power supply.jpg|204x204px]] | |||
|- | |- | ||
| [[Xbox 360:Xbox 360 Mods Wiki|Microsoft Xbox 360]] (Falcon/Opus) | | [[Xbox 360:Xbox 360 Mods Wiki|Microsoft Xbox 360]] (Falcon/Opus) | ||
|align="left"| Output: 12V DC, 5V DC | |align="left"| Output: 12V DC, 5V DC | ||
| align="left" | 14.2 A (12V), 1 A (5V) | |||
|? | |? | ||
|? | |? | ||
|align="left"| N/A, connector is keyed | |align="left"| N/A, connector is keyed | ||
|align="left"| | |align="left"| DPSN-168-CB A | ||
|align="left"| | |align="left"| Generic clones with same P/N | ||
|align="left"| | |align="left"| C7 to proprietary connector with overline tab | ||
|align="left"| External | |align="left"| External | ||
|align="left"| Forwards compatible | |align="left"| Forwards compatible (Requires adapter for S/E/One) | ||
|align="left"| | |align="left"| [[User:ApolloBoy|ApolloBoy]], [[User:Nadaman|Nadaman]] | ||
!align="left"| | !align="left"|[[File:Xbox 360 175W PSU.jpg|frameless|267x267px]] | ||
|- | |- | ||
| [[Xbox 360:Xbox 360 Mods Wiki|Microsoft Xbox 360]] (Jasper/ | | [[Xbox 360:Xbox 360 Mods Wiki|Microsoft Xbox 360]] (Jasper/Tonasket) | ||
|align="left"| Output: 12V DC, 5V DC | |align="left"| Output: 12V DC, 5V DC | ||
| align="left" | 12.1 A (12V), 1 A (5V) | |||
|? | |? | ||
|? | |? | ||
|align="left"| N/A, connector is keyed | |align="left"| N/A, connector is keyed | ||
|align="left"| | |align="left"| PB-2151-02MX | ||
|align="left"| | |align="left"| Generic clones with same P/N | ||
|align="left"| | |align="left"| C7 to proprietary connector with split overline tabs | ||
|align="left"| External | |align="left"| External | ||
|align="left"| | |align="left"| Forwards compatible (Requires adapter for S/E/One) | ||
|align="left"| | |align="left"| [[User:ApolloBoy|ApolloBoy]], [[User:Nadaman|Nadaman]] | ||
!align="left"| | !align="left"|[[File:Microsoft-Xbox-360-Power-Supply-Jasper.jpg|frameless|200x200px]] | ||
|- | |||
|[[Xbox 360:Xbox 360 Mods Wiki|Microsoft Xbox 360 S]] (Trinity) | |||
|Output: 12V DC, 5V DC | |||
|10.83 A (12V), 1 A (5V) | |||
| | |||
| | |||
|N/A, connector is keyed | |||
|PB-2131-02MX | |||
CPA09-010A | |||
EADP-135BB A | |||
|Generic clones with same P/N | |||
Original Xbox 360 power supplies with an S adapter | |||
|C7 to proprietary double barrel jack connector | |||
|External | |||
| ? | |||
|[[User:ApolloBoy|ApolloBoy]], [[User:Nadaman|Nadaman]] | |||
! | |||
|- | |- | ||
| [[Xbox 360:Xbox 360 Mods Wiki|Microsoft Xbox 360 S]] | | [[Xbox 360:Xbox 360 Mods Wiki|Microsoft Xbox 360 S]] (Corona/Waitsburg) | ||
|align="left"| Output: 12V DC, 5V DC | | align="left" | Output: 12V DC, 5V DC | ||
| align="left" | 9.6 A (12V), 1 A (5V) | |||
|88 W<ref name=":1" /> | |88 W<ref name=":1" /> | ||
|0.7 W | |0.7 W | ||
| align="left" | N/A, connector is keyed | |||
|align="left"| N/A, connector is keyed | | align="left" | PB-2121-03MX | ||
|align="left"| PB-2121-03MX | A10-120N1A | ||
|align="left"| | | align="left" | Generic clones with same P/N | ||
|align="left"| | Original Xbox 360 power supplies with an S adapter | ||
|align="left"| External | | align="left" | C7 to proprietary double barrel jack connector | ||
|align="left"| ? | | align="left" | External | ||
|align="left"| | | align="left" | ? | ||
!align="left"| | | align="left" | [[User:ApolloBoy|ApolloBoy]], [[User:Nadaman|Nadaman]] | ||
! align="left" |[[File:Xbox 360 S PSU.jpg|frameless|200x200px]] | |||
|- | |- | ||
| [[Xbox 360:Xbox 360 Mods Wiki|Microsoft Xbox 360 E]] | | [[Xbox 360:Xbox 360 Mods Wiki|Microsoft Xbox 360 E]] | ||
|align="left"| Output: 12V DC, 5V DC | | align="left" | Output: 12V DC, 5V DC | ||
| align="left" | 9.6 A (12V), 1 A (5V) | |||
|? | |? | ||
|? | |? | ||
| align="left" | N/A | |||
|align="left"| N/A | | align="left" | PB-2121-03M1 | ||
|align="left"| | | align="left" | Generic clones with same P/N | ||
|align="left"| | Original Xbox 360 power supplies with an E adapter | ||
|align="left"| | | align="left" | C7 to proprietary barrel jack connector | ||
|align="left"| External | | align="left" | External | ||
|align="left"| ? | | align="left" | ? | ||
|align="left"| | | align="left" | [[User:ApolloBoy|ApolloBoy]], [[User:Nadaman|Nadaman]] | ||
!align="left"| | ! align="left" |[[File:Xbox 360 E PSU.jpg|frameless|200x200px]] | ||
|- | |- | ||
| [[PS3:PS3 Mods Wiki|Sony PlayStation 3]] | | [[PS3:PS3 Mods Wiki|Sony PlayStation 3 (Original)]] | ||
|align="left"| Input: 100V-240V AC (most models), 220V-240V AC (early PAL models) | |align="left"| Input: 100V-240V AC (most models), 220V-240V AC (early PAL models) | ||
| | | align="left" | Various | ||
|189 W<ref name=":1" /> | |||
|1.1 W | |1.1 W | ||
|align="left"| ? | |align="left"| ? | ||
|align="left"| Various | |||
|align="left"| ? | |align="left"| ? | ||
|align="left"| C14 | |||
|align="left"| C14 | |||
|align="left"| Internal | |align="left"| Internal | ||
|align="left"| Detailed information can be found [https://www.psdevwiki.com/ps3/Power_Supply here]. | | rowspan="3" align="left" | Detailed information can be found [https://www.psdevwiki.com/ps3/Power_Supply here]. | ||
|align="left"| | |align="left"| [[User:ApolloBoy|ApolloBoy]], [[User:Nadaman|Nadaman]] | ||
!align="left"| | !align="left"| | ||
|- | |||
|[[PS3:PS3 Mods Wiki|Sony PlayStation 3 Slim]] | |||
|Input: 100V-240V AC | |||
| ? | |||
| ? | |||
| ? | |||
| ? | |||
|APS-250 (20xx) | |||
APS-270 (21xx/25xx) | |||
APS-306 or EADP-185AB (30xx) | |||
| ? | |||
|C7 non-polarized | |||
|Internal | |||
|[[User:ApolloBoy|ApolloBoy]], [[User:Nadaman|Nadaman]] | |||
! | |||
|- | |||
|[[PS3:PS3 Mods Wiki|Sony PlayStation 3 Super Slim]] | |||
|Input: 100V-240V AC | |||
| ? | |||
|76.3 W (43XX)<ref name=":2" /> | |||
| ? | |||
| ? | |||
|ADP-160AR | |||
APS-330(/B) | |||
N12-160P1A | |||
| ? | |||
|C7 non-polarized | |||
|Internal | |||
|[[User:ApolloBoy|ApolloBoy]], [[User:Nadaman|Nadaman]] | |||
! | |||
|- | |- | ||
| [[PS3:PS3 Mods Wiki|Sony PlayStation 3]] standard controller/keyboard/headset | | [[PS3:PS3 Mods Wiki|Sony PlayStation 3]] standard controller/keyboard/headset | ||
|align="left"| 5 V | |align="left"| 5 V | ||
| align="left" | 2x 500 mA | |||
|? | |? | ||
|? | |? | ||
|align="left"| USB-A | |align="left"| USB-A | ||
|align="left"| CECHZA1 | |align="left"| CECHZA1 | ||
| Line 1,918: | Line 2,085: | ||
|align="left"| External | |align="left"| External | ||
|align="left"| | |align="left"| | ||
|align="left"| | |align="left"| [[User:ApolloBoy|ApolloBoy]] | ||
!align="left"| | !align="left"| | ||
|- | |- | ||
| [[PS3:PS3 Mods Wiki|Sony PlayStation 3]] Move controller | | [[PS3:PS3 Mods Wiki|Sony PlayStation 3]] Move controller | ||
|align="left"| 5 V | |align="left"| 5 V | ||
| align="left" | ? | |||
|? | |? | ||
|? | |? | ||
|align="left"| ? | |align="left"| ? | ||
|align="left"| CECH-ZCC1 | |align="left"| CECH-ZCC1 | ||
| Line 1,932: | Line 2,099: | ||
|align="left"| External | |align="left"| External | ||
|align="left"| | |align="left"| | ||
|align="left"| | |align="left"| [[User:ApolloBoy|ApolloBoy]] | ||
!align="left"| | !align="left"| | ||
|} | |} | ||
| Line 1,955: | Line 2,122: | ||
!align="left"| Notes | !align="left"| Notes | ||
!align="left"| Confirmed by | !align="left"| Confirmed by | ||
!align="left"| | !align="left"| Image | ||
|- | |- | ||
| [[3DS:3DS_Mods_Wiki|Nintendo 3DS/2DS Series]] incl. New | | [[3DS:3DS_Mods_Wiki|Nintendo 3DS/2DS Series]] incl. New | ||
| Line 1,965: | Line 2,132: | ||
|align="left"| N/A, connector is keyed | |align="left"| N/A, connector is keyed | ||
|align="left"| WAP-002 | |align="left"| WAP-002 | ||
|align="left"| | |align="left"| Unofficial 5 V USB cables | ||
Generic clones with same P/N | |||
|align="left"| Proprietary connector | |align="left"| Proprietary connector | ||
|align="left"| External | |align="left"| External | ||
|align="left"| Eventually replaced with cost-cutting revision (thinner cable) | |align="left"| Same PSU as DSi and WAP-001. Eventually replaced with cost-cutting revision (thinner cable) | ||
|align="left"| | |align="left"| [[User:ApolloBoy|ApolloBoy]] | ||
|align="left"| | |align="left"| | ||
|- | |- | ||
| [[Vita:Vita_Mods_Wiki|Sony PS Vita]] | | [[Vita:Vita_Mods_Wiki|Sony PS Vita (PCH-1xxx)]] | ||
|align="left"| 5 V DC | |align="left"| 5 V DC | ||
|align="left"| 1 A (?) | |align="left"| 1 A (?) | ||
| Line 1,978: | Line 2,146: | ||
|? | |? | ||
|? | |? | ||
|align="left"| | |align="left"| N/A, connector is keyed | ||
|align="left"| PCH-ZAC1 | |align="left"| PCH-ZAC1 (Three piece power supply) | ||
|align="left"| | |align="left"| Any generic USB power supply | ||
|align="left"| | |align="left"| USB-A to proprietary connector | ||
|align="left"| External | |align="left"| External | ||
|align="left"| | |align="left"| USB port on PSU is electrically USB-A, but in a recessed position requiring a specially notched plug | ||
|align="left"| | |align="left"| [[User:ApolloBoy|ApolloBoy]], [[User:Nadaman|Nadaman]] | ||
|align="left"| | |align="left"| | ||
|- | |- | ||
| Line 1,999: | Line 2,167: | ||
|align="left"| External | |align="left"| External | ||
|align="left"| Recycled from developer Vita | |align="left"| Recycled from developer Vita | ||
|align="left"| [[User:ApolloBoy|ApolloBoy]] | |||
|align="left"| | |align="left"| | ||
| | |- | ||
|[[Vita:Vita_Mods_Wiki|Sony PS Vita (PCH-2xxx)]] | |||
|5 V DC | |||
|1 A (?) | |||
|? | |||
|? | |||
|? | |||
|N/A, connector is keyed | |||
|PCH-ZAC1 (Three piece power supply) | |||
|Any generic USB power supply | |||
|USB-A to micro USB-B | |||
|External | |||
|USB port on PSU is electrically USB-A, but in a recessed position requiring a specially notched plug | |||
|[[User:ApolloBoy|ApolloBoy]], [[User:Nadaman|Nadaman]] | |||
| | |||
|- | |- | ||
| [[WiiU:Wii U Mods Wiki|Nintendo Wii U]] | | [[WiiU:Wii U Mods Wiki|Nintendo Wii U]] | ||
|align="left"| 15V DC | | align="left" | 15V DC | ||
|align="left"| 5 A | | align="left" | 5 A | ||
|34 W<ref name=":0">https://www.nrdc.org/sites/default/files/video-game-consoles-IP.pdf</ref> | |34 W<ref name=":0">https://www.nrdc.org/sites/default/files/video-game-consoles-IP.pdf</ref> | ||
|0.4 W | |0.4 W | ||
|0.4 W | |0.4 W | ||
|align="left"| N/A, connector is keyed | | align="left" | N/A, connector is keyed | ||
|align="left"| WUP-002 | | align="left" | WUP-002 | ||
|align="left"| | | align="left" | Generic clones with same P/N | ||
|align="left"| Proprietary connector | | align="left" | Proprietary connector | ||
|align="left"| External | | align="left" | External | ||
|align="left"| Connector is very similar to the original Wii but is not compatible (colored yellow for identification). Unofficially<ref>[https://www.nintendolife.com/forums/wii-u/wii_u_multi_voltage]</ref> multivoltage. | | align="left" | Connector is very similar to the original Wii but is not compatible (colored yellow for identification). Unofficially<ref>[https://www.nintendolife.com/forums/wii-u/wii_u_multi_voltage]</ref> multivoltage. | ||
|align="left"| | | align="left" | [[User:ApolloBoy|ApolloBoy]] | ||
|align="left"| | | align="left" | | ||
|- | |- | ||
| [[WiiU:Wii U Mods Wiki|Nintendo Wii U GamePad]] | | [[WiiU:Wii U Mods Wiki|Nintendo Wii U GamePad]] | ||
|align="left"| 4.75 V DC | | align="left" | 4.75 V DC | ||
|align="left"| 1.6 A | | align="left" | 1.6 A | ||
|? | |? | ||
|? | |? | ||
|? | |? | ||
|align="left"| N/A, connector is keyed | | align="left" | N/A, connector is keyed | ||
|align="left"| WUP-011 | | align="left" | WUP-011 | ||
|align="left"| | | align="left" | Unofficial 5 V USB cables | ||
|align="left"| Proprietary connector | Generic clones with same P/N | ||
|align="left"| External | | align="left" | Proprietary connector | ||
|align="left"| Just barely enlarged 2/3DS/i/XL connector. Unofficially multivoltage. | | align="left" | External | ||
|align="left"| | | align="left" | Just barely enlarged 2/3DS/i/XL connector. Unofficially multivoltage. | ||
|align="left"| | | align="left" | [[User:ApolloBoy|ApolloBoy]] | ||
| align="left" | | |||
|- | |- | ||
| [[PS4:PS4 Mods Wiki|Sony PlayStation 4 (original)]] | | [[PS4:PS4 Mods Wiki|Sony PlayStation 4 (original)]] | ||
|align="left"| Input: 100-240V AC | | align="left" | Input: 100-240V AC | ||
|align="left"| ? | | align="left" | ? | ||
|95.1 W (12XX) | |95.1 W (12XX) | ||
115.1 W (11XX) | 115.1 W (11XX) | ||
137.3 W ( | |||
137.3 W (10xx)<ref name=":2">https://www.playstation.com/en-gb/legal/ecodesign/</ref> | |||
|0.3 W | |0.3 W | ||
|5.2 W (12XX) | |5.2 W (12XX) | ||
7.3 W (11XX) | 7.3 W (11XX) | ||
7.8 W ( | |||
|align="left"| | 7.8 W (10xx) | ||
|align="left"| | | align="left" | N/A | ||
|align="left"| ? | | align="left" | ADP-240AR (10XX/11XX) | ||
|align="left"| C7 non-polarized | ADP-200ER (12XX) | ||
|align="left"| Internal | | align="left" | ? | ||
|align="left"| | | align="left" | C7 non-polarized | ||
|align="left"| | | align="left" | Internal | ||
|align="left"| | | align="left" | | ||
| align="left" | [[User:ApolloBoy|ApolloBoy]] | |||
| align="left" | | |||
|- | |- | ||
| [[PS4:PS4 Mods Wiki|Sony PlayStation 4 | | [[PS4:PS4 Mods Wiki|Sony PlayStation 4 Slim]] | ||
|align="left"| Input: 100-240V AC | | align="left" | Input: 100-240V AC | ||
|align="left"| ? | | align="left" | ? | ||
|78.2 W (22XX) | |78.2 W (22XX) | ||
75.2 W (21XX) | 75.2 W (21XX) | ||
82.8 W (20XX)<ref name=":2" /> | 82.8 W (20XX)<ref name=":2" /> | ||
|0.2 W | |0.2 W | ||
|5.4 W (22XX) | |5.4 W (22XX) | ||
5.8 W (21XX) | 5.8 W (21XX) | ||
5.5 W (20XX) | 5.5 W (20XX) | ||
|align="left"| | | align="left" | N/A | ||
|align="left"| | | align="left" | ADP-160CR (20XX) | ||
|align="left"| ? | ADP-160ER (21XX) | ||
|align="left"| C7 non-polarized | |||
|align="left"| Internal | ADP-160FR (22XX) | ||
|align="left"| | | align="left" | ? | ||
|align="left"| | | align="left" | C7 non-polarized | ||
|align="left"| | | align="left" | Internal | ||
| align="left" | | |||
| align="left" | [[User:ApolloBoy|ApolloBoy]] | |||
| align="left" | | |||
|- | |- | ||
| [[PS4:PS4 Mods Wiki|Sony PlayStation 4 Pro]] | | [[PS4:PS4 Mods Wiki|Sony PlayStation 4 Pro]] | ||
|align="left"| Input: 100-240V AC | | align="left" | Input: 100-240V AC | ||
|align="left"| ? | | align="left" | ? | ||
|126 W (70XX) | |126 W (70XX) | ||
139 W (71XX) | 139 W (71XX) | ||
146 W (72XX)<ref>https://www.eurogamer.net/playstation-5-review-digitalfoundry</ref> | 146 W (72XX)<ref>https://www.eurogamer.net/playstation-5-review-digitalfoundry</ref> | ||
|0.2 W | |0.2 W | ||
|8.2 W (70XX) | |8.2 W (70XX) | ||
7.4 W (71XX) | 7.4 W (71XX) | ||
6.4 W (72XX) | 6.4 W (72XX) | ||
|align="left"| ? | | align="left" | ? | ||
|align="left"| | | align="left" | ADP-300CR (70XX) | ||
|align="left"| ? | ADP-300ER (71XX) ADP-300FR (72XX) | ||
|align="left"| C17 (CUH- | | align="left" | ? | ||
|align="left"| Internal | | align="left" | C17 (CUH-70xx/71xx) | ||
|align="left"| | C7 non-polarized (CUH-72xx) | ||
|align="left"| | | align="left" | Internal | ||
|align=" | | align="left" | The PS4 Pro has an internal power supply module, which can be accessed once the console is disassembled. Some revisions connected to an electrical outlet using a PC lead, while some used a Figure 8 AC cord. | ||
| align="left" | [[User:ApolloBoy|ApolloBoy]] | |||
| align="right" | [[File:PS4_Pro_original_power_supply.jpg|200px]] | |||
|- | |- | ||
| [[Xbox One:Xbox One Mods Wiki|Microsoft Xbox One]] | | [[Xbox One:Xbox One Mods Wiki|Microsoft Xbox One (original)]] | ||
|align="left"| Input: 100-127V AC (JP/US), Output: 12V DC, 5V DC | | align="left" | Input: 100-127V AC (JP/US), Output: 12V DC, 5V DC | ||
|align="left"| | | align="left" | 17.9 A (12V), 1 A (5V) | ||
|112 W<ref name=":0" /> | |112 W<ref name=":0" /> | ||
|0.4 W | |0.4 W | ||
|15.7 W | |15.7 W | ||
|align="left"| | | align="left" | N/A, connector is keyed | ||
|align="left"| | | align="left" | ADP-200AR A | ||
|align="left"| | PB-2221-02MX | ||
|align="left"| | |||
|align="left"| External | A12-220N1A | ||
|align="left"| | | align="left" | Generic clones with same P/Ns | ||
|align="left"| | Original Xbox 360 PSUs with adapter | ||
|align="left"| | | align="left" | C7 to proprietary double barrel jack connector | ||
| align="left" | External | |||
| align="left" | | |||
| align="left" | [[User:ApolloBoy|ApolloBoy]], [[User:Nadaman|Nadaman]] | |||
| align="left" |[[File:Xbox-One-PSU.jpg|frameless|200x200px]] | |||
|- | |- | ||
| [[Xbox One:Xbox One Mods Wiki|Microsoft Xbox One S]] | | [[Xbox One:Xbox One Mods Wiki|Microsoft Xbox One S]] | ||
|align="left"| Input: 100-240V AC | | align="left" | Input: 100-240V AC | ||
|align="left"| | Output: 12V DC | ||
| align="left" | 20.42A (12V) | |||
|62 W<ref name=":3">https://web.archive.org/web/20221118134519/https://support.xbox.com/en-US/help/hardware-network/power/learn-about-power-modes</ref> | |62 W<ref name=":3">https://web.archive.org/web/20221118134519/https://support.xbox.com/en-US/help/hardware-network/power/learn-about-power-modes</ref> | ||
|0.5 W | |0.5 W | ||
|11 W | |11 W | ||
|align="left"| | | align="left" | N/A | ||
|align="left"| | | align="left" | N15-120P1A | ||
|align="left"| ? | | align="left" | ? | ||
|align="left"| C7 non-polarized | | align="left" | C7 non-polarized | ||
|align="left"| Internal | | align="left" | Internal | ||
|align="left"| | | align="left" | | ||
|align="left"| | | align="left" | [[User:ApolloBoy|ApolloBoy]], [[User:Nadaman|Nadaman]] | ||
|align="left"| | | align="left" | | ||
|- | |- | ||
| [[Xbox One:Xbox One Mods Wiki|Microsoft Xbox One X]] | | [[Xbox One:Xbox One Mods Wiki|Microsoft Xbox One X]] | ||
|align="left"| Input: 100-240V AC | | align="left" | Input: 100-240V AC | ||
|align="left"| | Output: 12V DC | ||
| align="left" | 20.42A (12V) | |||
|100-172 W<ref>https://www.anandtech.com/show/11992/the-xbox-one-x-review/6</ref> | |100-172 W<ref>https://www.anandtech.com/show/11992/the-xbox-one-x-review/6</ref> | ||
|<1 W | |<1 W | ||
|10 W | |10 W | ||
|align="left"| | | align="left" | N/A | ||
|align="left"| | | align="left" | 1815 | ||
|align="left"| ? | | align="left" | ? | ||
|align="left"| C7 non-polarized | | align="left" | C7 non-polarized | ||
|align="left"| Internal | | align="left" | Internal | ||
|align="left"| | | align="left" | | ||
|align="left"| | | align="left" | [[User:ApolloBoy|ApolloBoy]], [[User:Nadaman|Nadaman]] | ||
|align="left"| | | align="left" | | ||
|- | |- | ||
| Nintendo Switch | | Nintendo Switch | ||
|align="left"| Input: 100-240V AC | | align="left" | Input: 100-240V AC | ||
|align="left"| 1.5A (5V), 2.6A (15V) | Output: 5V DC, 15V DC | ||
|7 W ( | | align="left" | 1.5A (5V), 2.6A (15V) | ||
|8.25 W (HAC-001) | |||
6-7 W [HAC-001(01) and Lite] | |||
6 W (OLED)<ref>https://www.nintendo.co.uk/Corporate/Consumer-Information/Eco-design/Information-about-energy-efficiency-and-eco-design-of-Nintendo-Switch-family-consoles-2026830.html</ref> | 6 W (OLED)<ref>https://www.nintendo.co.uk/Corporate/Consumer-Information/Eco-design/Information-about-energy-efficiency-and-eco-design-of-Nintendo-Switch-family-consoles-2026830.html</ref> | ||
|0.3-0.5 W | |0.3-0.5 W | ||
|0.3-0.5 W | |0.3-0.5 W | ||
|align="left"| N/A, connector is reversible | | align="left" | N/A, connector is reversible | ||
|align="left"| HAC-002 | | align="left" | HAC-002 | ||
|align="left"| | | align="left" | Various generic adapters, support for 15v recommended. | ||
|align="left"| USB-C | | align="left" | USB-C | ||
|align="left"| External | | align="left" | External | ||
|align="left"| Not fully USB-PD compliant. Compatible 15V power supply required for dock. | | align="left" | Not fully USB-PD compliant. Compatible 15V power supply required for dock. | ||
|align="left"| | | align="left" | [[User:ApolloBoy|ApolloBoy]], [[User:Nadaman|Nadaman]] | ||
|align="left"| | | align="left" |[[File:Nintendo Switch PSU (OEM).jpg|frameless|200x200px]] | ||
|} | |} | ||
| Line 2,168: | Line 2,373: | ||
!align="left"| Notes | !align="left"| Notes | ||
!align="left"| Confirmed by | !align="left"| Confirmed by | ||
!align="left"| | !align="left"| Image | ||
|- | |- | ||
| Sony PlayStation 5 | | Sony PlayStation 5 | ||
| Line 2,181: | Line 2,386: | ||
|align="left"| C7 non-polarized | |align="left"| C7 non-polarized | ||
|align="left"| Internal | |align="left"| Internal | ||
|align="left"| | |align="left"| The ADP-400DR is an internal power supply module, which can be accessed once the console is disassembled. To connect to an electrical outlet, the PS5 uses a standard Figure 8 AC cord. | ||
| | |align="left"| [[User:TheRealOC|TheRealOC]] | ||
|align="right"| [[File:PS5_ADP-400DR_power_supply.jpg|200px]] [[File:Standard_Figure_8_AC_cord_.jpg|200px]] | |||
|- | |- | ||
|Sony PlayStation 5 Digital Edition | |Sony PlayStation 5 Digital Edition | ||
| Line 2,195: | Line 2,401: | ||
|C7 non-polarized | |C7 non-polarized | ||
|Internal | |Internal | ||
| | |align="left"| The ADP-400DR is an internal power supply module, which can be accessed once the console is disassembled. To connect to an electrical outlet, the PS5 uses a standard Figure 8 AC cord. | ||
| | |align="left"| [[User:TheRealOC|TheRealOC]] | ||
|align="right"| [[File:PS5_ADP-400DR_power_supply.jpg|200px]] [[File:Standard_Figure_8_AC_cord_.jpg|200px]] | |||
|- | |- | ||
| Microsoft Xbox Series S | | Microsoft Xbox Series S | ||
| Line 2,206: | Line 2,413: | ||
| align="left" | N/A | | align="left" | N/A | ||
| align="left" | 1921 | | align="left" | 1921 | ||
| align="left" | | | align="left" | M1111343-001 | ||
| align="left" | C7 non-polarized | | align="left" | C7 non-polarized | ||
| align="left" | Internal | | align="left" | Internal | ||
| align="left" | | | align="left" | The Series S uses an internal power supply module, manufactured by LiteOn, which can be accessed once the console is disassembled. To connect to an electrical outlet, the console uses a standard Figure 8 AC cord | ||
| align="left" | | |align="left"| [[User:TheRealOC|TheRealOC]] | ||
|align="right"| [[File:Xbox_Series_S_original_power_supply.jpg|200px]] [[File:Standard_Figure_8_AC_cord_.jpg|200px]] | |||
|- | |- | ||
| Microsoft Xbox Series X | | Microsoft Xbox Series X | ||
| Line 2,220: | Line 2,428: | ||
| align="left" | N/A | | align="left" | N/A | ||
| align="left" | 1920 | | align="left" | 1920 | ||
| align="left" | | | align="left" | M1109865-006 | ||
| align="left" | C7 non-polarized | | align="left" | C7 non-polarized | ||
| align="left" | Internal | | align="left" | Internal | ||
| align="left" | | | align="left" | The Series X uses an internal power supply module, manufactured by LiteOn, which can be accessed once the console is disassembled. To connect to an electrical outlet, the console uses a standard Figure 8 AC cord | ||
| align="left" | | |align="left"| [[User:TheRealOC|TheRealOC]] | ||
|align="right"| [[File:Xbox_Series_X_original_power_supply.jpg|200px]] [[File:Standard_Figure_8_AC_cord_.jpg|200px]] | |||
|} | |} | ||
| Line 2,231: | Line 2,440: | ||
* [https://www.retrorgb.com/quality-psus-for-classic-consoles.html "Quality PSU’s For Classic Consoles"]. | * [https://www.retrorgb.com/quality-psus-for-classic-consoles.html "Quality PSU’s For Classic Consoles"]. | ||
* [https://www.firebrandx.com/triads.html "Triad Brand Replacement Power Supplies"]. Retrieved 2009-09-05. | * [https://www.firebrandx.com/triads.html "Triad Brand Replacement Power Supplies"]. Retrieved 2009-09-05. | ||
[[Category:ConsoleMods Wiki]] | |||
Latest revision as of 11:39, 18 September 2024
Retro gaming has seen a resurgence in popularity in recent years, with gamers increasingly seeking out original consoles to play classic games on. However, one common issue that arises with these consoles is the availability and reliability of their power supplies. Original equipment manufacturer (OEM) power supplies are often no longer in production, making them scarce and expensive. This has led many gamers to turn to aftermarket power supplies, which can vary greatly in terms of performance and specifications. This guide aims to provide an overview of the power supply requirements and specifications for various retro consoles, and to offer advice on choosing aftermarket power supplies that are as close as possible to the original equipment.
Specifications should be confirmed by a member of wiki community, or a trustworthy source (See "Confirmed By" column).
Explanation of Terms
Console:
The name of the gaming console can be found in this column. An asterisk symbol (*) beside a console's name means that a Triad brand replacement power supply is listed by Firebrandx and/or Castlemania Games for this console. See the Triad Power Supplies page for more information.
Voltage:
A good analogy for “output voltage” (measured in "Volts", symbol: V) might be water flowing through a hose. Just like how the pressure of the water determines how fast water flows through the hose, the “output voltage” of a power supply determines how much electrical current can flow through a device. If the output voltage is too low, the console may not work properly, just like how a low-pressure hose may not be able to wash away dirt effectively. On the other hand, if the output voltage is too high, it may damage the console, just like how a high-pressure hose can damage delicate plants. The output voltage on the power supply must be within a specified range for the console to function correctly.
Generally speaking, the "Voltage" figure on the replacement power supply should match the specs of the OEM unit (see tables below) as closely as possible. There will be exceptions to this rule, and they will be highlighted in the "Notes" column.
Amps:
Amperage, which is measured in amps (A) or milliamps (mA), refers to the amount of potential electrical current that can be supplied by a power supply. To go back to the water pipe analogy, the amperage is like the width of the pipe, and determines how much water (electricity) can flow through at once. A higher amperage figure means that more current can flow, which is important for powering consoles or devices that require more energy.
It’s important to choose a power supply with enough amperage for your device – the console will only draw as much current as needed, so the A (or mA) figure on the replacement power supply can be higher than what the console requires (see below). However, the A/mA figure should not be lower than what the console requires, or else the power supply may overheat or even damage the console.
The figures below are taken from the console’s OEM power supply, and do not account for additional power draw caused by various modifications, flashcart devices, wireless controllers or similar after-market additions.
Polarity:
Polarity refers to the orientation of the positive and negative voltage in the power supply; kind of like the direction of traffic on a road. Just as traffic moves in one direction on a one-way street and in two directions on a two-way street, power also flows in a specific direction depending on the polarity.
There are two types of polarities: positive center polarity (C+) and negative center polarity (C-). They can be distinguished by the symbols which can be found, usually either on the power brick, or on the plug.
In the same way that cars going the wrong way on a one-way street can cause an accident, connecting a power supply with the wrong polarity can damage your console. To avoid damage to the console, the user should inspect the symbol on their power supply and ensure that it polarity matches the polarity of the corresponding console (see table below).
Examples of a Centre-positive symbol
Examples of a Centre-negative symbol
Note that centre-positive and centre-negative diagrams are differentiated from each other not by the left-to-right sequence (as seen above, either polarity can be displayed from left to right), but by which sign (positive + or negative -) is directly connected to the centre circle. The central circle's direct association with the plus or minus sign indicates whether the central pin of the connector carries a positive or negative charge, respectively.
Avg Power Draw:
Average power supply, which is measured in watts (W), can be obtained using the formula W = V x A (watts = volts x amps) to calculate the instantaneous power draw of a console at any given moment. However, this formula may not give an accurate representation of the console's average power draw over time as power consumption can vary depending on the device's activities and usage patterns. For example, a gaming console may consume more power while running a graphics-intensive game than when it's in standby mode.
Therefore, by looking at the average wattage drawn by a console over time, obtained from either manufacturer-provided statistics or direct measurement using a device such as a "Kill A Watt," users can better estimate the console's actual power consumption. This article's columns display the wattage drawn by the console over time, including when powered on and running a game, when powered off, and (if applicable) when in standby or sleep mode, using only measurements taken with the original power supply.
Original PN:
The OEM power supply for a given console will have a part number printed on it. Therefore, if one console had several different models of power supply produced for it during its lifetime, the manufacturer can differentiate between the different models (as each model may have different specifications such as the output voltage, amperage or plug size). Customers can also use the part number to find a replacement power supply online or by contacting the manufacturer directly.
The numbers in the "Original PN" column refer to the part numbers for the original stock power supply for a given console.
Replacement PN:
Gamers may consider getting a third-party power supply for their console in a few situations. Firstly, if the original power supply is damaged or lost and needs to be replaced, a third-party power supply may be a more affordable option than purchasing a new original power supply from the manufacturer.
Secondly, some customers may prefer to use a third-party power supply that has additional features or specifications that the original power supply does not have. For example, a third-party power supply may have a longer cord, a higher wattage rating, or additional surge protection.
It's important to note that using a third-party power supply may void the console's warranty and may also carry the risk of damaging the console if the power supply is not of good quality or if it is not compatible with the console. Customers should do their research to ensure they are purchasing a reputable and compatible third-party power supply. Triad brand replacement power supplies that are listed by Firebrandx and/or Castlemania Games are generally recognized in the retro-gaming community as being a quality option. If a recommended replacement power supply for a given console is available, the part number will be listed in this column.
Connection:
In the context of retro gaming, a "connector" is the physical interface between the power supply and the console it is powering. It typically has a plug on one end that attaches to the power supply and a receptible (or a "jack") on the other end that receives the plug and provides power to the device. Connectors come in various shapes, sizes, and types - the main reason that console manufacturers use different connector types and barrel sizes is due to differences in power requirements, physical space limitations, and proprietary design choices. Console manufacturers may use proprietary designs for their power connectors in order to maintain control over the distribution of power supplies for their consoles. This can help ensure compatibility and prevent third-party companies from producing low-quality or unsafe power supplies that could damage the console or harm users.
Power Supply:
Broadly speaking, there are two types of power supply: Internal and External.
"External" (for example the Atari 2600) refers to power supplies with a "black power brick" (i.e. an AC adapter) attached to the cable. The "brick" is a device that converts the "AC power" from the wall outlet and converts it into the right kind of "DC power" that the console needs to work. It keeps the console safe from any electrical issues that might happen and ensure it gets the right amount of power to work properly. The reason that the power brick is often a separate device (rather than being built into the console itself) is because different regions of the world use different voltages and plug types for their wall outlets. The power brick is designed to work with the specific region where the console is being used, to ensure it doesn't get damaged.
Sometimes, the console will have no visible power prick (for example, the Dreamcast or the PlayStation). In these cases, it is likely that the console has an "Internal" power supply board, inside the console, that connects directly to its motherboard. The internal power board performs basically the same function as an external power brick, which is to convert the incoming AC voltage from a wall outlet to the DC voltage required by the console. Many gaming consoles with internal power supplies will use a standard figure 8 cable to connect to the wall outlet, but this is not always the case; a guide to common connectors can be found here and on the IEC 60320 Wikipedia page. The user should also ensure that the console's internal power supply is rated for the AC coming out of their wall. If your console's internal power supply does not match your country's AC voltage (for example, a North American gamer using a European Dreamcast), then step-up/step-down transformers to go up/down in voltage for the target device may be a good option.
Notes:
Any exceptions to the above guidelines, or idiosyncrasies related to an individual console, should be laid out in the "Notes" column. For example, there are exceptions to the rule that voltage on a replacement should be as close as possible to the voltage on the original power supply. The Sega Genesis for instance, uses a 7805 voltage regulator to step the input down from 9V to 5V. The 7805 expects a minimum voltage of 6.5V - the significance of this is that a Genesis 2 (whose original power supply outputs 10V) will work fine with a 9V power supply.
Readers may also note that many early first-generation gaming consoles, such as the Magnavox Odyssey and the first versions of the Atari Home Pong, used batteries instead of AC adapters. This was because they were designed to be portable and used with a TV. At the time, AC adapters were typically large, heavy, and expensive, and would have made the consoles much less portable. Batteries, on the other hand, were readily available and allowed the consoles to be used anywhere without needing to be plugged into a wall outlet. Additionally, the relatively simple electronics of these early consoles required much less power than modern consoles, so batteries could provide sufficient power for extended periods of play.
First generation of consoles
| Console | Voltage | Amps | Polarity | Avg Power
Draw (On) |
Avg Power
Draw (Off) |
Original PN | Replacement PN | Connection | Power Supply | Notes | Confirmed by | Image |
|---|---|---|---|---|---|---|---|---|---|---|---|---|
| Magnavox Odyssey | Output: 9V DC | 100 mA | Tip positive | ? | ? | 1A9179 | ? | 2.5 mm TS jack | External (or six internal "C" batteries) | Odyssey can be powered by six "C" cell batteries, or an Atari 2600 power adapter with a 3.5-to-2.5 mm tip adapter. 400mA recommended for replacement PSU. | TheRealOC | 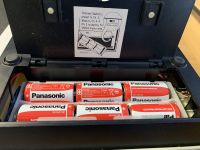
|
| Magnavox Odyssey 100 | Output: 9V DC | 200 mA | ? | ? | ? | PIDB-15 | ? | 3.5 mm TS jack | External (or six internal "C" batteries) | Console is powered by either six "C" batteries or a 9V AC adapter. | 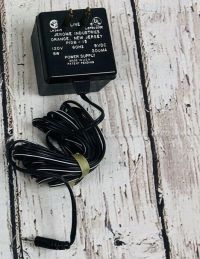
| |
| Magnavox Odyssey 200 | OUTPUT 9V AC | 100ma | ? | ? | ? | ? | ? | ? | External (or six internal "C" batteries) | Console is powered by either six "C" batteries or a 9 volt AC adapter. | 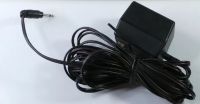
| |
| Magnavox Odyssey 300 | OUTPUT 9V DC | 100ma | ? | ? | ? | AG 9004 BK | ? | ? | External (or six internal "C" batteries) | Console is powered by either six "C" batteries or a 9 volt AC adapter. | 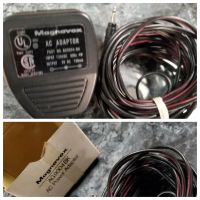
| |
| Magnavox Odyssey 400 | OUTPUT 9V DC | 100ma | ? | ? | ? | AG 9004 BK | ? | ? | External (or six internal "C" batteries) | Console is powered by either six "C" batteries or a 9 volt AC adapter. | 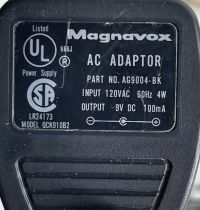
| |
| Magnavox Odyssey 500 | Output 9 volts | ? | ? | ? | ? | ? | ? | ? | External (or six internal "C" batteries) | Console is powered by either six "C" batteries or a 9 volt AC adapter. | 
| |
| Magnavox Odyssey 4305 | ? | ? | ? | ? | ? | 701479-4 (AC/DC Power Assembly) | Unknown | Internal/Chassis-mounted | Internal/Chassis-mounted | The Odyssey 4305 is a 19” television (based on the chassis of the Magnavox T991 television) but with a built-in Odyssey. The device uses a chassis-mounted isolation transformer with no external brick (standard plug coming out the back). | TheRealOC | 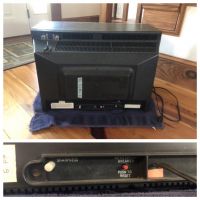
|
| Magnavox Odyssey 2000 | ? | ? | ? | ? | ? | ? | ? | ? | External (or six internal "C" batteries) | Console is powered by either six "C" batteries or a 9 volt AC adapter. | 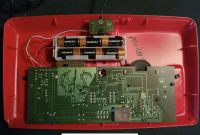
| |
| Magnavox Odyssey 3000 | OUTPUT 9 volts | 78mA | ? | ? | ? | ? | ? | ? | External (or six internal "C" batteries) | Console is powered by either six "C" batteries or a 9 volt AC adapter. | 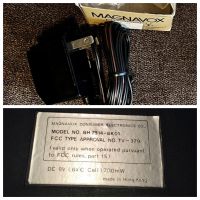
| |
| Magnavox Odyssey 4000 | OUTPUT 9V DC | 100 mA | ? | ? | ? | AG 9004 BK | ? | ? | External | Unlike most Odyssey models, the AC adapter is necessary as the console does not use batteries. | 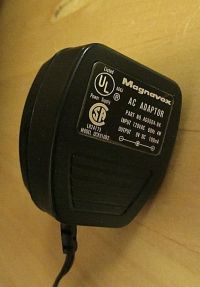
| |
| Philips Odyssey 200 | ? | ? | ? | ? | ? | ? | ? | ? | ? | European release of Magnavox Odyssey 200. Unclear if batteries can be used (TBC) | ||
| Philips Odyssey 2001 | 18,6V- | 120mA | ? | ? | ? | FW3009 | ? | ? | External | Unlike most Odyssey models, the AC adapter is necessary as the console does not use batteries. | 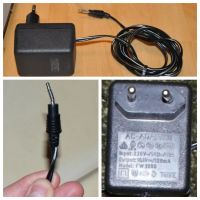
| |
| Philips Odyssey 2100 | ? | ? | ? | ? | ? | ? | ? | ? | External | Unlike most Odyssey models, the AC adapter is necessary as the console does not use batteries. | 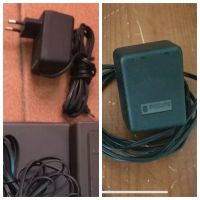
| |
| TV Tennis Electrotennis (Epoch) | ? | ? | ? | ? | ? | ? | ? | ? | Internal (batteries) | Console is completely wireless; powered by four D size batteries. | 
| |
| Atari Home Pong (Model C-100) | 5.5V DC | 100 mA | ? | ? | ? | 004720 | ? | ? | External PSU | Console can be powered by four "D"-size batteries, or an AC adapter (“battery eliminator”) | 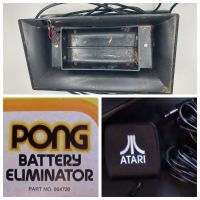
| |
| Atari Super Pong (Model C-140) | OUTPUT 6V DC | ? | ? | ? | ? | ? | ? | ? | External Power Supply Unit (6V) | Console can be powered by four "D"-size batteries, or an AC adapter (“battery eliminator”) | 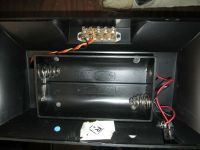
| |
| Coleco Telstar | OUTPUT 9V DC | 100mA | ? | ? | ? | Model 6041 | ? | ? | ? | Console is powered by either six "C" batteries or a 9V adapter. | 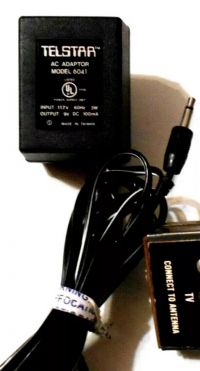
| |
| Coleco Telstar Classic | OUTPUT 9V DC | 100mA | Polarity unknown but the Atari 2600 adapter tends to be compatible. | ? | ? | Model 6041 | ? | Typically the tip is positive but in some units, the polarity can be reversed and the unit may need repairs following a blown transistor. | ? | Unusually for this series, the console doesn’t use batteries. The adapter is 100mA and outputs 3 watts at 60hz. | 
| |
| Coleco Telstar Deluxe | Output 9 volts | ? | ? | ? | ? | ? | ? | ? | ? | Console verified to operate off either a 9V adapter or six C-Cell batteries. Other details TBD | ||
| Coleco Telstar Ranger | OUTPUT 9V DC | 100 mA | ? | ? | ? | Model 6041 | ? | ? | ? | Console is powered by either six "C" batteries or a 9V adapter. | 
| |
| Coleco Telstar Alpha | OUTPUT 9V DC | 100 mA | ? | ? | ? | Model 6041 | ? | ? | ? | Console is powered by either six "C" batteries or a 9V adapter. | 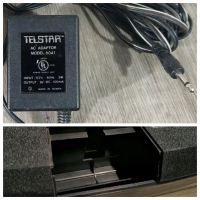
| |
| Coleco Telstar Colormatic | OUTPUT 9V DC | 200 mA | ? | ? | ? | ? | ? | ? | ? | ? | 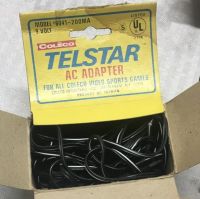
| |
| Coleco Telstar Regent | OUTPUT 9V DC | 200mA | ? | ? | ? | ? | ? | ? | ? | ? | 
| |
| Coleco Telstar Sportsman | Output 9 volts | ? | ? | ? | ? | ? | ? | ? | ? | Confirmed that console operates off batteries (size undetermined) and a 9V adapter. A standard Atari 2600 adapter will work. More details TBD | ||
| Coleco Telstar Combat! | OUTPUT 9V DC | 200mA | ? | ? | ? | ? | ? | ? | ? | Console verified to run via six c-cell batteries or 9V adapter. | 
| |
| Coleco Telstar Colortron | ? | ? | ? | ? | ? | ? | ? | ? | ? | ? | 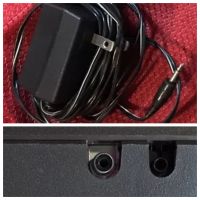
| |
| Coleco Telstar Marksman | OUTPUT 9V DC | 200mA | ? | ? | ? | ? | ? | ? | ? | ? | 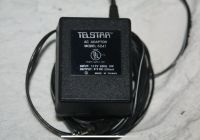
| |
| Coleco Telstar Galaxy | OUTPUT 9V DC | 200mA | ? | ? | ? | Model 6041 | ? | ? | ? | Confirmed that working AC adapter outputs 3W; unsure whether console has a battery compartment (TBD) | 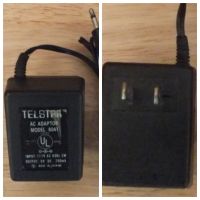
| |
| Coleco Telstar Gemini | OUTPUT 9V DC | 200mA | ? | ? | ? | ? | ? | ? | ? | Console does not have a battery compartment. Verified to work with slightly different “3W” version of the 6041-200ma Telstar AC adapter. | 
| |
| Coleco Telstar Arcade | OUTPUT 9V DC | 200 mA | ? | ? | ? | Model 6041-200ma | ? | ? | ? | Possibly could also be powered by D-size batteries (unconfirmed) | 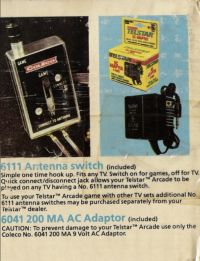
| |
| Nintendo Color TV - Game 6 | OUTPUT 9V DC | ? | ? | ? | ? | ? | ? | ? | ? | ? | 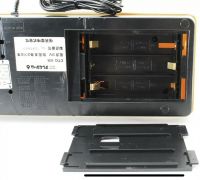
|
Second generation of consoles
| Console | Voltage | Amps | Avg Power
Draw (On) |
Avg Power
Draw (Off) |
Polarity | Original PN | Replacement PN | Connection | Power Supply | Notes | Confirmed by | Image |
|---|---|---|---|---|---|---|---|---|---|---|---|---|
| Atari 2600 | 9V DC | 500 mA | ? | ? | Tip positive | CO10472 | ? | 3.5 mm TS jack | External | Different styles of this AC adapter exist, but all have the same specs and part number | ApolloBoy | 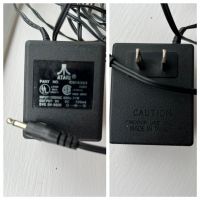
|
| Sears Video Arcade II/Atari 2800 | 9V AC | 750 mA (US), 1 A (JP) | ? | ? | N/A | C017539 (US), N/A (JP) | WSU090-1300-R | 5.5 mm x 2.1 mm barrel jack | External | The SVA II/2800 will accept a DC power supply so long as the voltage and current are within spec; JP 2800 supply outputs higher voltage on 120V and is not recommended for use outside Japan | ApolloBoy | |
| Magnavox Odyssey 2 | 9V AC-12V AC, depending on PSU | 400 mA-830 mA, depending on PSU | ? | ? | N/A | ? | ? | 3.5 mm TS jack (early models) or 5.5 x 2.1 mm barrel jack (later models) | External | Multiple revisions of the Odyssey 2 AC adapter exist, each with slightly different voltage and current ratings | ApolloBoy | |
| Philips Videopac G7000 (European release of Odyssey 2) | OUTPUT 9V DC | 1.3 A | ? | ? | ? | FW3300 | ? | ? | External | ? | 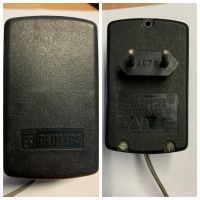
| |
| Mattel Intellivision | Input: 120V AC; Output: 5V DC, 12V DC, 16V DC (unregulated), -2.1V DC | ? | ? | ? | N/A, power cord to electrical outlet is hardwired | ? | ? | N/A | Internal | The ribbon cable that connects the power supply to the motherboard is extremely fragile, be very careful! | ApolloBoy | |
| Epoch Cassette Vision | 6V DC | 300 mA | ? | ? | Tip negative | WSU060-1250-R | 5.5 x 2.1 mm barrel jack | External | Same for the Cassette Vision Jr. | ApolloBoy | ||
| Mattel Intellivision II | 16.7V AC | 1 A | ? | ? | N/A | 5872-9629 | ? | 5.5 x 2.5 mm barrel jack | External | A variation exists with slightly lower output voltage and current ratings (16.2V AC and 955 mA) | ApolloBoy | |
| Coleco ColecoVision | 5V DC, -5V DC, 12V DC | 0.9 A (5V), 0.1 A (-5V), 0.3 A (12V) | ? | ? | N/A, connector is keyed | 55416 | N/A | Rectangular four-pin connector, same as used by the TI-99/4A computer (though not the same pinout!) | External | ApolloBoy | 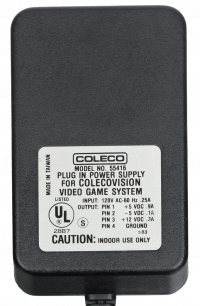
| |
| Atari 5200 (Four controller port model) * | 11.5V DC | 1.95 A | ~13 W | 2.3 W | Tip positive | C018187 | WSU090-2000-13 | 5.5 x 2.5 mm barrel jack | External | The four-port Atari 5200 had an interesting "one cable" design where both the RF signal and the power ran through one coaxial cable which was permanently attached to the system. A power mod is available that allows the console to use a conventional switch box or direct RF adapter. | ApolloBoy | 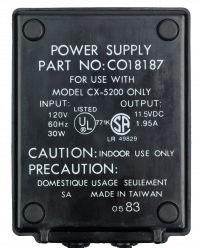
|
| Atari 5200 (Two controller port model) * | 9.3V DC | 1.95 A | ? | ? | Tip positive | C018187 | WSU090-2000-13 | 5.5 x 2.5 mm barrel jack | External | ApolloBoy | ||
| GCE/MB Vectrex | ? | ? | ? | ? | N/A, power cord to electrical outlet is hardwired | ? | ? | N/A | Internal | ApolloBoy | 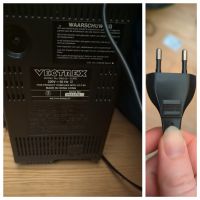
|
Third generation of consoles
| Console | Voltage | Amps | Avg Power
Draw (On) |
Avg Power
Draw (Off) |
Polarity | Original PN | Replacement PN | Connection | Power Supply | Notes | Confirmed by | Image |
|---|---|---|---|---|---|---|---|---|---|---|---|---|
| Nintendo Entertainment System (US) * | 9V AC | 1.2 A | ? | ? | N/A | NES-002 | WSU090-1300 or WSU090-1300-R | 5.5 x 2.1 mm barrel jack | External | The NES will accept a DC power supply so long as the voltage and current are within spec | ApolloBoy | 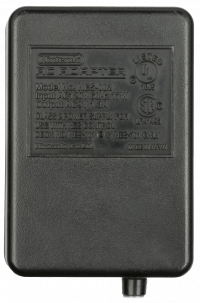
|
| Nintendo Entertainment System (PAL) * | 9V AC | 1.2 A | ? | ? | N/A | NES-002 | WSU090-1300-13 or WSU090-1300-R13 | 5.5 x 2.5 mm barrel jack | External | The NES will accept a DC power supply so long as the voltage and current are within spec | ApolloBoy | |
| Famicom * | 10V DC | 850 mA | 6.3 W | 1.4 W | Tip negative | HVC-002 | WSU090-1300-R | 5.5 x 2.1 mm barrel jack | External | PSU outputs higher voltage on 120V and is not recommended for use outside Japan | ApolloBoy | 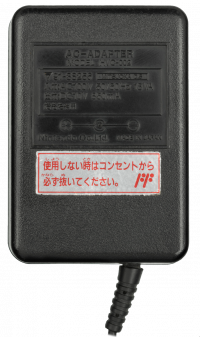
|
| AV Famicom * | 10V DC | 850 mA | 6.5 W | 1.2 W | Tip negative | HVC-002 | WSU090-1300-R | 5.5 x 2.1 mm barrel jack | External | PSU outputs higher voltage on 120V and is not recommended for use outside Japan | ApolloBoy | 
|
| Famicom Disk System * | 9V DC | 400 mA | ? | ? | Tip negative | HVC-025 | WSU090-1300-R | 5.5 x 2.1 mm barrel jack | External or six internal C-cell batteries | With a splitter it should be possible to run both a Famicom and Disk System from a single AC adapter without batteries; the WSU-090-2000-R is recommended for this | ApolloBoy | |
| Twin Famicom * | 7.6V DC | 1.25 A | ? | ? | Tip positive | UADP-0041CEZZ | WSU075-1500-13 | 5.5 x 2.5 mm barrel jack | External | Please note that the Twin Famicom's power circuitry is very sensitive to input voltage, anything higher than 7.6V causes the power transistor to run very hot; PSU outputs higher voltage on 120V and is not recommended for use outside Japan | ApolloBoy | |
| Sega SG-1000 * | 9V DC | 850 mA | 12.6 W | 2.4 W | Tip negative | SA-150 | WSU090-1300-R | 5.5 x 2.1 mm barrel jack | External | PSU outputs higher voltage on 120V and is not recommended for use outside Japan | ApolloBoy | |
| Sega SG-1000 II * | 9V DC | 850 mA | 9.5 W | 2.4 W | Tip negative | SA-150 | WSU090-1300-R | 5.5 x 2.1 mm barrel jack | External | PSU outputs higher voltage on 120V and is not recommended for use outside Japan | ApolloBoy | |
| Sega Mark III * | 9V DC | 850 mA | 8.6 W (no FM Sound Unit) 9.5 W (with FM Sound Unit) |
2.3 W | Tip negative | SA-150 | WSU090-1300-R | 5.5 x 2.1 mm barrel jack | External | PSU outputs higher voltage on 120V and is not recommended for use outside Japan | ApolloBoy | |
| Sega Master System * | 9V DC | 1 A | ? | ? | Tip negative | 3025 | WSU090-1300-R | 5.5 x 2.1 mm barrel jack | External | Different styles of this AC adapter exist, but all have the same specs and part number | ApolloBoy | |
| Sega Master System (JP, MK-2000) * | 9V DC | 850 mA | 8.9 W | 2.4 W | Tip negative | SA-150 | WSU090-1300-R | 5.5 x 2.1 mm barrel jack | External | Different styles of this AC adapter exist, but all have the same specs and part number; PSU outputs higher voltage on 120V and is not recommended for use outside Japan | ApolloBoy | |
| Atari 7800 | 9V DC | 1 A | ? | ? | N/A, connector is keyed | CO24471-001 | ? | Two-pin keyed connector | External | Different styles of this AC adapter exist, but all have the same specs and part number | ApolloBoy | 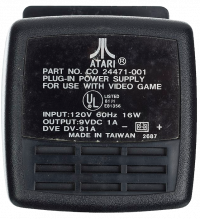
|
| Casio PV-1000 * | 15V DC | 500 mA | ? | ? | Tip negative | AD-4815 | WSU150-0560-R | 5.5 x 2.1 mm barrel jack | External | ApolloBoy | 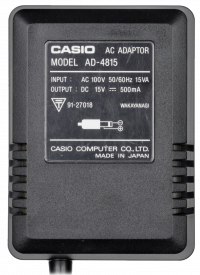
| |
| Epoch Super Cassette Vision * | 8.5V DC | 800 mA | ? | ? | Tip negative | N/A | WSU090-1300-R | 5.5 x 2.1 mm barrel jack | External | PSU outputs higher voltage on 120V and is not recommended for use outside Japan | ApolloBoy | |
| Amstrad GX4000 * | 11V DC | 500 mA | ? | ? | Tip positive | GX4000PSU/UK (UK), GX4000PSU/E (EU) | WSU090-1300 | 5.5 x 2.1 mm barrel jack | External | ApolloBoy |
Fourth generation of consoles
| Console | Voltage | Amps | Avg Power
Draw (On) |
Avg Power
Draw (Off) |
Polarity | Original PN | Replacement PN | Connection | Power Supply | Notes | Confirmed by | Image | ||
|---|---|---|---|---|---|---|---|---|---|---|---|---|---|---|
| Atari Lynx * | 9V DC | 1A | ? | ? | Centre positive | C103891-001 | WSU090-1300 | Barrel size 3.5mm x 1.35mm | External | Users need a 9V 1.3A center-positive TRIAD with a 2.1mm or 2.5mm inner diameter barrel (depending on the adapter barrel they purchase), as well as a "5.5mm x 2.1mm Female to 3.5mm x 1.35mm Male" Plug Socket DC Power Adapter. The console can also be powered by six AA batteries. | TheRealOC | 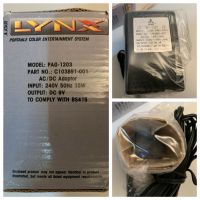
| ||
| NEC TurboGrafx 16 * | 10.5V DC | 730 mA | ? | ? | Tip negative | HES-ACA-01 | WSU090-1300-R | 5.5 x 2.1 mm barrel jack | External | ApolloBoy | 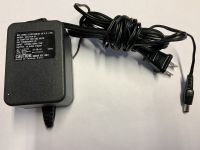
| |||
| PC Engine * | 9V DC | 650 mA | ? | ? | Tip negative | PAD-105/PAD-106 | WSU090-1300-R | 5.5 x 2.1 mm barrel jack | External | Same information also applies to both Core Grafx models and the PC Engine Shuttle | ApolloBoy | |||
| NEC PC Engine CD * | 9V DC | 1.45 A | ? | ? | Tip negative | AD-IF30/AD-IF30A | WSU090-2000-R13 | 5.5 x 2.5 mm barrel jack | External | Note that this is for the IFU-30 interface; the CD player portion (CDR-30) uses the same AC adapter as the PC Engine console when used as a standalone CD player | ApolloBoy | |||
| NEC TurboGrafx-CD * | 11V DC | 1.53 A | ? | ? | Tip negative | HES-ACA-02 | WSU120-2000-R13 | 5.5 x 2.5 mm barrel jack | External | Note that this is for the dock; the CD player portion (HES-CDR-01) uses the same AC adapter as the TG-16 console when used as a standalone CD player. Also note that the TG-CD dock will not power up properly with anything less than 10V, and the CD player will not read discs when docked | ApolloBoy | |||
| NEC SuperGrafx | 9V DC | 800 mA | ? | ? | Tip positive | PAD-113 | ? | 6.3 x 3.0 mm barrel jack | External | ApolloBoy | ||||
| NEC TurboExpress/PC Engine GT | 7V DC | 700 mA | ? | ? | Tip positive | HES-ACA-04 (US), PAD-121 (JP) | ? | 3.5 x 1.35 mm barrel jack | External or six internal AA-cell batteries | ApolloBoy | ||||
| NEC TurboDuo/PC Engine Duo | 10V DC | 1 A | ? | ? | Tip positive | HES-ACA-05 (US), PAD-124 (JP) | ? | 6.3 x 3.0 mm barrel jack | External | NEC also released an external battery pack for the Duo in Japan only | ApolloBoy | |||
| NEC Super CD-ROM2 | 12V DC | 1 A | ? | ? | Tip positive | PAD-125 | ? | 6.3 x 3.0 mm barrel jack | External | The Super CD-ROM2 also has a jumper cable which passes through power to the connected PC Engine console. This cable plugs into a 3.5 mm x 1.35 mm barrel jack on the Super CD and then into the power jack on the PC Engine. | ApolloBoy | |||
| NEC PC Engine LT | 9V DC | 700 mA | ? | ? | Tip positive | PAD-127 | ? | ? | External | ? | ApolloBoy | |||
| NEC PC Engine Duo-R/Duo-RX | 9V DC | 1 A | ? | ? | Tip positive | PAD-129/PAD-130 | ? | EIAJ-03 barrel jack | External | ApolloBoy | ||||
| Philips CD-i | ? | ? | ? | ? | ? | ? | Open source option | ? | ? | |||||
| Pioneer LaserActive | Input: 100V AC (JP), 120V AC (US) | ? | ? | ? | N/A, power cord is hardwired | N/A | N/A | N/A | Internal | ? | ||||
| Sega Genesis (model 1) * | 9V DC | 1.2 A | ? | ? | Tip negative | MK-1602 | WSU090-1300-R | 5.5 x 2.1 mm barrel jack | External | ApolloBoy | ||||
| Sega Mega Drive (model 1) * | 9V DC | 1.2 A | 17 W (VA0) | 3.7 W (VA0) | Tip negative | SA-160 (JP) | WSU090-1300-R | 5.5 x 2.1 mm barrel jack | External | ApolloBoy | ||||
| Sega Genesis (model 2) | 10V DC | 850 mA | 8.4 W (VA2.3) 6.2 W (VA4) |
2.8 W | Tip positive | MK-2103 (US), SA-190 (JP) | ? | EIAJ-03 barrel jack | External | ApolloBoy | ||||
| Sega Genesis 3 | 10V DC | 300 mA | ? | ? | Tip positive | MK-1479 | ? | EIAJ-03 barrel jack | External | ApolloBoy | ||||
| Sega Mega Jet | 10V DC | 850 mA | 5.1 W | 2.8 W | Tip positive | SA-190 | ? | EIAJ-03 barrel jack | External | ? | ApolloBoy | |||
| Sega Genesis Nomad | 10V DC | 850 mA | ? | ? | Tip positive | MK-2103 | ? | EIAJ-03 barrel jack | External or six AA-cell batteries via clip-on pack or rechargeable battery via clip-on pack | ? | ApolloBoy | |||
| Sega 32X | 10V DC | 850 mA | ? | ? | Tip positive | MK-2103 (US), SA-190 (JP) | ? | EIAJ-03 barrel jack | External | Exactly the same as the model 2 Genesis/Mega Drive | ApolloBoy | |||
| Sega Duo / Trio | 10V DC | 3A | ? | Both | NA | ? | (5.5 x 2.1) + (4.75 x 1.75) +(6.9 x 4.1 barrel jack with 0.7 inner pin) | External | Aftermarket solutions. Adapter cable splits one power plug into two or three for powering Genesis and Sega CD and/or 32X.
|
|||||
| Sega/Victor Wondermega RG-M1 | 9.5V DC | 1.5 A | ? | ? | Tip positive | AA-S95 | Sony AC-FX150; Sony SCPH-70100/SCPH-79100 | EIAJ-03 barrel jack | External | ApolloBoy | ||||
| Sega CDX | 9.5V DC | 1.5 A | ? | ? | Tip positive | MK-4122 | Sony AC-FX150; Sony SCPH-70100/SCPH-79100 | EIAJ-03 barrel jack | External | Do not use the MK-2103 AC adapter as it does not supply enough current | ApolloBoy | |||
| JVC X'Eye/Victor Wondermega RG-M2 | 9.5V DC | 1.5 A | ? | ? | Tip positive | AA-S95 (JP), AA-S95J (US) | Sony AC-FX150; Sony SCPH-70100/SCPH-79100 | EIAJ-03 barrel jack | External | Same specs as the CDX AC adapter; as with the CDX do not use the MK-2103 AC adapter as it does not supply enough current | ApolloBoy | |||
| Sega Pico | 10V DC | 850 mA | 8.4 W (VA2.3) 6.2 W (VA4) |
2.8 W | Tip positive | MK-2103 (US) | ? | EIAJ-03 barrel jack | External | ApolloBoy | ||||
| Sega Game Gear * | 9V DC (JP/EU), 10V DC (US) | 850 mA or 1.2 A (JP), 850 mA (US), 1.2 A (EU) | 5.7 W (two ASIC model) | 2.8 W | Tip negative (EU/JP), tip positive (US) | SA-150 or SA-160 (JP), 2103/MK-2103 (US), 1605 (EU) | WSU090-1300-R (EU/JP) | 5.5 x 2.1 mm barrel jack (EU/JP), EIAJ-03 barrel jack (US) | External or six internal AA-cell batteries | European and Japanese Game Gears use the same AC adapter as the model 1 Mega Drive, whereas (for some reason) US models use a different AC adapter which was later used for the model 2 Genesis/Mega Drive | ApolloBoy | |||
| Nintendo Game Boy | 4.8V DC | 150 mA | ? | ? | Tip negative | DMG-003 | ? | ? | External or four internal AA-cell batteries | Also doubles as a rechargeable battery pack | ||||
| Nintendo Game Boy Pocket | 3V DC | 300 mA | ? | ? | Tip positive | MGB-005 | ? | ? | External or two internal AAA-cell batteries | ? | ||||
| Super Nintendo (US) | 10V DC | 850 mA | 4.7 W (SNS-101)
7.0 W (SNS-CPU-GPM-02) |
1.1 W | Tip negative | SNS-002 | ? | 6.9 mm x 4.1 mm barrel jack with 0.7 mm inner pin | External | 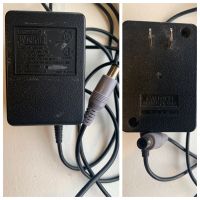
| ||||
| Super Famicom * | 10V DC | 850 mA | 6.8 W (SHVC-CPU-01) 6.2 W (SNS-CPU-1CHIP-01) |
1.2 W | Tip negative | HVC-002 | WSU090-1300-R | 5.5 x 2.1 mm barrel jack | External | Exactly the same as the original Famicom | ApolloBoy | 
| ||
| Super Nintendo (PAL) * | 9V AC | 1.2 A | ? | ? | Not applicable | NES-002 | ? | 5.5 x 2.5 mm barrel jack | External | Exactly the same as the PAL NES; the PAL SNES has a charge pump circuit which generates 12V DC for SCART autoswitching, hence the use of an AC power supply | ApolloBoy | |||
| SNK Neo Geo AES * | 5V DC (PRO-POW models only), 10V DC (PRO-POW3/E models only) | 3 A (5V), 1 A (10V) | ? | ? | Tip negative | PRO-POW (5V) NEO-POW3 (10V) | WSU050-3000-R (5V), WSU090-1300-R (10V) | 5.5 x 2.1 mm barrel jack | External | Older AES consoles used a regulated 5V DC AC adapter while newer models had an unregulated 10V supply. Be *very* careful! | ApolloBoy | |||
| SNK Neo Geo CD | 5V DC, 12V DC | 2 A (5V), 1 A (12V) | ? | ? | N/A, connector is keyed | POWCD-J (JP) | N/A | Three-pin connector, same as found on some Panasonic and Sony MSX2 models (though not the same pinout!) | External | ? | ApolloBoy | 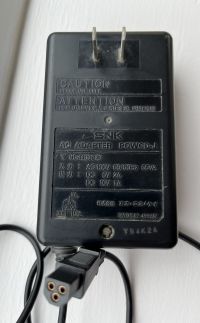
|
Fifth generation of consoles
| Console | Voltage | Amps | Avg Power
Draw (On) |
Avg Power
Draw (Off) |
Polarity | Original PN | Replacement PN | Connection | Power Supply | Notes | Confirmed by | Image |
|---|---|---|---|---|---|---|---|---|---|---|---|---|
| Commodore Amiga CD32 | 5V DC, 12V DC | ? | ? | ? | N/A | ? | ? | 4-pin DIN | External | ? | ||
| Panasonic 3DO | 100-120V AC (NTSC) | ? | ~30 W | ? | N/A | ? | ? | Built in cable on FZ-1 model, non-polarized C7 on FZ-10 model. | Internal | ? | ||
| Atari Jaguar * | 9V DC | 1.2 A | ? | ? | Tip negative | 500273/PP-912 | WSU090-1300-R | 5.5 x 2.1 mm barrel jack | External | ApolloBoy | 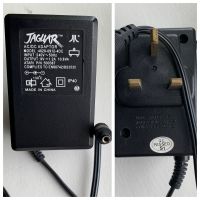
| |
| Atari Jaguar CD * | 9V DC | 1.2 A | ? | ? | Tip negative | 500273/PP-912 | WSU090-1300-R | 5.5 x 2.1 mm barrel jack | External | Exactly the same as the Jaguar itself | ApolloBoy | |
| Bandai Playdia * | 9V DC | 850 mA | ? | ? | Tip positive | BA-002 | WSU090-1300 | 5.5 x 2.1 mm barrel jack | External | |||
| Sega Saturn | 100-120V AC (NTSC), 220-240V AC (PAL) | ? | ? | ? | N/A | ? | ReSaturn (External PSU Mod) | C7 polarized (NTSC-U)
C7 non-polarized (All other regions) |
Internal | |||
| Sony PlayStation | 100-120V AC (NTSC), 220-240V AC (PAL) | ? | ? | ? | N/A | ? | RePSX (External PSU Mod), PicoPSU | C7 polarized (NTSC-U)
C7 non-polarized (All other regions) |
Internal | |||
| Sony PSone | 7.5V DC | 2 A | 5.5 to 7 W (no LCD) 12.2 to 15 W (with LCD) |
0.7 W (no LCD) 2.1 W (with LCD) |
Tip positive | SCPH-112 (JP)
SCPH-113 (US) SCPH-114 (EU) SCPH-115 (UK) |
? | EIAJ-03 barrel jack | External | Do not use a PS2 slim AC adapter! | ApolloBoy | |
| NEC PC-FX | Input: 100V AC | ? | ? | ? | N/A, power cord is hardwired | ? | N/A | N/A | Internal | |||
| Casio Loopy | 24V DC | 1 A | ? | ? | Tip positive | AD-2410J | ? | 5.5 x 2.5 mm barrel jack | External | ? | ||
| Apple Pippin | Input: 100-240V AC | ? | ? | ? | N/A | ? | N/A | C14 | Internal | |||
| Nintendo 64 | 3.3V DC, 12V DC | 2.7 A (3.3V), 0.8 A (12V) | 7 W (with Expansion Pak) | 0.8 W (with Expansion Pak) | N/A, entire power supply is designed to only fit one way into the console itself | NUS-002 | ? | Proprietary connector | External | ApolloBoy |
Sixth generation of consoles
| Console | Voltage | Amps | Avg Power
Draw (On) |
Avg Power
Draw (Off) |
Polarity | Original PN | Replacement PN | Connection | Power Supply | Notes | Confirmed by | Image |
|---|---|---|---|---|---|---|---|---|---|---|---|---|
| Game Boy Advance | 3.3V DC | 350 mA | ? | ? | N/A, connector is molded to only fit one way into the system | AGB-009 | ? | N/A, fits into battery bay | External or two internal AA-cell batteries | The original GBA does not have a dedicated AC adapter input like other Game Boy systems, all external AC adapters use the battery terminals | ApolloBoy | |
| Game Boy Advance SP | 5.2V DC | 320 mA | N/A, system cannot be powered on without the battery | 2.3 W (AGS-101) | N/A, connector is keyed | AGS-002 | Unofficial 5 V USB cables
Generic clones with same P/N |
Proprietary connector | External | ApolloBoy, Ryccardo | ||
| Game Boy Micro | 5.2V DC | 320 mA | ? | ? | N/A, connector is keyed | OXY-002 | Unofficial 5 V USB cables
Generic clones with same P/N |
Proprietary connector | External | ApolloBoy | ||
| Sega Dreamcast | Input: 100V AC (JP), 120V AC (US), 220/240V AC (EU/UK); Output: 3.3V DC, 5V DC, 12V DC | ? | ? | ? | ? | ? | External PSU Replacements | C7 polarized (NTSC-U)
C7 non-polarized (All other regions) |
Internal | |||
| Sony PlayStation 2 (original) | Input: 100V AC (JP), 120V AC (US), 220/240V AC (EU/UK)
Output: 12V DC |
Various | 28.5 to 34 W (SCPH-37000) | 2.3 W (SCPH-37000) | ? | Various | RePS2(External PSU Mod) | C7 polarized (NTSC-U)
C7 non-polarized (All other regions) |
Internal | ApolloBoy | ||
| Sony PlayStation 2 Slim (SCPH-7xxxx) | Input: 100V-240V AC
Output: 8.5V DC |
Input: 1.5 A, Output: 5.65 A | ~16 W (PS2 game) ~15.5 W (PS1 game) |
0.7 W | Tip positive | SCPH-70100
SCPH-79100 |
Generic clones with same P/N | EIAJ-03 barrel jack | External | ApolloBoy | 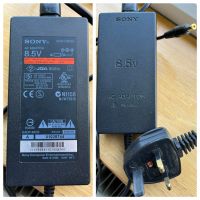
| |
| Sony PlayStation 2 Slim (SCPH-9000x) | Input: 100-240V AC Output: 7.5V DC | Output: 4.5 A | ? | ? | N/A | EADP-34DF? | ? | C7 non-polarized | Internal | Power supply is multivoltage despite what is indicated on the outside of the console | ApolloBoy | |
| VM Labs Nuon | Input: 120V AC | ? | ? | ? | N/A, power cord is hardwired | ? | ? | N/A | Internal | ? | ||
| Microsoft Xbox | ? | ? | ? | ? | N/A | Various | ? | C7 non-polarized | Internal | |||
| Nintendo GameCube | 12V DC | 3.25 A | ? | ? | Connector is keyed, rounded side is positive | DOL-002 | ? | Proprietary connector | External | Ryccardo | 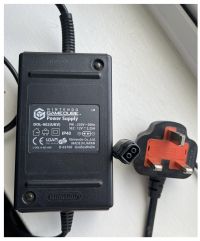
|
Seventh generation of consoles
| Console | Voltage | Amps | Avg Power
Draw (On) |
Avg Power
Draw (Off) |
Polarity | Original PN | Replacement PN | Connection | Power Supply | Notes | Confirmed by | Image |
|---|---|---|---|---|---|---|---|---|---|---|---|---|
| Nintendo DS | 5.2 V DC | 320 mA | ? | ? | N/A, connector is keyed | AGS-002 | Unofficial 5 V USB cables
Generic clones with same P/N |
Proprietary connector | External | Same as GBA SP except for console name removed from sticker | ApolloBoy, Ryccardo | |
| Nintendo DS Lite | 5.2 V DC | 450 mA | ? | ? | N/A, connector is keyed | USG-002 | Unofficial 5 V USB cables
Generic clones with same P/N |
Proprietary connector | External | Resembles Mini-USB B to the point a mangled connector can be directly and "correctly" connected | ApolloBoy, Ryccardo | |
| Nintendo DSi series | 4.6 V DC | 900 mA | ? | ? | N/A, connector is keyed | WAP-002 | Unofficial 5 V USB cables
Generic clones with same P/N |
Proprietary connector | External | Originally invented for Nintendo/Buffalo WAP-001 Wi-Fi access point | ApolloBoy, Ryccardo | |
| Sony PSP (except N1000/Go) | 5 V DC | EP: 1500 mA, LP: 2000 mA | ? | ? | Negative ground | PSP-100 (two piece)
PSP-103 (fixed cable) PSP-383/384 ("Wall Wart" with fixed cable) |
Third party USB-based cables; official USB charging (if console can boot from battery, not on stock 1000 series motherboards) | EIAJ-02 (4.0/1.7 mm barrel) | External | ApolloBoy, Nadaman, Ryccardo | ||
| Sony PSP-N1000 series (Go) | 5 V DC | 1500 mA | ? | ? | USB-A | PSP-N100 (Three piece power supply)
PSP-N104 ("Wall Wart" two piece) PSP-N430 (USB cable) |
Generic USB power supply?
Generic clones of N430 USB cable and/or PSP-N100/N104 |
USB-A to proprietary connector | External | USB port on PSU is electrically USB-A, but in a recessed position requiring a specially notched plug | ApolloBoy, Nadaman | |
| Nintendo Wii | 12V DC | 3.7 A | 16 W[1] (WiFi on or off) | 9 W,
1.9 W (WiFi on) |
Connector is keyed; cut corner is negative, as is the shield of the coaxial DC wire | RVL-002 | Generic clones with same P/N | Proprietary connector | External | ApolloBoy, Ryccardo | 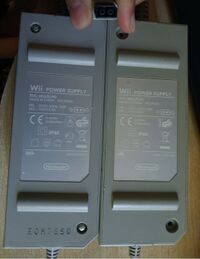
| |
| Mattel HyperScan | ? | ? | ? | ? | ? | ? | ? | ? | ? | ? | ? | ? |
| Microsoft Xbox 360 (Xenon/Zephyr) | Output: 12V DC, 5V DC | 16.5 A (12V), 1 A (5V) | 172 W[1] | 2.2 W | N/A, connector is keyed | DPSN-186CB-1A
HP-AW205EF3 |
Generic clones with same P/N | C15 to proprietary connector with central and overline tabs | External | Forwards compatible (Requires adapter for S/E/One)
HP-AW205EF3 version of this PSU doesn't have the latches on the connector |
ApolloBoy | 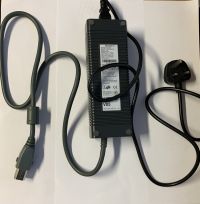
|
| Microsoft Xbox 360 (Falcon/Opus) | Output: 12V DC, 5V DC | 14.2 A (12V), 1 A (5V) | ? | ? | N/A, connector is keyed | DPSN-168-CB A | Generic clones with same P/N | C7 to proprietary connector with overline tab | External | Forwards compatible (Requires adapter for S/E/One) | ApolloBoy, Nadaman | 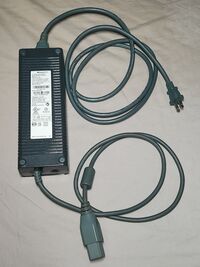
|
| Microsoft Xbox 360 (Jasper/Tonasket) | Output: 12V DC, 5V DC | 12.1 A (12V), 1 A (5V) | ? | ? | N/A, connector is keyed | PB-2151-02MX | Generic clones with same P/N | C7 to proprietary connector with split overline tabs | External | Forwards compatible (Requires adapter for S/E/One) | ApolloBoy, Nadaman | 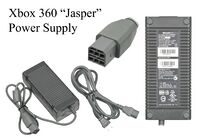
|
| Microsoft Xbox 360 S (Trinity) | Output: 12V DC, 5V DC | 10.83 A (12V), 1 A (5V) | N/A, connector is keyed | PB-2131-02MX
CPA09-010A EADP-135BB A |
Generic clones with same P/N
Original Xbox 360 power supplies with an S adapter |
C7 to proprietary double barrel jack connector | External | ? | ApolloBoy, Nadaman | |||
| Microsoft Xbox 360 S (Corona/Waitsburg) | Output: 12V DC, 5V DC | 9.6 A (12V), 1 A (5V) | 88 W[1] | 0.7 W | N/A, connector is keyed | PB-2121-03MX
A10-120N1A |
Generic clones with same P/N
Original Xbox 360 power supplies with an S adapter |
C7 to proprietary double barrel jack connector | External | ? | ApolloBoy, Nadaman | 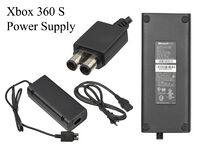
|
| Microsoft Xbox 360 E | Output: 12V DC, 5V DC | 9.6 A (12V), 1 A (5V) | ? | ? | N/A | PB-2121-03M1 | Generic clones with same P/N
Original Xbox 360 power supplies with an E adapter |
C7 to proprietary barrel jack connector | External | ? | ApolloBoy, Nadaman | 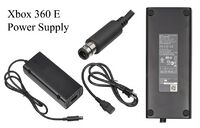
|
| Sony PlayStation 3 (Original) | Input: 100V-240V AC (most models), 220V-240V AC (early PAL models) | Various | 189 W[1] | 1.1 W | ? | Various | ? | C14 | Internal | Detailed information can be found here. | ApolloBoy, Nadaman | |
| Sony PlayStation 3 Slim | Input: 100V-240V AC | ? | ? | ? | ? | APS-250 (20xx)
APS-270 (21xx/25xx) APS-306 or EADP-185AB (30xx) |
? | C7 non-polarized | Internal | ApolloBoy, Nadaman | ||
| Sony PlayStation 3 Super Slim | Input: 100V-240V AC | ? | 76.3 W (43XX)[2] | ? | ? | ADP-160AR
APS-330(/B) N12-160P1A |
? | C7 non-polarized | Internal | ApolloBoy, Nadaman | ||
| Sony PlayStation 3 standard controller/keyboard/headset | 5 V | 2x 500 mA | ? | ? | USB-A | CECHZA1 | PS3 console, compatible (handshaking) USB hosts | C7 to two USB-A | External | ApolloBoy | ||
| Sony PlayStation 3 Move controller | 5 V | ? | ? | ? | ? | CECH-ZCC1 | ? | Barrel jack, unspecified | External | ApolloBoy |
Eighth generation of consoles
| Console | Voltage | Amps | Avg Power
Draw (On) |
Avg Power
Draw (Off) |
Avg Power
Draw (Standby) |
Polarity | Original PN | Replacement PN | Connection | Power Supply | Notes | Confirmed by | Image |
|---|---|---|---|---|---|---|---|---|---|---|---|---|---|
| Nintendo 3DS/2DS Series incl. New | 4.6 V DC | 900 mA | ? | ? | ? | N/A, connector is keyed | WAP-002 | Unofficial 5 V USB cables
Generic clones with same P/N |
Proprietary connector | External | Same PSU as DSi and WAP-001. Eventually replaced with cost-cutting revision (thinner cable) | ApolloBoy | |
| Sony PS Vita (PCH-1xxx) | 5 V DC | 1 A (?) | ? | ? | ? | N/A, connector is keyed | PCH-ZAC1 (Three piece power supply) | Any generic USB power supply | USB-A to proprietary connector | External | USB port on PSU is electrically USB-A, but in a recessed position requiring a specially notched plug | ApolloBoy, Nadaman | |
| Sony PS Vita TV | 5 V DC | 2000 mA | ? | ? | ? | Negative ground | PDEL-100 | PSP power bricks and their equivalents | EIAJ-02 (4.0/1.7 mm barrel) | External | Recycled from developer Vita | ApolloBoy | |
| Sony PS Vita (PCH-2xxx) | 5 V DC | 1 A (?) | ? | ? | ? | N/A, connector is keyed | PCH-ZAC1 (Three piece power supply) | Any generic USB power supply | USB-A to micro USB-B | External | USB port on PSU is electrically USB-A, but in a recessed position requiring a specially notched plug | ApolloBoy, Nadaman | |
| Nintendo Wii U | 15V DC | 5 A | 34 W[3] | 0.4 W | 0.4 W | N/A, connector is keyed | WUP-002 | Generic clones with same P/N | Proprietary connector | External | Connector is very similar to the original Wii but is not compatible (colored yellow for identification). Unofficially[4] multivoltage. | ApolloBoy | |
| Nintendo Wii U GamePad | 4.75 V DC | 1.6 A | ? | ? | ? | N/A, connector is keyed | WUP-011 | Unofficial 5 V USB cables
Generic clones with same P/N |
Proprietary connector | External | Just barely enlarged 2/3DS/i/XL connector. Unofficially multivoltage. | ApolloBoy | |
| Sony PlayStation 4 (original) | Input: 100-240V AC | ? | 95.1 W (12XX)
115.1 W (11XX) 137.3 W (10xx)[2] |
0.3 W | 5.2 W (12XX)
7.3 W (11XX) 7.8 W (10xx) |
N/A | ADP-240AR (10XX/11XX)
ADP-200ER (12XX) |
? | C7 non-polarized | Internal | ApolloBoy | ||
| Sony PlayStation 4 Slim | Input: 100-240V AC | ? | 78.2 W (22XX)
75.2 W (21XX) 82.8 W (20XX)[2] |
0.2 W | 5.4 W (22XX)
5.8 W (21XX) 5.5 W (20XX) |
N/A | ADP-160CR (20XX)
ADP-160ER (21XX) ADP-160FR (22XX) |
? | C7 non-polarized | Internal | ApolloBoy | ||
| Sony PlayStation 4 Pro | Input: 100-240V AC | ? | 126 W (70XX)
139 W (71XX) 146 W (72XX)[5] |
0.2 W | 8.2 W (70XX)
7.4 W (71XX) 6.4 W (72XX) |
? | ADP-300CR (70XX)
ADP-300ER (71XX) ADP-300FR (72XX) |
? | C17 (CUH-70xx/71xx)
C7 non-polarized (CUH-72xx) |
Internal | The PS4 Pro has an internal power supply module, which can be accessed once the console is disassembled. Some revisions connected to an electrical outlet using a PC lead, while some used a Figure 8 AC cord. | ApolloBoy | 
|
| Microsoft Xbox One (original) | Input: 100-127V AC (JP/US), Output: 12V DC, 5V DC | 17.9 A (12V), 1 A (5V) | 112 W[3] | 0.4 W | 15.7 W | N/A, connector is keyed | ADP-200AR A
PB-2221-02MX A12-220N1A |
Generic clones with same P/Ns
Original Xbox 360 PSUs with adapter |
C7 to proprietary double barrel jack connector | External | ApolloBoy, Nadaman | 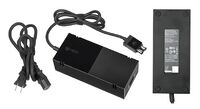
| |
| Microsoft Xbox One S | Input: 100-240V AC
Output: 12V DC |
20.42A (12V) | 62 W[6] | 0.5 W | 11 W | N/A | N15-120P1A | ? | C7 non-polarized | Internal | ApolloBoy, Nadaman | ||
| Microsoft Xbox One X | Input: 100-240V AC
Output: 12V DC |
20.42A (12V) | 100-172 W[7] | <1 W | 10 W | N/A | 1815 | ? | C7 non-polarized | Internal | ApolloBoy, Nadaman | ||
| Nintendo Switch | Input: 100-240V AC
Output: 5V DC, 15V DC |
1.5A (5V), 2.6A (15V) | 8.25 W (HAC-001)
6-7 W [HAC-001(01) and Lite] 6 W (OLED)[8] |
0.3-0.5 W | 0.3-0.5 W | N/A, connector is reversible | HAC-002 | Various generic adapters, support for 15v recommended. | USB-C | External | Not fully USB-PD compliant. Compatible 15V power supply required for dock. | ApolloBoy, Nadaman | 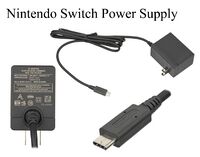
|
Ninth generation of consoles
| Console | Voltage | Amps | Avg Power Draw (On) | Avg Power Draw (Off) | Avg Power Draw (Standby) | Polarity | Original PN | Replacement PN | Connection | Power Supply | Notes | Confirmed by | Image |
|---|---|---|---|---|---|---|---|---|---|---|---|---|---|
| Sony PlayStation 5 | Input: 100-240V AC; Output: 12V DC | Output: 31 A | 200 W[2] | 1.3 W | 3.2 W | N/A | ADP-400DR | N/A | C7 non-polarized | Internal | The ADP-400DR is an internal power supply module, which can be accessed once the console is disassembled. To connect to an electrical outlet, the PS5 uses a standard Figure 8 AC cord. | TheRealOC | 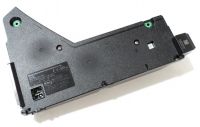 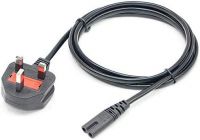
|
| Sony PlayStation 5 Digital Edition | Input: 100-240V AC; Output: 12V DC | Output: 31 A | 200 W[2] | 1.3 W | 3.8 W | N/A | ADP-400DR | N/A | C7 non-polarized | Internal | The ADP-400DR is an internal power supply module, which can be accessed once the console is disassembled. To connect to an electrical outlet, the PS5 uses a standard Figure 8 AC cord. | TheRealOC |  
|
| Microsoft Xbox Series S | Input: 100-240V AC; Output: 12V DC | Input: 2.3 A; Output: 13.75 A | 74 W[6] | 0.4 W | 10 W | N/A | 1921 | M1111343-001 | C7 non-polarized | Internal | The Series S uses an internal power supply module, manufactured by LiteOn, which can be accessed once the console is disassembled. To connect to an electrical outlet, the console uses a standard Figure 8 AC cord | TheRealOC | 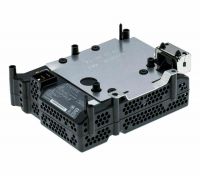 
|
| Microsoft Xbox Series X | Input: 100-240V AC; Output: 12V DC | Input: 4.5 A (100-127V), 2.3 A (200-240V); Output: 21.25 A | 153 W[6] | 0.5 W | 13 W | N/A | 1920 | M1109865-006 | C7 non-polarized | Internal | The Series X uses an internal power supply module, manufactured by LiteOn, which can be accessed once the console is disassembled. To connect to an electrical outlet, the console uses a standard Figure 8 AC cord | TheRealOC | 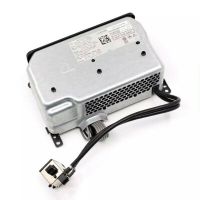 
|
References
- "Quality PSU’s For Classic Consoles".
- "Triad Brand Replacement Power Supplies". Retrieved 2009-09-05.
- ↑ 1.0 1.1 1.2 1.3 https://www.cmu.edu/ceic/assets/docs/publications/working-papers/ceic-11-01.pdf
- ↑ 2.0 2.1 2.2 2.3 2.4 https://www.playstation.com/en-gb/legal/ecodesign/
- ↑ 3.0 3.1 https://www.nrdc.org/sites/default/files/video-game-consoles-IP.pdf
- ↑ [1]
- ↑ https://www.eurogamer.net/playstation-5-review-digitalfoundry
- ↑ 6.0 6.1 6.2 https://web.archive.org/web/20221118134519/https://support.xbox.com/en-US/help/hardware-network/power/learn-about-power-modes
- ↑ https://www.anandtech.com/show/11992/the-xbox-one-x-review/6
- ↑ https://www.nintendo.co.uk/Corporate/Consumer-Information/Eco-design/Information-about-energy-efficiency-and-eco-design-of-Nintendo-Switch-family-consoles-2026830.html


